Leaderboard


Popular Content
Showing content with the highest reputation on 09/13/2019 in all areas
-
So I had along with my wife and dog a very pleasant catch up with my mate on his farm over the last week where we among other things, worked on the gearbox mount repair. He is extremely experienced in these type of crankcase weld repairs and modifications over many years. He reported that the cases weren't nice to weld due to probably a high content of zinc in the alloy very much the same as late model Ducati bevel cases. He started off in the mill by machining down the square lug section with a ball end cutter to the level of the case to give himself some space to get the torch in and a nice radius to weld up to. We then locally heated the case with a torch to 190 deg C. As soon as the welding was completed I held the case and he used a 1/4 inch arbour in a rivet gun and peened the entire weld while it was still soft. This stress relieves the area and reduces or eliminated any distortion to the gearbox end plate face and also shaped the welded area to a degree. He then used the die grinder and blended the welded area to the original lug. When I got home I did some further minor detail work with the die grinder as I had a very small cutter and then used some emery to further smooth it off. It did of course look a bit nicer with just the die grinder finish and if I weren't going to paint it and leave it in its natural finish I would bead blast it and it would be almost undetectable. We checked with a machinists flat and the end plate face was totally undistorted but interestingly I had checked it on my granite surface plate before we started and found in the area from the cracked mount around to the fastener below the oil filler port you could geta .004" feeler gauge in so the rear plate face wasn't true to start with. Pete put it on the mill and levelled it up with a .0035" cut. The whole process took a couple of hours with me doing nothing but assisting with heating the case and holding it during the peening process. I guess it would be a $125 US repair at an estimate with the exchange rate as it currently is. We both kind of feel that the cracks origin is probably more to do with the casting and cooling than anything else. Some will have a tiny intergranular crack develop during the cooling process due to the large local change in cross section and will then go on to develop a full blown leaking crack after an undetermined amount of heat/stress cycles. This case wasn't leaking and had no visible crack so it may have gone on for years without issue or the crack may never have propagated. So cleaning painting and assembly to go. Might need to consult Pete Roper for a borrow of a few gearbox tools. L/H mount radiused and smoothed. This lug interface with the main body of the gearbox housing was also not radiused so I undercut the lug end and formed a radius. The final repair Ciao4 points
-
2 points
-
I'll just leave this here, written about Alfas, but applies to all Italian machines.... The Italian Tune-Up is No Myth, (from Pat Braden's Alfa Bible): "You’ve sunk your next five years’ paychecks into this sweet Italian beauty and you’re not going to abuse it, by golly. You shift at 2500 rpm and never go over 70 mph. To prove your point, the car needs tuning so often now that if you really put your foot into it you’re sure something would explode. That’s Italian cars for you. Somewhere, right now in Italy, someone’s driving exactly the same car as yours. His right foot is pressed firmly to the floor, where it has been for the last three hours. The rubber on the brake pedal shows no perceptible wear. The speedometer and tachometer are both trying to bury themselves offscale. His arms are weary from cranking the wheel back and forth as he negotiates the mountain roads. His eyes gleam and his heart is glad for he has never once had cause to do more than regular maintenance to his thoroughbred of a car that has uncounted kilometers on its engine. He’s right and you’re wrong!"2 points
-
Every Spine Raid's pièce de résistance.....2 points
-
I run the Meinolf map in my V11 and it is great. Night and day difference. His map is for the 15M ECU. You just need the proper cables and a laptop with the writer program. It only takes a minute to flash the new map on. Back up your old one first. That takes about 10-15 minutes. Adjust valves, reset the TPS to 157mv and balance the throttle bodies and you will have a great running V11.2 points
-
A smarter guy would just take the fuse out of the camera hot wire.2 points
-
Love PennAdam's RossoMandello! Sweeeet! Ridin' on Appalachian mountain roads . . . in&out of the shadows, head up, late apex, and roll on! "Show up. Bring tools."2 points
-
2 points
-
2 points
-
Thats what i've been using for some time on multiple italian machines, and i also have had my electrical issues go away. Thing is though, i have to admit that some time back I ended up defaulting to just going through the italian machine electrical the first winter I would own the machine (winter projects, not during riding season :->), which meant the roadstercycle mosfet regulator, upgrading any suspect looking wiring from stator to reg and then on to battery, removing un-needed italian butt connectors, then often also spending the $$ on the hicap cables. I used to fret over which of those changes was the most important, but ended up drinking the coolaid for "its my toy, and i want it right" to justify the expense in each case. A wise case can be made for all that being overkill and a waste of some of that money, as well as for the opposite, which is to have a well sorted machine. over time. i've had success with each of those fixes on different bikes, so i usually do them all now. The hicap cables worked wonders on my old ST4, whereas just upgrading the wiring and connectors to the VR from the stator on 3 different Gran Canyons seemed to be the real silver bullet for the issues that plagued that model. The shindengen I also do, but not as clear on whether it really was the answer based on trial & error, since that upgrade was always accompanied by another change (usually the wiring upgrade, which is certainly the cheapest of all those options). In fact, now that i think about it, i started doing that in around 2005, and since then i have not had a single electrical issue on any of my (modified as described) bikes. knock on wood. charging is great, batteries last 7+ years and are only replaced because i figure its time and not because of any bad symptoms (though note i also use deltran batt tenders all winter, always), and no oddball "won't start" issues. Very possibly just lucky, but the miles, years, and number of italian machines so modified are adding up to what might be a relevant data set...1 point
-
Then there are the SpineRaiders that "just know" . . .1 point
-
Should is one thing. cheers tom1 point
-
I'm actually going south to se him on sunday, with 3 brains. That will be interesting, and hopefully not hurt my brain to much. Cheers tom.1 point
-
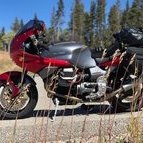
V11 in its natural habitat!1 point
-
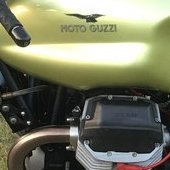
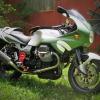
Ok, I know it's a recent acquisition, but I love her, 02 in "Champagne". Was a California bike, now she resides in South West Colorado. Dave1 point