Leaderboard


Popular Content
Showing content with the highest reputation on 01/27/2021 in all areas
-
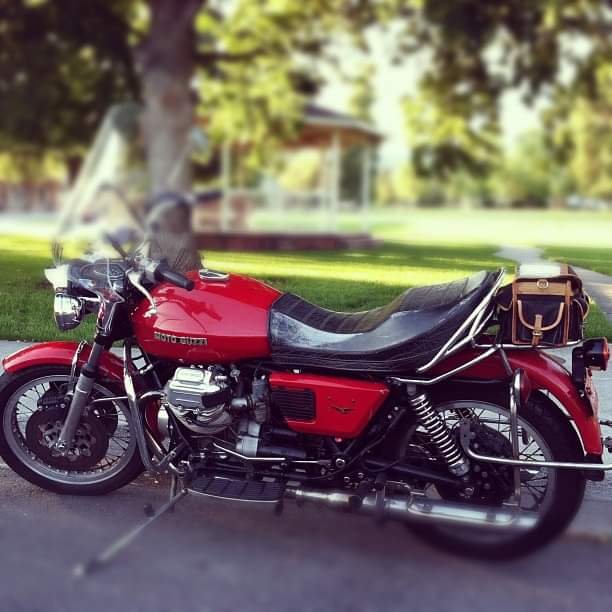
old pic, old bike, younger guy3 points
-
It seems you made it! Welcome. The site goes through the occasional update and sometimes is left with a minor technical hang up. It would be helpful if you describe what problems you encountered while joining. maybe it's an easy fix. other than that I can only think the BMW on your list 'may' have caused a problem ...3 points
-
Why is this forum almost impossible to join? I pledged sigma nu back in the day and only had to survive drunken sharpie humiliation to get an invite.2 points
-
Eureka ! After removing the tank on the black frame to repair the low fuel level sensor leak . I had a monster of a time getting it back on . NEVER again . The next time I am going to get two new pucks (just in case something goes wrong) and mill the diameter (on the old ones) down 1/4" at a time until the tank slips on easily . This should fix everything .2 points
-
I do love my vert... that is, until she leaves me stranded
 2 points
 -
Resin impregnating would work best with a new set of cases that had never seen oil. MV did it in their early 750s, do not know how they did it, I imagined some kind of tank with the casing completely submerged and put under pressure. Must have been fun determining the time to leave it in the tank, to short and not fully impregnated, too long and nicely encased in a solid block of resin. These folk seem to have it covered, interesting read. https://www.midlanddeburrandfinish.co.uk/casting-impregnation?gclid=CjwKCAiAu8SABhAxEiwAsodSZIgrKkXwzzYCJq7A8IJACW-TTPC0_4hlMRPaw1ke-C4BFyDGMyUWTxoCKt0QAvD_BwE2 points
-
BMW's? really? where? Quick, turn off the lights and close the curtains, maybe they'll think we're not home and the riff raff will keep moving, lol. PB, I can't offer any insight to technical difficulties joining the forum, likely had something to do with the rigorous, vetting and scrutineering committee,working silently but diligently in the background, obviously you passed the mustard, welcome, but be careful you don't hit your head on the cone of silence as you enter to kiss the ring.2 points
-
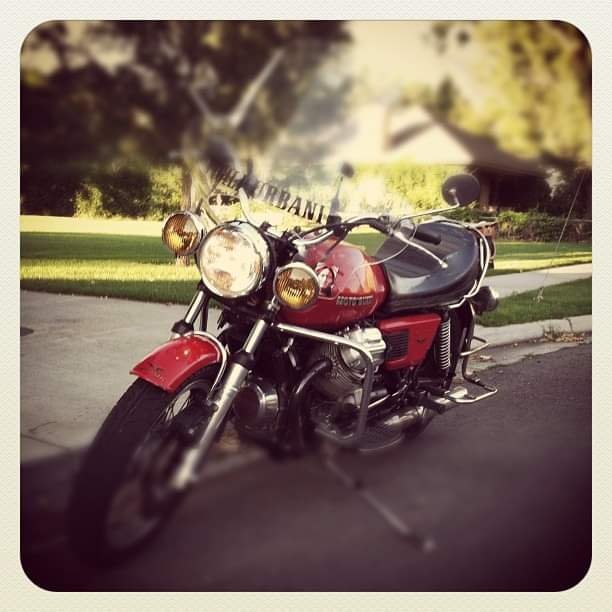
here's mine2 points
-
Seriously. It was a yellow BMW R1100S that my Sport caught me catting around with. She popped a gearbox seal just to let me know not to stray . . . Guzzis can be coy . . .2 points
-
I've experienced casting porosity quite a few times over the years with Italian motorcycles so why would the V11/V10 be any different. I thought I'd do a piece on dealing with it in the case of the Daytona engine, specifically the cylinder head. It's of course of no real import to anyone here V11 wise but may be of general interest. My original V11 engine had an issue with the oil drain back gallery in the l/h head apparently which the original owner had rectified with a sleeve. I've not had the opportunity to look at it but it has never leaked in the 10 years I've owned the bike, so I'll call it fixed. The issue with the Daytona engine arose a few months after I got it running with an annoying accumulation of a small amount of oil on one of the r/h cylinder fins. Originally I put it down to a leaky rocker cover gasket but a careful evaluation found it to be from one of the rocker cover attach screw blind holes. Four of the cover retaining screws are on the "wet" side of the cover o-ring and are blind holes to the external part of the head. Several of these holes had been over drilled at the factory by a very small amount and broken through to the head exterior. Oil was seeping down the thread holes and working its way to the outside and eventually to the edge of the cooling fins. Great, simple fix. Either seal the screws on fitment of the rocker cover, which is a bit of a pain or somehow seal the bottom of the holes. I took the latter path and screwed a 6X4 grub screw down to the bottom of the holes sealed with Loctite 242. This still left me with 12mm of thread engagement which was plenty. Here's a totally inadequate image of the screw hole with the grub screw in the bottom. Unfortunately the leaks persisted. I suspected it may have been from the spark plug drain gallery vertical wall. The vertical walls of this area of the head form an internal pair of drain "wells" with the head drain galleries at the bottom of these rectangular wells. Measuring a spare head I calculated the wall thickness here to be around 3mm which is pretty thin for a sand casting. I also recalled a brief thought flash through my mind when I was painting the heads that I'd better get paint up in there or I might end up with an oil seep issue. Funny the fleeting thoughts that come back to you in hindsight. I've long suspected that one of the primary reasons for the Italians painting engines going back 35 years of so was to preclude these porosity issues. Here you can see in this damaged spare head the drain wells and the spark plug drain gallery exit between the fins. One well has a red sealing coat over the area that forms the roof and vertical wall of half the plug drain gallery and the other roof section and vertical wall section is unsealed. I wanted to test the sealer in the oven to makes sure it would stand the local heat in the head. I painted on some dye check developer to these vertical walls inside the plug drain gallery and sure enough the tell-tale signs of porosity seeping. First image the r/h head and the second the l/h. The dark round patches in the white developer are the tells. So the challenge is how to fix this without pulling the heads if possible. Pulling the heads is a pain. Apart from the actual work involved you then need to go through the retorque process and reset the valve clearances etc. painful. Part of what I did in my professional aviation career was to come up with insitu technical solutions to to keep aircraft out of the hangar flying an earning a dollar so I put that hat on and had a muse. The typical way to address porosity issues is to clean the component, heat it up which will usually bring any trapped oil out of the casting and then drop the whole thing in a warm bath of loctite 290 wicking grade and let it soak for a few hours and wash it down and the porosity is sealed. Not possible here of course without pulling and disassembling the heads. There are commercial variations on this process that immerse the component in a vacuum chamber and then a pressure chamber of 290 or variations on that material but once again not insitu. What I eventually came up with was a vacuum system using a brake bleeding pump and home made rubber seal. I sealed off the spark plug end of the plug drain gallery with aluminium tape and connected my homemade seal to the vacuum pump at the outer end to create a 27 inch vacuum in the plug drain gallery. The outer rubber seal was made from an old piece of rubber thong sole. This would hold a vacuum quite well with a few pumps every 3 or 4 minutes. An image of the aluminium tape used to seal the plug drain gallery at the plug hole end I then devised a rubber plug to seal the drain hole in the bottom of the head drain wells. A little tricky as with the head rocker gear support installed the hole isn't visible without a mirror. Here's the plug. Here's the plug installed on the head on the engine with the drain well filled with 290. Some of the images are from "proof of concept" experiments with my spare damaged head on the bench. Painting on the internal sealer insitu was a fiddly job with the rocker arm supports in the way but with small brushes bent to various shapes quite doable. So the process now was to fill the plugged drain well and fill them with solvent and pull a vacuum in the plug drain gallery to draw the solvent through the porosity and clean out residual oil. Then dry out the drain well and repeat the process with the loctite to seal the porosity. I inserted a small piece of paper towel inside the plug drain cavity on both occasions with the solvent and the loctite to get an indication if my process was sound. If you look carefully you can see a light green tinge to the paper, so the solvent and loctite were migrating through the porosity. So repeat for the other head area and the jobs almost done. I wanted a little "belt and braces" assurance so in addition to the loctite sealing I also coated the well areas with Glyptal internal engine sealer as well. That's the reddish coating. So I can claim a complete success I'm happy to say. Nice and oil tight. Next time I'll listen to my small internal voice a bit more closely and do the due diligence on those areas I know intuitively could be an issue. Ciao1 point
-
Thanks Bill, but if I still have it in May I'll probably be keeping it. Get to be a citizen then, traffic infractions may not seem so important. Certainly won't be getting ridden in this . Hows the weather in Florida ?
 1 point
 -
Took a small crescent out of each of mine with a Stanley knife til tank fitted snugly.1 point
-
Old Harley-Davidsons, particularly the sand-cast engines nearly always had some porosity. As you've done here, Glyptol was the most common answer, after a solvent bath and oven baking. V8 Automotive guys use it too. Interestingly, Jack Roush Engineering used (uses?) copper plating on the entire block, because it can in no way peel off and compromise integrity.1 point
-
Picasso, FYI, there's a google group for Convert riders.. it be even harder to join.1 point
-
Could be a Taptalk issue? I've always wanted a V11 and found a nice one; the seller turned out to be unreasonable. Therefore, I ended up with a horizontally opposed instead of a 90 degree V. I will say Guzzi owners are much more welcoming, Been owners tend to be a tight knit group of conceited @sses. Some day...1 point
-
If anyone wants a brace , contact me . I bought two and found out this only fits the red frame .1 point
-
I've had a couple of Beemers, but I'm a slow learner..1 point
-
Wait . . . you mean no sharpened drunkies have been by to initiate you in to the party? Well . . . then you're in! Cheers!1 point
-
LowRyter sez: "contact Don here": https://www.motivcycleworks.com/ Here is a LowRyter post with more contact info in another thread about the frame plate: @SFTripod, There are several other issues to consider if your RedFrame's tail is wagging the dog . . .1 point
-
Someone asked me if I was going to Mandello del Lario, instead of the South'n SpineRaid, for the Centenary Celebration . . . Showing up at the Seventeenth South'n SpineRaid, with 200.000 km on my Sport, IS my Centenary Celebration!1 point
-
Yes Pete "super wick-in" is the 290 green stuff. Low viscosity. And yes Araldite is another fix. Many round case bevel drive Ducati's back in the early 70's had Araldite in the cases from the factory. When I put Desmoquatro engines together with new cases I used to go to the importers and they would bring out their whole stock of crankcases and I'd go through them and chose the one with the least porosity. Not, no porosity but the least! Ciao1 point
-
I've had a few porous heads on 8V's, the castings are quite thin and the cooling drilling's complicate things. I've had quite good success using Loctite 'Super Wick-in', can't remember the number. Sometimes a smear of epoxy over the top works wonders.1 point
-
I think Little Feat was the best band ever. I was reading the bio on those guys ("Willin") and they were pretty volatile. The band was about to throw in the towel before they recorded "Waiting for Columbus", the best Live album of all time. They had the Tower of Power and Mick Taylor. Stories of drug fueled all nighters, playing mad at each other on stage, Richie throwing his drumsticks at Lowell when he was singing. Lowell mixed the record, the band was ready to quit and they listed to the first song, "Playing in the Band" and wow. WOW. So after reading that, here is Mick Taylor + Little Feat. "Apolitical Blues" Lowell's next gig was producing The Dead's "Shakedown Street". After an all night coke binge with Mickey Hart, Lowell said his drum solo was crap and Mickey beat him good. Lowell left, the album was recorded but not quite finished. Great story.1 point
-
So, early RedFrames (and the 2001 Rosso Mandello) have 4.5 inch rear rim width and were delivered with 170 tires. My 2000 came with really soft, 'pointy' Pirelli Dragon Corsa that were gone in a flash. The 170 is a little bit of a "pinch" onto that rim which then looses some "roundness" in the profile. I have found the 160 on the 4.5" rim much nicer on the turn-in, especially with a more "sport-touring" tire (currently Bridgestone Battlax T31). Beginning with the 2002 LongFrames, rim width increased to 5.5" and came with a 180 tire. Lots of folks, similarly, have gone with a 170 on the wider rim of the later V11. YMMV!!1 point
-
While musing about the Isle of Man, It occurred to me that the logistics would be easier and the event more interesting if I shipped the bike into Italy and rode it to IoM...1 point