

Lucky Phil
-
Posts
4,540 -
Joined
-
Last visited
-
Days Won
234
Content Type
Profiles
Forums
Events
Gallery
Community Map
Everything posted by Lucky Phil
-
Ok didnt know that. I think I'd still go with a tube insert between the lugs and leave the metal in the holes. Seems the cracking is a bit hit and miss but better to address it if possible. I would go all out if I had the equipment of my machinist friend was still local to me but hopefully the extra gearbox support and radius will be enough to mitigate the risk. Ciao
-

Replacing all fasteners, is there a list?
Lucky Phil replied to JBBenson's topic in Technical Topics
Really? Proof? Ciao -
Replacing all fasteners, is there a list?
Lucky Phil replied to JBBenson's topic in Technical Topics
Stainless Steel is a poor choice for fasteners on a motorcycle esp one that vibrates a bit. The material is too hard and so has minimal stretch which leads to loosening fasteners. they were made for the marine and building industries not for automotive use. I hate the way passive cad plated steel fasteners dull after a while but I wouldnt go SS. The Daytona engine I have just completed and the gearbox I have apart on the bench have been converted to all Titanium external fasteners including the washers. I guess the engine cost around $230AU or so to do and the gearbox around $140AU. Ti fasteners dont weather, stay tight and look great for the life of the bike or car. All my bikes have gradually morphed over to Titanium fasteners including the chassis bolts and nuts. The cost is up there I know but I think its worth the money in the long term. Ciao -
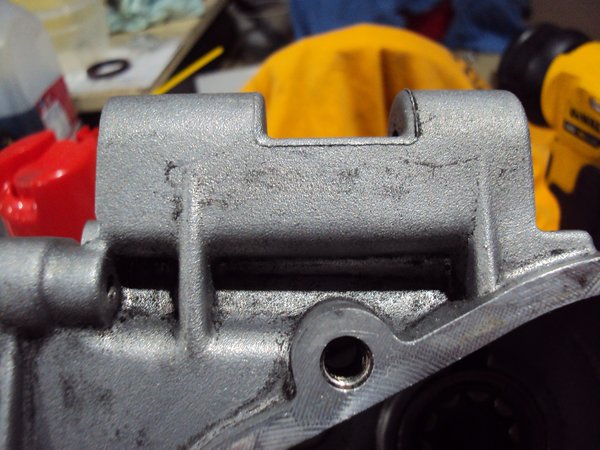
On balance I think I'll leave it the way it is with just the radius done. The above is interesting and I understand the concept but its not quite applicable to the V11 gearbox mount in that no matter what the loads will go through the radiused area. No ability to create a modified load path. To give a lateral steel bush any meaningful wall thickness you would need to open up the mount holes 4mm which I think would be too much but the idea is sound. What you could do is use a tube between the inner faces of the mount lugs that the bolt passes through which would achieve the same results with regards to the crushing/squeezing loads from the bolt. However that would require machining the inner faces of the bosses to square them up and I dont have access to a mill at the moment.The lateral ribs between the mount lugs are also at bolt hole center line as well which will take the mount bolt crush well enough I think on balance. Considering the occurrence of gearbox cracking, the mileage at which it generally occurs, the fact I now have the supplemental gearbox mount and have done the radiusing and the low mileages I actually do I think as I said I'll leave it there. All good suggestions though and worthy of consideration for those with the box out and access to the machining equipment and the prospect of lots of miles. Ciao
-
You mean take that corner off? Ciao
-
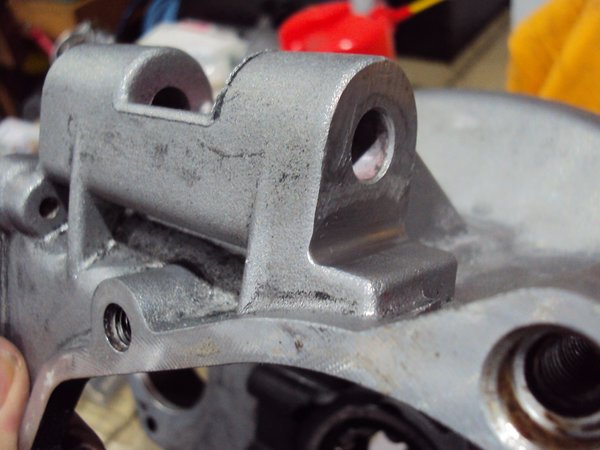
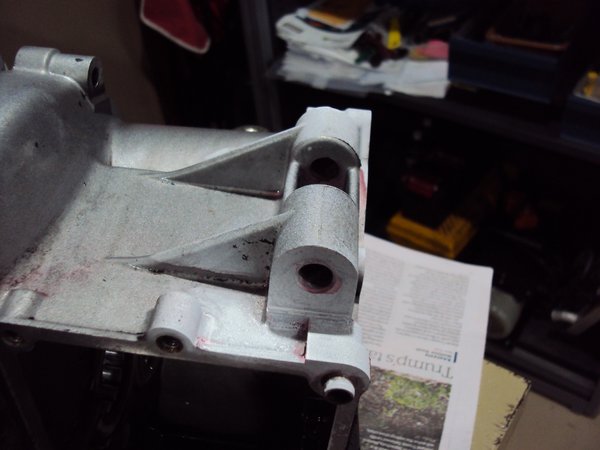
So here's the gearbox mount rework. 4mm round file and take it carefully. Finish off with some 800 wet and dry on the file followed by green Scotchbrite. Important to make sure the finish of the fillet is smooth and free from surface defects that may cause stress risers. Ciao
-
From the album: V10 Engine
-
From the album: V10 Engine
-
From the album: V10 Engine
-
Timing Gear Set - Replacing timing chain
Lucky Phil replied to FalcoLion's topic in Technical Topics
I take all the points made but as the old saying goes, long after you've forgotten the cost the quality remains. I btw didn't replace my V11 pump when I did the gear upgrade. I didn't realize Joes pumps were available and there was some fitment issues due to patchy quality of some aftermarket pumps around that time so I stuck with the std pump. I did however use a DHS pump I'd had for years in the Daytona rebuild. Ciao -
Timing Gear Set - Replacing timing chain
Lucky Phil replied to FalcoLion's topic in Technical Topics
I think I covered the benefits of Joes pump adequately. Ciao -
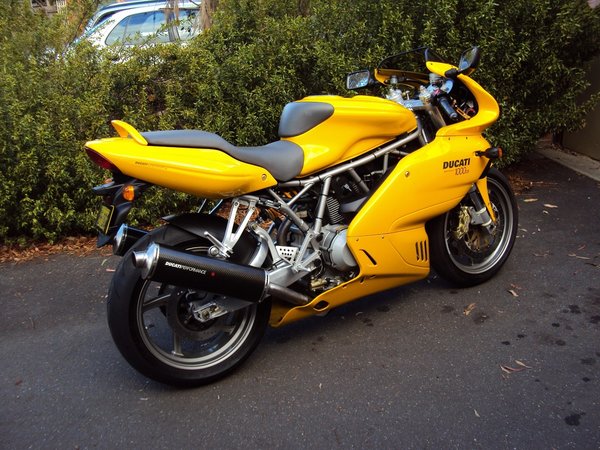
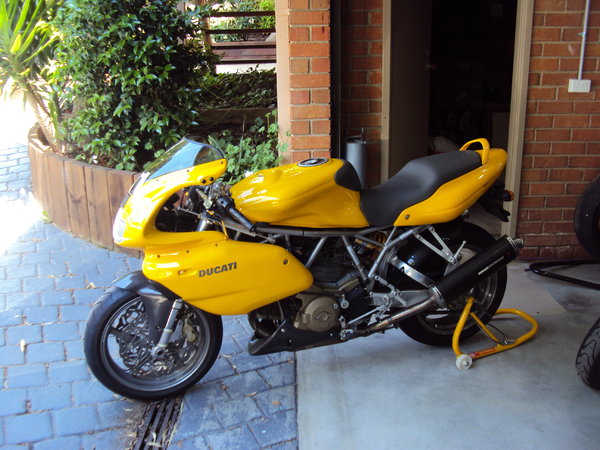
How about one of these. Year model 2003 1000ss Dual Spark Or in this guise. Ciao
-
From the album: lucky phils V11
-
From the album: lucky phils V11
-
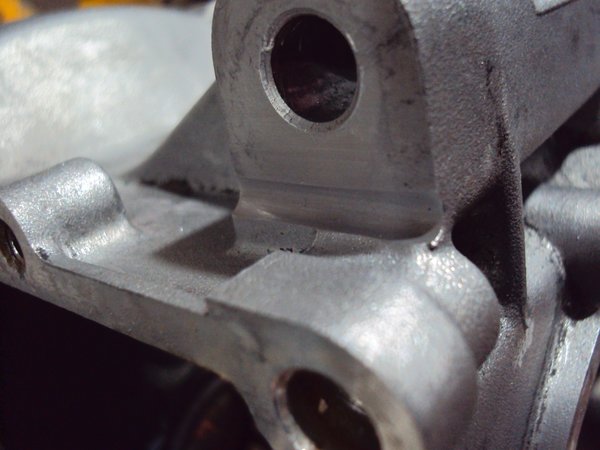
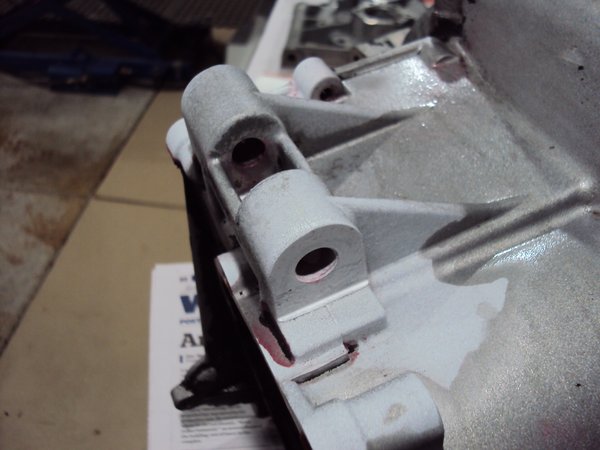
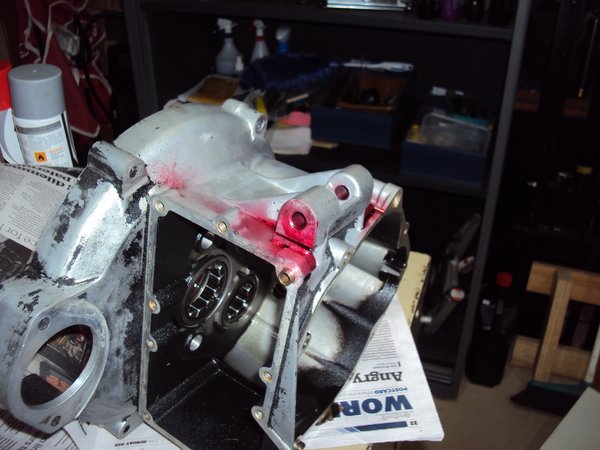
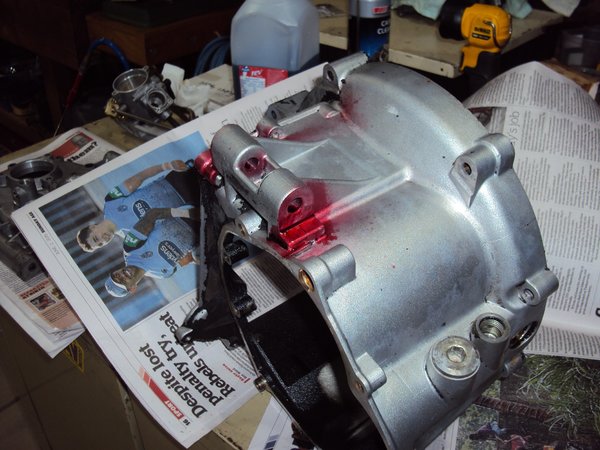
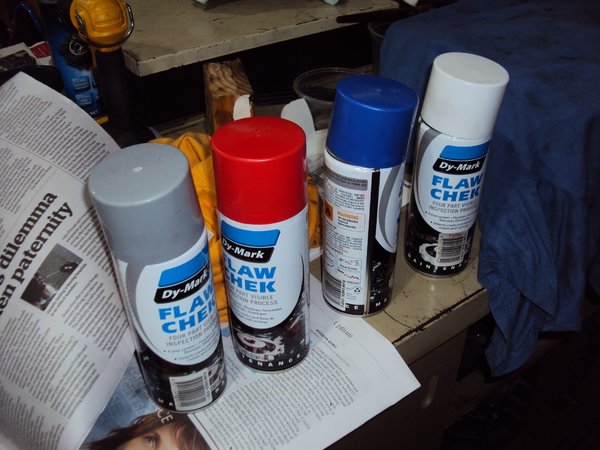
I thought before I get too far into this gearbox stripping and painting I'd better check that the mounts weren't cracked. First step break out the dye check kit. Clean down the mount area and apply the dye. Wait for 15 minutes. Clean it off again with solvent and apply the developer. All good thankfully. Its not hard to see why they can crack here. There is not genuine radius from the vertical machined face to the horizontal area. its just the edge created by the face cutter. I'll create a radius here by hand as there's a decent amount of material and what you lose will be more than compensated for by the removal of the stress raiser from the machining. Ciao
-
From the album: lucky phils V11
-
From the album: lucky phils V11
-
From the album: lucky phils V11
-
From the album: lucky phils V11
-
From the album: lucky phils V11
-
Nut side, not that its going to make much of a difference. Ciao
-
Timing Gear Set - Replacing timing chain
Lucky Phil replied to FalcoLion's topic in Technical Topics
The original pump isn't going to fail but as has been mentioned the pump from Joe is better quality and addresses some issues. Most of the answers you are looking for are in the images. The pressed in steel support for the idler gear means the gear runs on a hardened steel shaft and not a gear supported on an integral shaft running in an alloy housing. The gear is better supported and the housing wear is eliminated as shown in the images. Some of the internal housing wear can be due to the minimal support of the original gear and a combination of wear between the shaft and the housing bore allowing the gear teeth faces to contact the housing internally causing damage which reduces oil pressure. Having the shaft rotate in the housing also means you lose oil pressure through the clearance between the shaft and the housing bore. Joes pump will last longer than the std pump and will pump slightly more oil due to less losses. Joes pump I believe also uses the later Daytona/Centauro/MGS-01 21mm wide pump gears as apposed to the 16mm V11 gears which means it has the highest volume oil pump of all the big block engines. So better, quality, higher volume, less losses and better durability probably sums it. I guess at the end of the day most people fall into 2 camps, those that think quality has value for its own sake and those that dont. Its a bit like people that pay big money for a beautiful original looking custom paint job without any orange peel etc. It has no practical value and is going to cop damage etc from road use but they still want and appreciate the quality. Individual value systems. Ciao -
Timing Gear Set - Replacing timing chain
Lucky Phil replied to FalcoLion's topic in Technical Topics
No I fitted the gears to my old pump but Joes new version is far superior to anything else out there I believe. His pump has the idler gear running on a steel shaft like a Ducati pump instead of the shaft being incorporated in the gear and it running in the alloy pump housing. The whole upgrade is about quality improvements as Mikko outlined and that's exactly how I feel about most mods I undertake. Its an opportunity to correct the cost cutting and quality short cuts of a mass produced piece of engineering. It will never equal a factory race bike of course but its an interesting and satisfying engineering path to go down all the same. Of course you could always start with something truly horrid in design and engineering terms like a Norton Commando or a Triumph twin but lets face it nobody wants to waste that much time:) Ciao -
Timing Gear Set - Replacing timing chain
Lucky Phil replied to FalcoLion's topic in Technical Topics
I covered this in my Joe Caruso timing gear install thread. Dont bother checking it just fit a new one. Tip....you can buy the old version much cheaper than the updated version and simply die grind the oil feed slots yourself in about 5 minutes. Ciao -
I think the days of gears were over once accountants and not engineers started running businesses. Ciao

