Leaderboard


Popular Content
Showing content with the highest reputation on 08/10/2022 in all areas
-
Very cool. The VanGogh museum in Amsterdam is on the infernal list of " museums I've set the alarm off" in, much to the amusement of my brother...stuck my nose too close to see the thick paint layers and set off a space alarm. The guards laughed, I was mortified. Probably can't do that anymore....4 points
-
At least you didn't glue your hand to a painting .2 points
-
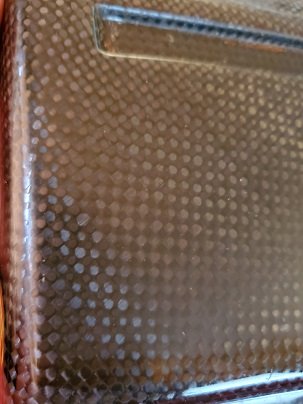
BTW, every other CF part on my Tenni is also 1x1 weave except for the hugger. 1x1 looks like a checker board. 2x2 looks like diagonal blocky lines. 1x1 is also called plain weave, and 2x2 is sometimes called twill weave.2 points
-
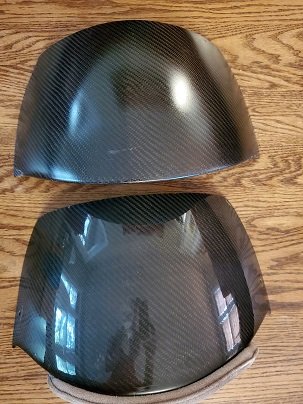
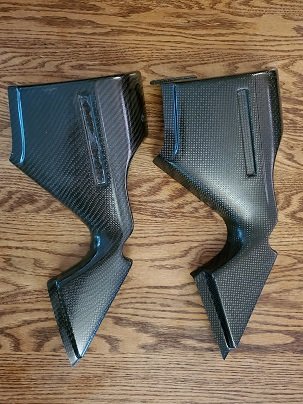
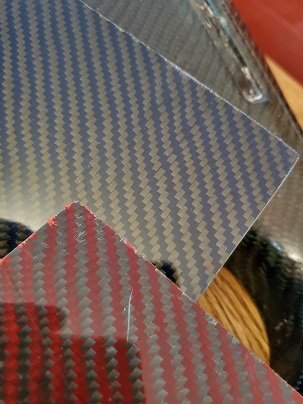
Note that these pieces are prototypes, not final product. There are a few rough edges, holes are not yet holes, and I presume the CF was laid a bit quickly. Even with the final product, you will know that this is hand-laid fiber. To me, that's a plus -- and similar to the rest of the CF bits on my bike. If you're not okay with that, walk away. First up, a pic of the humps: Prototype at north. Note that this was an attempt to replicate the more satin finish of the vacuum-method pieces. I am not a fan. Next up, the side cover. Original on right. If people want these, we should figure out what to do about the depression for the gummy stickers (wanted or not). Next, a close up of the samples of the Kevlar weaves. They are leaning against the prototype side panel with regular 2x2 CF weave.
 2 points
 -
Color bands only signify resistance value. No directional requirement. Paul B2 points
-
I'm baaaack. Sorry for the long, long delay and being incommunicado. Summer seemed to have other plans for me. I did manage to get down to Gettysburg and talk to the CF guy. He's made a couple prototypes for me and I'll share some pics of what I've got in a follow up post shortly (it's really hard to get a decent photograph of carbon fiber parts). When I first went down there some months ago, I left with Greg three pieces: 1) a OEM plastic seat cowl to model, 2) my aftermarket (presumably) non-vacuum mold seat cowl for comparison to 3) my OEM vacuum-molded CF side panel. To clarify, as I understand it, there are a couple different CF processes, including: 1) where a vacuum is created that sucks quite a bit of the resin through and off the carbon fiber, leaving a thinner, lighter, less glossy finished product; and 2) a standard process whereby much of the resin remains on the finished surface, rendering a somewhat glossier finish and more robust piece. My Tenni, between the seat cowl, side panels, front fender, hugger, gauges thingy, and starter cover, has at least three different finishes. My initial hope was to match the seat cowl (tail hump -- what are we calling this thing now) to all of the other CF pieces (excepting the hugger). Unfortunately, that is not possible with the manufacturer. Frankly, it may not be desirable for the tail hump anyway, from a durability standpoint. Anyway, although I had only taken the side panel so Greg could see the finish I had originally hoped for, a little (potentially fortuitous) miscommunication resulted in him making a prototype of the side panel, too. I like the prototypes well enough to commission a better mold and a batch of tail humps. I'm not opposed to doing the same for the side panels. Cost is not going to be prohibitive, but it may change a bit with inflation, so I'm not going to quote any prices. I'm pretty sure I can make my initial outlay. Since I hadn't spoken to any of y'all about the desirability of side covers, I told Greg to go ahead with the seat cowl and that I'd get back to him on the side panels. So, let me know if you are gung ho on the side panels and I'll have those reusable molds made up, too, if there's enough interest. As for the options, I got a sample of the red and the blue kevlar weaves. I like them both. They are very understated and would only really pop in bright sunlight. Kevlar weaves will be about 50% more $$$ than standard 2x2 carbon weave. Photos coming shortly. Thanks for your patience and understanding that both the manufacturer and I have other things to do as well. For his part, Greg recently had a joint replacement and is still getting around a bit slowly. He and his family business have more than enough dragster bodies work and he only took this on because he thought it was a cool project. We are at least several months away from having finished products. He and his daughter are very nice folks and I know they will do their best to get us high quality stuff. Cheers, Frey2 points
-
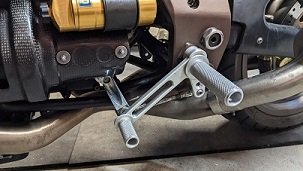
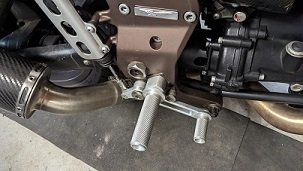
Hello folks, I think, I cracked the case. Once I have installed and test driven I will post pics. The installation is a mix of provided parts and old linkages of the original shifter. After install and test drive. Shifting is firm but not better. Lowering range is low, 1cm, so not a great kit for lowering your peg. Pics see attachments for fit and finish.
 2 points
 -
It would be a good time to groom, align, clean, and lubricate the entire external shift mechanism. Clean, grease, and adjust the tension on the shifter pivot bolt. Make sure the connecting rod length holds the shift extender parallel to the arm at the gearbox and the lock nuts are tight. Be certain the shifter lever does not strike the frame side plate on the downstroke . . . For the Chuckstud (yeah, I read it like that the first time through. ) superspring, contact super- @Scud:
 2 points
 -
Great bit off kit! Had the pleasure of receiving it just in time ahead of a long trip to Germany and Luxembourg. It held up great and improved the shifting a great deal.2 points
-
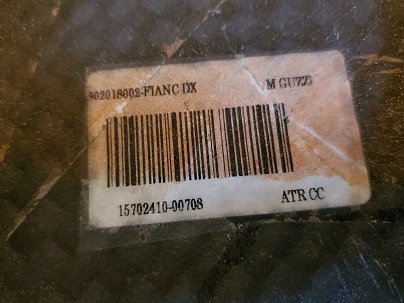
Just realized looking at pics online that Tenni doesn't appear to have any CF from factory. I bought my Tenni with all the CF bits. Side cover I believe to be an MG product, judging from sticker. It appears to be 1x1 weave. But, my Mistral mufflers are very clearly -- like Docc's -- 2x2 weave.
 1 point
 -
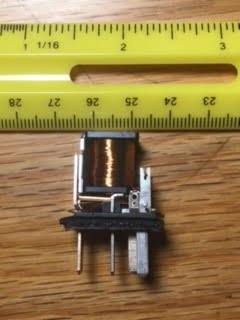
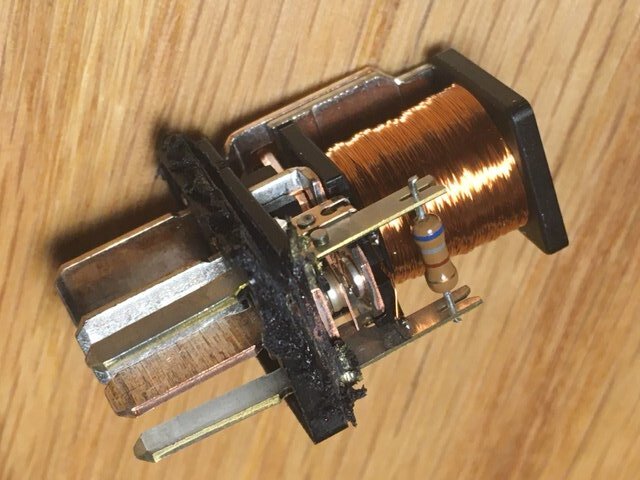
ebay uint sacrificed, resistor color bands go left to right, blue to gold - docc's look opposite. I'm no electrical engineer but that seems like a difference
 1 point
 -
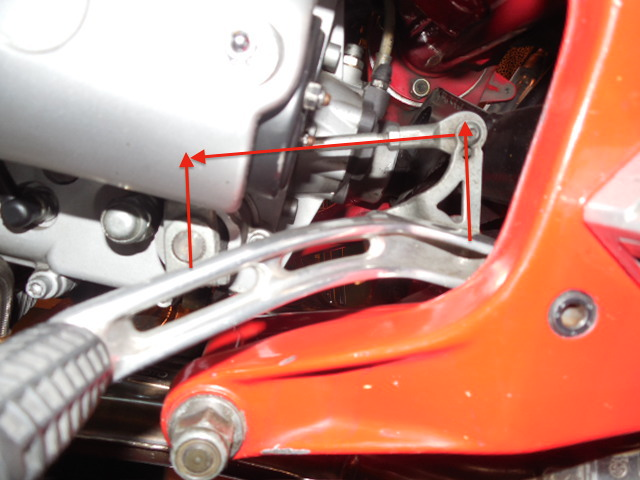
This ARGAL adjustable foot control set came with the bike when I bought it. Has anybody installed this kit for adjustable foot controls on their V11 Cafe Sport or similar? I can't figure out how this kit fits my bike? See this picture as to how the kit looks like! Please post some pictures if you have an installed kit on your bike! Thanks a bunch!
.thumb.jpg.7b154f0301618ea94e8d4e4296ff709b.jpg) 1 point
1 point -
The single biggest improvement you can make to the shift action of your V11 is to lengthen the shift lever arm and incorporate a new eye end mount hole 12mm ctr to ctr from the original upper hole. Shortens up the shift action to Japanese bike standards and gives the gearbox return spring greater leverage over the shift lever. It also makes the shift action a little bit stiffer which means you need a little more load on the lever before it shifts gear which makes for a faster cleaner shift. This is the shift selector. The area that is blued rides over the pins on the shift drum during the lever return after a shift. It usually has a rough finish and often doesn't bear across the full face of the pin and causes the shifter to hang up on return. Draw file it smooth and blue it to check for correct contact and if it isn't right dress it so it is. Do the other face on the left of photo as well of course.This arm always has a bend in it due to the way its stamped from a flat sheet. Carefully rework it so its flat and straight without any twists and polish the faces with some fine emory. The shifter mechanism stop can allow over travel of the mechanism. This one has had pads welded to the stop faces and dressed back to prevent this happening. Don't ever be tempted to adjust the large eccentric on the shifter cover with it fitted to the bike. It is a very sensitive adjustment that controls shifter travel and over travel and needs to be on the bench to set up correctly. It wont solve your shifting woes alone so leave it alone when on the bike. Note the detent roller, it often doesn't ride correctly in the detents. Remove and bend the roller arm until it locates correctly. Note the different covers, the later type on the left with the shift selector arm return limit adjustable eccentric and the older type on the right with the fixed roll pin. Set up the eccentric with about 0.030" clearance to the shift arm at its closest point in the travel. This later unit also has the extra banana shaped support plate. Guzzi sell a mod kit for the earlier bikes. A close up of the return limit eccentric adjuster on the later covers. The return spring can be installed the wrong way. Make sure when fitted the spring isn't contacting the cover, if it is remove it and install the other way. On the bench set up and ready to install. The V11 shifts like a Japanese bike now, short travel, slick shifts with or without using the clutch and no return binding. This is the mod kit which comes with new cover with eccentric adjuster, new selector wheel pins with the ability to fit the banana support link and from memory a new shift selector arm and spring and new centering spring. Note the shifter input arm and stop assembly in the lower right hand of the photo. The pin you can see under the shifter wheel with the spring arms around it is the large eccentric adjuster which controls the travel of the shift mechanism and provides the stops in both directions. As mentioned earlier adjust it on the bench only, its very sensitive and governs how far the mechanism moves the gear selector dog to engage the gears. If its a long way out you can have a situation where it moves the gear to a fully engaged position and then pulls it partially out of engagement during the shift and under engagement in the other direction. Ciao1 point
-
I'll sacrifice one of my Chinese (Canadian) ebay relays and post a pic later this week. Ordered 5 CITs from onlinecomponents as well, just to be prepared. Maybe the relay position info is posted somewhere on this forum but I haven't found it yet. I got a sticky note from a previous owner in my manual that lists them as: 1 - starter 2 - headlight, (I gather from reading this forum its also the tachometer) 3 - sidestand 4 - ECU 5 - Fuel Injection1 point
-
Thanks to Chuck, I have a Lucky Phil Extender and plan to install it soon. All the pics on this thread are really helpful & interesting. Read all 7 pages this morning, my second pass thru this thread maybe. Not sure I *totally* understand how the shifting mechanism works but am learning more each time. Sounds like after installing the improved extender, switching out 2 internal springs and examining some internal parts they touch are next steps. Where does one acquire the chuckskud super spring? Installing the Lucky Phil Extender *seems* like its a fairly simple job. Remove 3 bolts, remove old part, install new extender, attach 3 bolts. I *think* I can do all that without removing anything else. Do I need to keep tension on the shifter while doing this? Let me know if I am missing any obvious steps or anything you think might help that I need to know before I try the install.1 point
-
There are a lot of V11s that are not V11 Sports... such as bunch of V11 cruisers. Are you sure that kit was meant for a V11 Sport?1 point
-
I saw this exhibit when it was here in San Diego. Very cool. My next book has a chapter featuring a story about van Gogh's relationship with Paul Gauguin. They lived together in the "yellow house." The chapter subtitle is "lessons from a dysfunctional relationship" and it reveals a lot of new research that causes us to rethink what we know about van Gogh. For example, van Gogh's letters show that it was Gaugin who inspired him to take more risk and explore with his art (Gauguin also influenced Picasso). A recent scientific review of van Gogh's letters suggests that he suffered from bipolar disorder, and was not insane. Bipolar is swinging between bouts of depression and hyperactivity - and yes, he produced nearly one masterpiece per day during that time. There are a few more major surprises in there too, but the book won't be out till next year. And in case you missed it, Willem Dafoe played van Gogh in "At Eternity's Gate" which portrays a credible alternative to van Gogh's supposed suicide. The film draws from academic research that suggests two boys were playing with a gun that accidentally went off. When van Gogh realized what happened and that he would die, he lied to protect the boys.1 point
-
That sounds like a fantastic immersive experience, well beyond your typical museum exhibit. After living for a couple of years in Paris, Monsieur Vincent had his most prolific period in Arles, a short ride from where I grew up. In a little over a year he spent there, he produced over 200 paintings and 100+ drawings depicting local life and the countryside of this area in the south of France. Beautiful country with a warm and bright southern light compelled him to work frantically and can be experienced throughout his outdoor paintings there. I should say that it’s also where he lost his mind... This beautiful countryside is littered with meandering 2 lanes roads from sea to rolling hills, linking small villages through marshes and vineyards and is best experienced on two wheels for all of its sensory palette.. That is where most of my early experience riding motorcycles took place. @LowRyterThat should tie this topic back up nicely to a more moto-centric subject...1 point
-
These kind of political comments are totally unnecessary and unwanted on this forum.1 point
-
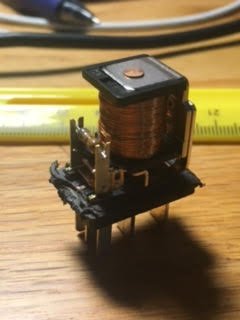
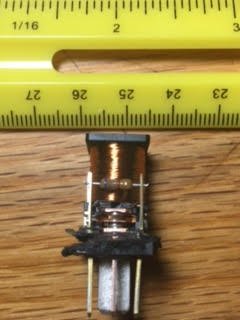
The cover is not hard to get off, but always seem to come off in pieces. I suppose the case could be removed with a Dremel® cut-off wheel and epoxied back on to save the relay for use. Inside the high current OMRON the chassis parts are notably robust along with a the coil windings being substantial (lots of windings), but most notably the coil stands vertical and the resistor is mounted next to it (not underneath) in its own substantial mount. To me, this set-up looks like it would shed heat well. I haven't inspected the contacts directly, but we have that in Ryalnd3210's post where he compared the OMRON (G8HN not the high current "E") to the popularized Chinese GEI. CIT 1.2 watt (left) / OMRON G8HE (right):1 point
-
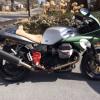
Coppas have Öhlins. This one has Nöhlins. Wrong forks, shock, fairing, paint, handlebars. Other than that, it's fine. More questions than answers.1 point
-
That there is the Coppa Di Merda Limited edition.. An "Enhanced" survivor.. Stripe added for" ultra speed"..Limited edition parts from E. Baye and special Amazonian racer parts from Jaque Bezos. Exquisite. Timeless.. Wait.. Down $1200????? They wanted $7200 at one time for that?!!1 point
-
Hello Chuck, the kit received at Monday. The customs want to see it.0 points


.jpg.b4842bce60e4ed952a035ce47ef1fdb9.jpg)