

rockers
-
Posts
18 -
Joined
-
Last visited
Content Type
Profiles
Forums
Events
Gallery
Community Map
Posts posted by rockers
-
-
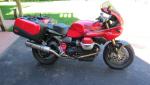
Excellent condition Rosso Corse. About 9,000 miles, 2nd owner. Many extras installed, including H&B Bags with rack, Russel Day-Long saddle, Bar Risers, Roper Plate, running lights. Bike had upgraded performance package and titanium exhaust.
Located in northern Wisconsin. Send a message for more info and photos.

-
 6
6
-
-
I have a "Rich's" custom seat from my 03 Lemans for sale?...but shipping to Canada is expensive
Bob
rockersbmw@gmail.com
-
I don't know If we have ouch base in the past, but my beautiful Rosso Corse is still available
Bob
rockersbmw@gmail.com
-
Is this the same speedo as on your Nero Corsa?
E-mail me rockersbmw@gmail.com
Bob
-
Thr Rossa Corsa is still for sale although it is Winter up here. I haven't checked the website in a while...my fault.
Price lowered to $8000. Please e-mail me rockersbmw@gmail.com
Bob
-
1
-
-
Beautiful 2003 Rosso Corsa that I've owned for the last 4 years. Bought from original owner.
Approximately 9,000 miles. The speedo failed at approx. 7,000 miles. I replaced it with a new speedo the original gave me with the bike, but it is in kilometers - 3,230 kM ( I don't know why the speedo was kM...maybe an order screw-up). All fluids changed at 3,100 kM. Last major services done at Ned's Cycle at time of speedo change out (0 kM).
The Rosso came with the upgraded ECU and Titanium Exhaust. ( I also have the originals included with sale. Also the Moto lights on the forks.
I added the color matched Heppco-Becker saddlebags with rack. I also added 4 inch bar risers and a "Roper Plate" in the oil sump..
Bike has two seats. The "Rich's Seat" came with the bike and is included in the price. I had a Russell Day-Long made last year for $500 and will include for extra $300.
E-mail me for photos or questions rockersbmw@gmail.com
Bob Alexander
Hurley, Wisconsin
PS- I will be riding in Europe till mid August, but can answer e-mails.
Pick-up Only! No Shipping!
-
1
-
-
The following came off my V11 Lemans RC when it was almost new
Original Mufflers (Pair) Almost New- $400.00
Stock Windshield- $50
Valve Covers (Silver with Red letters) - $150
Stock SS Clutch & Brake lines- $25
Stock Air Box- $50
Don't have pictures, but I can take some, E-mail me at rockers@centurytel.net
-
I've got a 2004 Rosso Corse. The previous owner and myself made a few upgrades to the bike and I have various items for sale. Please e-mail me for a complete list, pictures, and prices. rockers@centurytel.net
All are in "as new" or very good condition due to minimal use on bike.
Pair of valve covers
Pair of original mufflers
Original Windscreen
Ventura Rear Tail Rack
New Speedometer (kM/hr)
Pair of Muffler Hangers
Thanks
Bob
-
I have a Ventura Sport rack that I removed from my 2003 Rosso Corsa. I added full H & B saddlebags and rear rack.
The Ventura rack installs easy with two L-brackets. Then the rack is added/removable by slip-on and two thumb screws.
Rack is in "as-new" condition. Price includes shipping in CONUS. (new price is $250 plus shipping).
See link for more info http://www.ventura-mca.com/fitments/Moto%20Guzzi/541-v11_le_mans.aspx
E-mail rockers@centurytel.net for pictures.
Bob
-
I have a pair of H&B 40 L Junior sidecases for sale. These have the Moto Guzzi emblem instead of H&B. They have the painted trim which I just had repainted to closely matcg the LeMans Blue/Grey color. These have never been installed on a bike and look "as new" and includes a pair of keys. Mounts can be bought to fit most Guzzis. $450 includes shipping to CONUS. E-mail rockers@centurytel.net for pictures.
-
I hate to post another "speedo" question..but I didn't locate an answer.
Bought my Rosso Corsa last year with a failed Speedo, however replaced the cable last winter and everything has been fine till yesterday. On the way home from our "Fall Color Ride", the Odometer/Trip Meter stopped working correctly. Speedo is working fine so I assume it's not a cable problem. It appears that the odo/tm is rolling but only recording about 25% of the miles. If I go 10 miles it rolls 2.5 miles on both. I know that will help resale, if I ever sell, but I'd like some hints for a cheap fix.
Bob (n da U.P.)
-
Hi
My H & B mounts just arrived for my Rosso Corsa. I just relized that the Mounts are for the stock muffler/pipe setup. Mine had the Titanium High Pipes installed by previous owner.
I know I need to install the original bracket for hanging the muffler to fit up with the bag mounts.
Any tips for lowering the Titanium mufflers to the original lower positon to make the bag mounts work? I would hate to put original pipes back on.
Thanks
Bob
rockers@centurytel.net
-
New Black Face Speedometer (chrome ring) for 2005 LeMans and maybe others. This is a Metric (kM) mdoel that was shipped to previous owner as an error. Part number on package is worn off but has a build date of 5/2007. $100.00 plus shipping.
E-mail rockers@centurytel.net
-
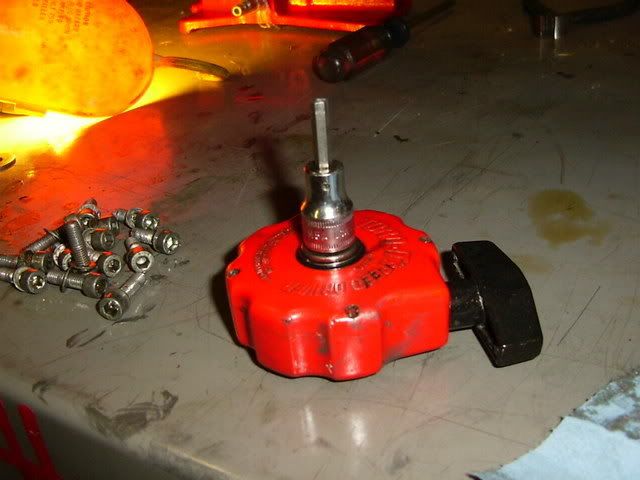
I put mine on at 0400 hrs Sunday morning, before my Sunday ride. For anyone who's interested, here's some words and pix on what's involved:
Preliminaries
1) Drain the oil. I did it the night before so more of the oil would drip off the parts I would be playing with. If you will be changing oil and filter, remove the filter, too. I had just changed oil two weeks prior, so I'm reusing the oil and filter.
2) Inspect the sloppage plate, and if necessary, debur it.
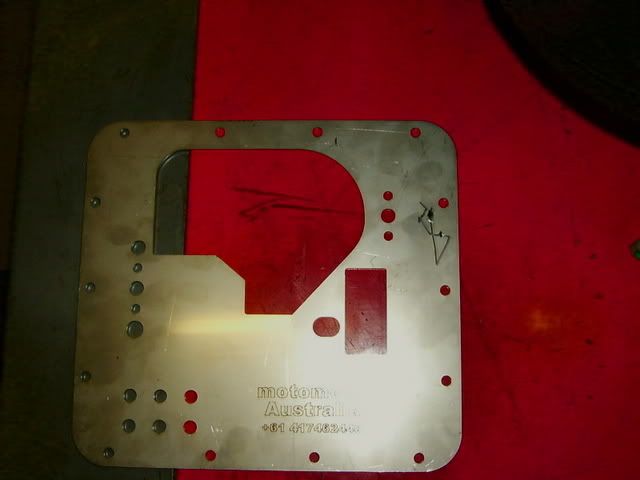
Here's the plate. It's a very nice piece that's even inscribed with the name of Pete's company, so that when some archeologist unearths your V11 ten thousand years from now, they'll read the inscription and surmise that the Aussies ruled all the world in the year 2006.
There were no real burrs on the one Pete sent me, but whatever cutting process used left a minor raised ring around the circumferences of some of the holes. The only holes on which this could possible matter are the ones for the oil journals. I used a flat file to gnaw them down. This shows it about halfway through the gnawing. Clean the plate thoroughly afterward.
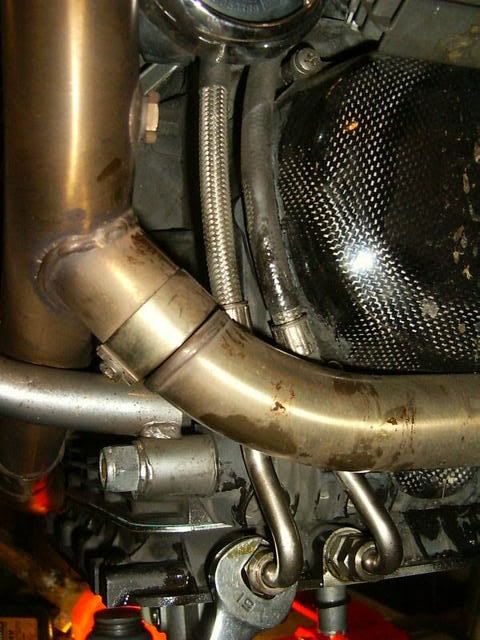
3) Using a 19mm wrench, loosen and remove the three oil lines that enter the sump.
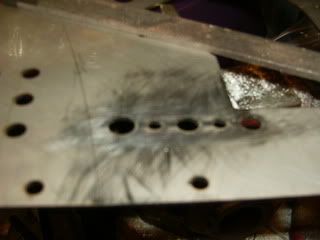
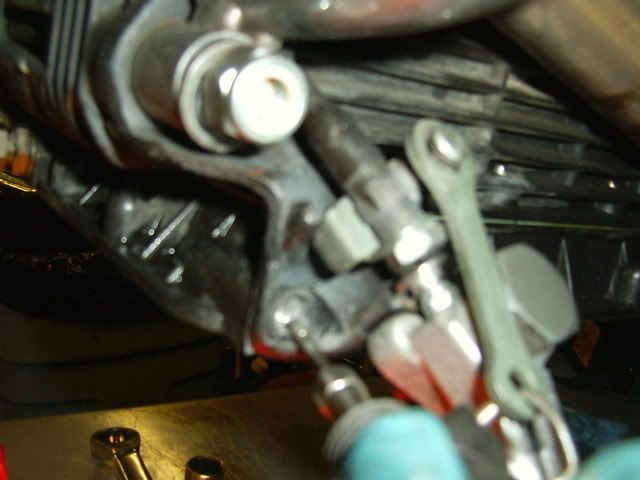
4) Remove the screw that fastens the sidestand support to the upper sump, as shown in the fuzzy photo above. Loosen also the big bolt that holds the sidestand mount to the crankcase. I have a crashbar, so I had to loosen the big silver neut shown, which fastens on the crashbar.
5) Remove the lower sump by removing the screws that fasten it. If you lack an air ratchet, or (like me) can't stand the racket made by air tools early in the morning, let me introduce you to my little friend, the perfect tool for this job: Mr. Torq-It. He's great for taking out and replacing all those sump screws.
6) Loosen the upper sump by removing the screws around its inner perimeter. Some of them are shown below, as is another of my little little friends: Mr. Hoseclamp. This one is best friends with Billy Bob's oil filter, but there's another Mr. Hoseclamp out there who wants to be your oil filter's friend, too.

7) Loosen the four screws that hold fasten all the plumbing for the oil system (two are shown above). Support the oil filter and the rest of the guts as you are removing the last screw, so it doesn't tear free of its threads under weight of the upper sump.
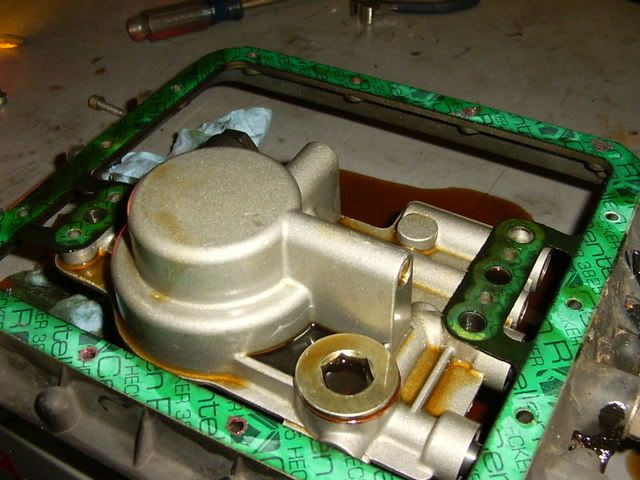
8) Set the upper sump carefully on a bench, supporting it if necessary to keep it from tiliting and spilling the oil out of you filter, as shown above.
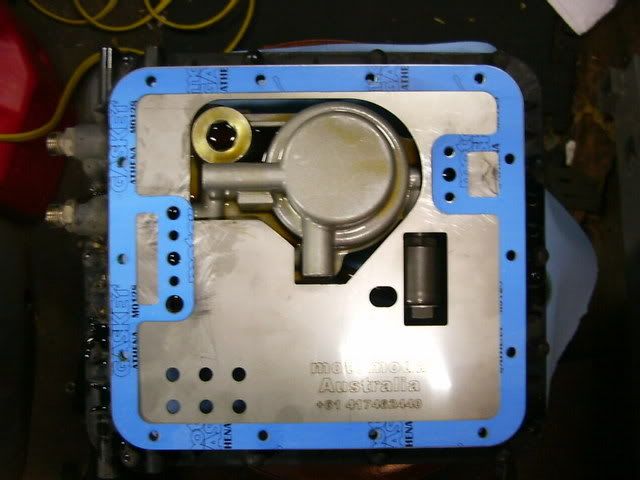
9) If the old gasket is torn, replace it, and then top it with the sloppage plate and add another gasket on top, as shown above. Those lobes of the gasket that extend toward the center are the most important part of the gasket and need to be in perfect shape because they seal the pressurized oil journals. Make sure they are in top shape. A leak from one of the journals will be internal, so you won't see it. A small leak won't be catastrophic, but a big leak will be. I do not use gasket goo for these gaskets. If you insist on using gasket goo around these journals, use it very sparingly (so you do not plug a journal) or use an anaerobic sealer so it will not harden in the journal if it gets in there. As the photo shows, the sloppage tray is a good fit and fills well all the space toward the back of the sump (right side of photo), so it should keep more oil near the pickup during drag-race starts.
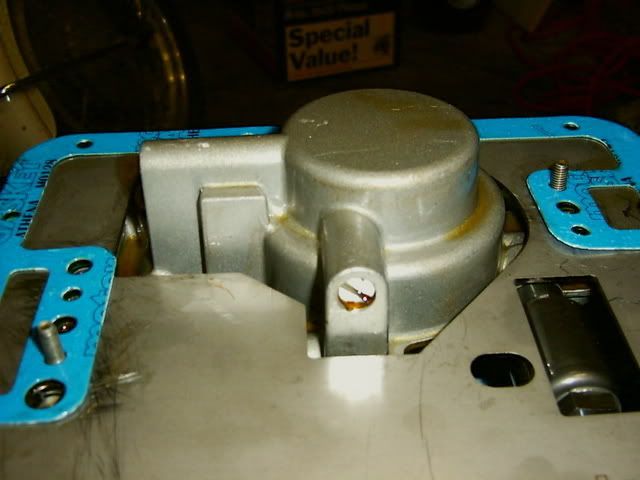
10) Time to install the upper sump and sloppage plate. It is vital that the gaskets that surround the oil journals stay in place during installation. One good way to ensure this is to slide one bolt into place at both front and rear journal blocks before lifting the assembly into place, as shown above. Lift it into place and start threading the two screws until they can support the assembly. Then, insert the other two screws and thread them in partway. It is best not to fasten them until you have started threading in all the perimeter screws. Go ahead and thread in these perimeter screws loosely, then tighten the oil-journal screws, and lastly tighten the perimeter screws.
11) If the lower sump gasket is torn, replace it, and then lift the lower sump into place and tighten its perimeter screws.
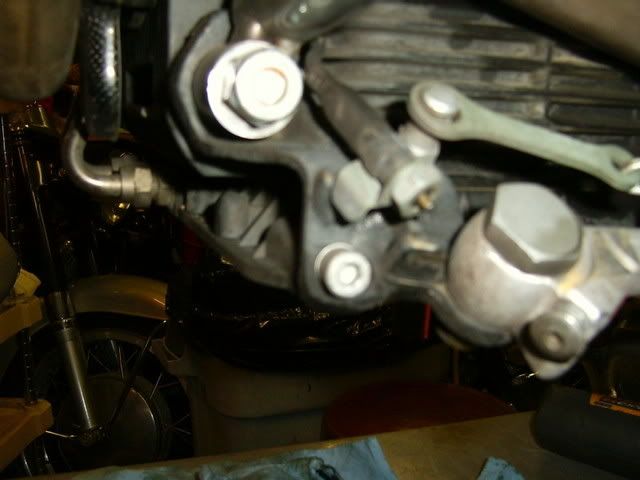
12) Hook up the three ol lines and tighten them. The two at the front are often routed so tightly that they rub together and onto the alternator cover. As you can see above, mine were abrading each other and the alternator cover. Take this opportunity to separate them before you tighten the fittings, so they do not wer through.
12) By adding the sloppage plate, you've lowered the upper sump by about 2.5mm, between the thickness of the plate and extra gasket. Because of this, you may need to relieve the lower perimeter of the hole in the sidestand mount. In my case, I had to remove about 0.5mm and did it with a Dremel and burr, as shown in the fuzzy photo above. Tighten both the screw into the sump and the bolt above it that fastens the sidestand mount to the engine block.
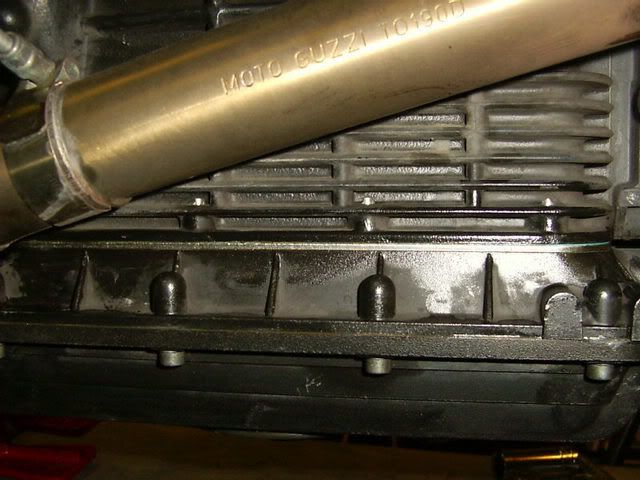
13) The thin, silver "Roper Line" betwixt engine block and upper sump is the only external cue that that plate's in there. Check your work once-over, add engine oil, and go for a ride.
I added oil to halfway between full and add, as checked by the Guzzi method, meaning with the bike level and dipstick screwed all the way in (this is about where iit had been when I experienced oil starvation under acceleration before) and then rode it yesterday on a long ride two-up.Tonight I'll try some full-on launches while watching the oil-pressure gauge to see if the sloppage tray does its job.
Whatever the result, afterwards, I'm gonna add oil to the full mark as checked by the safer method of just inserting the dipstick to the top of the threads.
Thanks again, Pete!
-
Just bought a 05 Rosso Corsa last August. Winter is here and it's time for some shop work.
I need to add sidecases to the Rosso and also Bar Risers (I'm Old). Any help on what is for sale or recommendations would be appreciated.
E-mail me at rockers@centurytel.net
Thanks
Bob
Also have a good as new MG Tank bag available for the LeMans.

2003 Le Mans OEM Mufflers- $250
in Personal Ads
Posted
Pair of OEM mufflers from my 2003 LeMans Rosso Corse. Very good condition.
E-mail for photos rockersbmw@gmail.com