Search the Community
Showing results for tags '3d printing'.
Found 1 result
-
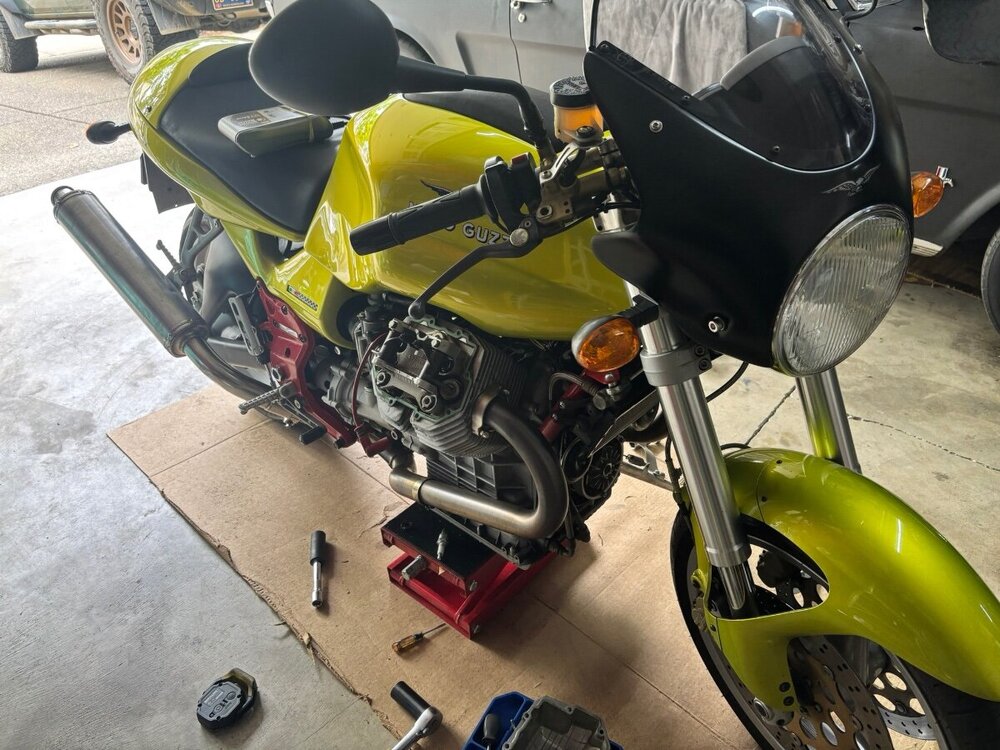
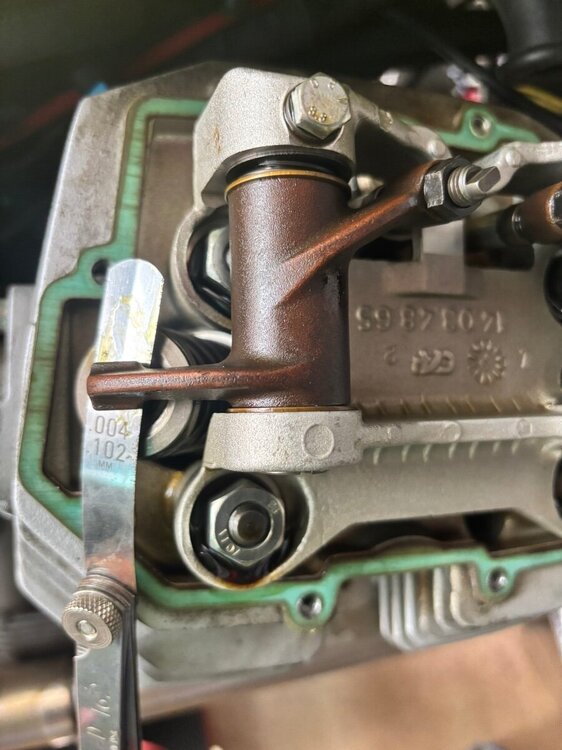
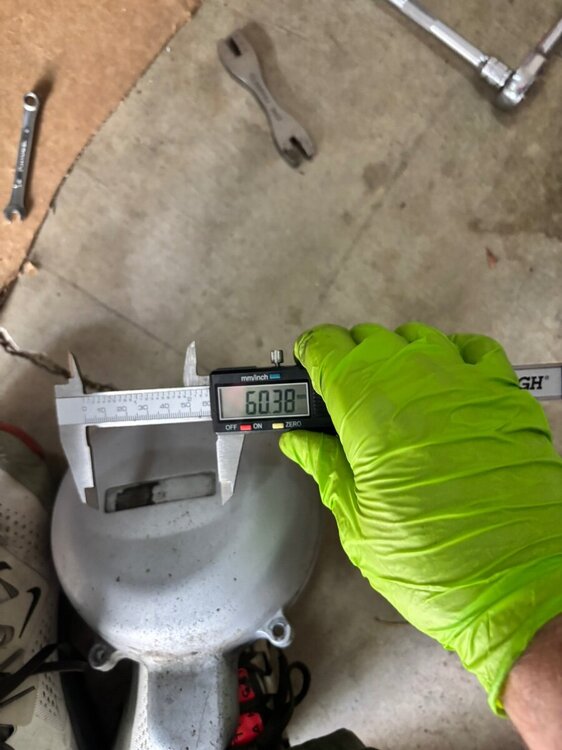
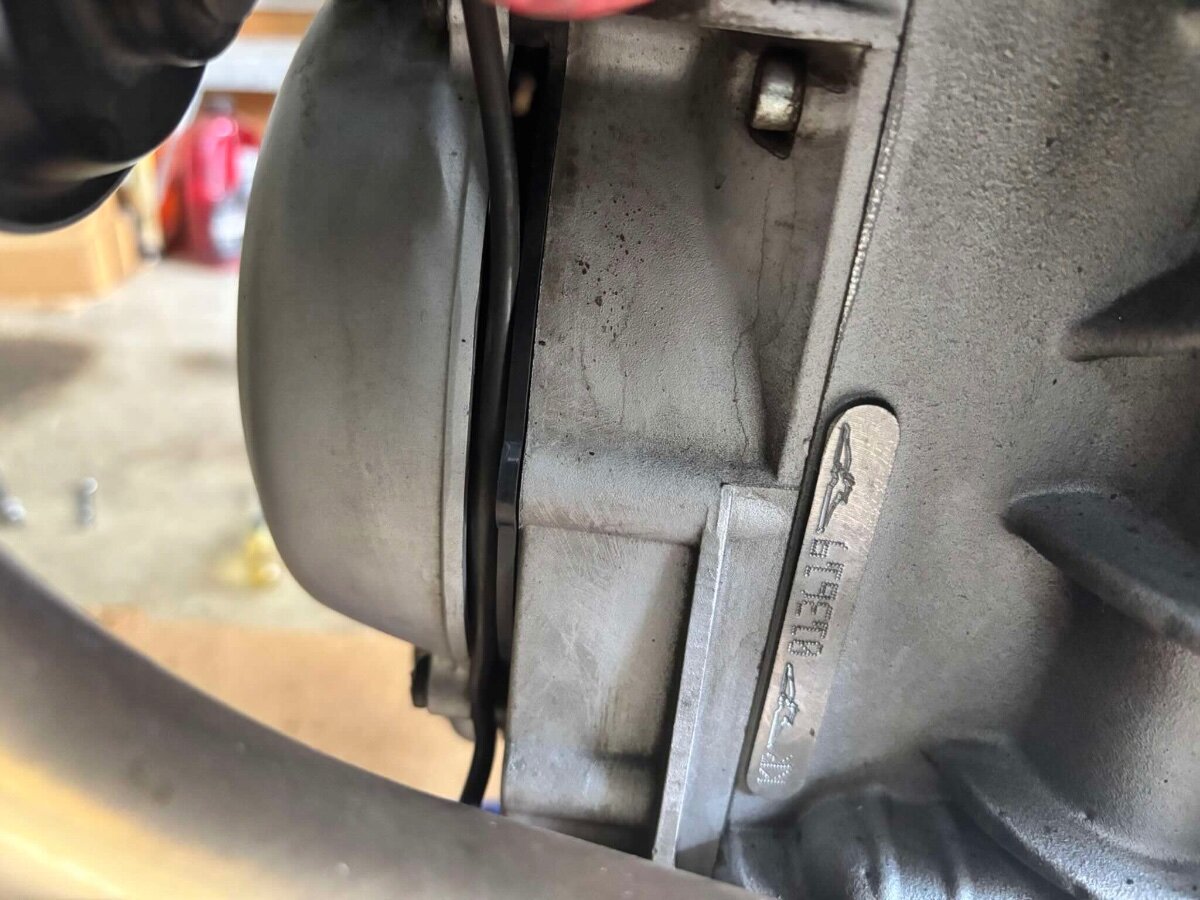
Valve were getting a little noisy. I could hear them over the Mistrals. Now to be honest I really haven't put that many miles on this bike. But I could tell it was time. And having done the valves on my previous 850-T I knew it wouldn't be much different. If anything, easier. The easier part was the marks on the flywheel. I don't think the earlier bikes had that. Or did they? Unfortunately I forgot to plug in the battery tender but the Schauer brought it back to life. But I had time while it was charging to tend to the valves. I will probably get kicked off the forum but the intake was .008in so yeah, not good. Time to get it back to spec. I went with .004 intake and .006 exhaust. I could still hear the valves after I was done so maybe I should go tighter? I followed the guide here on the forum and used the alternator nut to turn the crank. S = Sinistra and D = Destra. Thanks @ChrisPDX But two things about the alternator cover. One is the badge on the front is missing. I think I might 3D print out something to go here. Second was the side stand wire. Did I take a picture before moving the wire? I took a mental picture which, as expected, turned out to be useless. I thought the wire actually looped behind the cover bracket, but it seems too short for that. Is it suppose to tucked behind or just tuck close?