

tmcafe
-
Posts
379 -
Joined
-
Last visited
Content Type
Profiles
Forums
Events
Gallery
Community Map
Posts posted by tmcafe
-
-
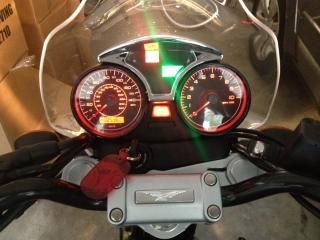
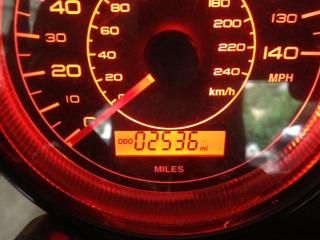
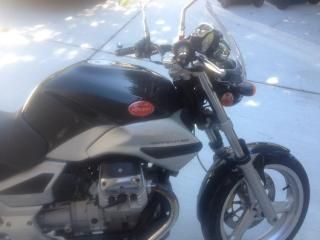
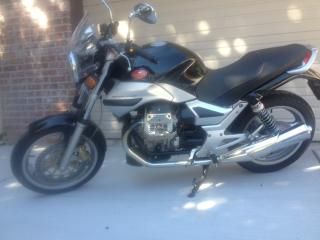
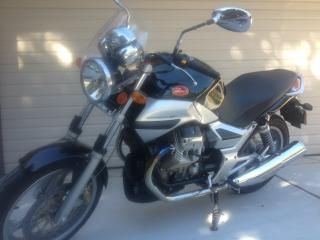
Superb bike, mint, no issues ever, always garaged by first and second owner. Originally purchased and serviced at MPH Cycles in Houston. Guzzi windshield from MG Cycle. Brand new hard side cases, center stand, and engine guards, not installed. Bike currently at second owner in Utah. Most miles are from its trip from Houston!
$5000
http://i9.photobucket.com/albums/a84/tee_m/IMG_3069_zpsefe20edc.jpg
http://i9.photobucket.com/albums/a84/tee_m/BrevaDash_zpseb047c54.jpg
http://i9.photobucket.com/albums/a84/tee_m/BrevaOdo_zps20bb8022.jpg
http://i9.photobucket.com/albums/a84/tee_m/Breva3_zpsadb399a6.jpg
http://i9.photobucket.com/albums/a84/tee_m/Breva4_zpscac4f756.jpg
http://i9.photobucket.com/albums/a84/tee_m/Breva1_zpsd2259b03.jpg
http://i9.photobucket.com/albums/a84/tee_m/Breva2_zps0df25a7c.jpg
-
Seeking one in good shape (ends not worn out), e.g., from somebody who ditched their OEM pipes.
-
Unless your battery is a late battery you should always hear the pump and also a click at least from the starter. No pump and no reaction at all from the starter in my eyes rather is a problem with the above mentioned connectors or the relais sockets. Check the sockets first.
Besides that, keeping the Hawker well charged is always a good idea. They might be strong, nevertheless they're well on the short side of what a good V2 would need.
Hubert
Thanks. I forgot which brand the battery is but it's the original one I got from new with the bike in Sep of 2007. I tried again today and I could hear the pump and the click from the starter relay (I pulled out and reinserted before that). I'll try to find my charger and charge the battery before I look into more.
-
silly you, it takes way more power to crank the motor over.. get a charger on it and you'll prolly be fine.
I suspected it might be silly
 Thx.
Thx. -
Thanks. A good reason to find my meter in some of the garage boxes I haven't opened since I moved.

As far as the handlebar and connection, I've had that problem before and the contacts have been replaced. But I'll try again just in case.
I suspect it might be the voltage since the pump priming noise didn't come back on subsequent tries.
-
Granted I haven't started it for quite a while (late fall). Not on battery tender but light came on fine, gas pump noise (at least the first time I turned the key on), horn, turn signals, only no starter action whatsoever. I also checked the obvious kill switch. Does it need a whole lot more juice to turn the starter that the appearance of the other electricals? Sorry if it's a silly question.
-
I yesterday removed the oil sump (again) and took off the the oil filter holder. I was hoping to find a broken gasket but all was fine. Dissembled the OPRV hoping to find something that kept the valve open, but all was clean. I had no means to test it so but it back together. Next I replaced the 4 o-rings to the oil cooler. they seemed a bit flat, and the new ones seemed to be more tight. I was hooping this would solve the problem.
Since right now I couldn't find anything else, I was about to refit the filter holder. But first gave it a visual 'inspection'. By pure coincidence I noticed a rubber ring between the filter holder and the filter that appeared broken. Took the filter off and there it was: Half of the rubber ring of the old filter was still there, as you can see on the picture. I clearly hadn't checked or noticed it when replacing the old filter two weeks ago.
Put it all together again, now also with recommended hose clamp on the filter. I only haven't tested the pressure jet, cause I still need to get the oil in the engine from a small bowl without making a mesh. But I'm quite sure the problem is found and fixed. If not, I'll let you know... Thanks

-
Yes, forgot that. Although if it's just for doing the valves it's easier to turn the rear wheel to find the TDC.Welding would get rid of the extra joint maintenance, but wonder if there's a reason for having the crossover mobile. Maybe it's just Luigi who wanted the crossover but didn't want to redesign the pipes to have the crossover welded, so he improvised the current system.
As stated earlier, not having to remove the entire exhaust system to access the alternator was the likely cause behind a non-welded front x-over...
-
True, a few more screws but easier to handle. Plus you see what shape they're in the headers' gaskets.Maybe welding it like LemanI is the right way after all.
I always disassemble the whole thing, two more screws that leaving one side on.
Maybe

Welding would get rid of the extra joint maintenance, but wonder if there's a reason for having the crossover mobile. Maybe it's just Luigi who wanted the crossover but didn't want to redesign the pipes to have the crossover welded, so he improvised the current system.
-
True, a few more screws but easier to handle. Plus you see what shape they're in the headers' gaskets.Maybe welding it like LemanI is the right way after all.
I always disassemble the whole thing, two more screws that leaving one side on.
Maybe
Welding would get rid of the extra joint maintenance, but wonder if there's a reason for having the crossover mobile. Maybe it's just Luigi who wanted the crossover but didn't want to redesign the pipes to have the crossover welded, so he improvised the current system.
-
Thanks. What was the reason you switched back to the original gaskets? Leaks?I did, and tried the same procedure in the thread you are refering to, it used a tie down strapped across the cross over during re-assembly, yes? Eventually the cross over started getting loose again. I tried a few different ways to deal with it. The OEM gaskets were $25.00 each IIRC. I'm happy at this point without mine at all, but as always, your bike, your call.
That being said, my local dealer is EXCEPTIONAL, and during a discussion on this topic, he said he could fix it and make it stay tight. Unfortunetly, with the way things are these days, my repairs will have to remain in my garage, since money is very tight, and my kids want to eat, like, everyday, etc...
Otherwise, I'd hand him my bike in an instant 


One thing I noticed after I installed the shims is that there's more vibration above 5k, I can feel it in the pegs. Maybe I should tighten the whole thing like in the example you mention. If the original gaskets are so $$, the shims are a better buy anyway.
-
I assume the PC and simple aftermarket headers work very well, though it's a more pricy solution than fixing the crossover.My gut feeling is that the front crossover might only be really helpful on the stock exhaust system
A manufacture would not be adding cost to a product if they thought it did nothing. I have only seen dyno reports on bikes with aftermarket crossovers, mufflers and pcIII's which the front crossover just showed a hint of a hp increase.
Well, Guzzi may have been doing a styling exercise, trying to better tie in the new LeMans w/ the original, which had a hard-welded front x-over [that was a source of complaint due to the tedium of removing the one-piece header system]?
I postulated on Guzzitech once that the front x-over would have had some f/x on the 4k rpm dip, & Todd's reply was that with a better collector & a PCIII it was unnecessary & more reliable to go w/ no front x-over. Not exactly my point [mine being a path of frugality], but the better solution, no doubt.

Curious if anybody went back to the OEM crossover gaskets.
-
My gut feeling is that the front crossover might only be really helpful on the stock exhaust system
A manufacture would not be adding cost to a product if they thought it did nothing. I have only seen dyno reports on bikes with aftermarket crossovers, mufflers and pcIII's which the front crossover just showed a hint of a hp increase.
I should have done my homework better. I vaguely remembered a discussion where Greg said that the crossover does have a role. In the same post, I found their shop's cure for the loose crossover joints:
http://www.v11lemans...72entry140272
After all, there must be a logic to the fiber/graphite gaskets that prevent too much vibration in the headers and joints.
-
I guess that might be a problem. In retrospect I should have kept the original sleeve/gasket on the left, where it was almost fine (the pipe would still spin in the sleeve though). I just didn't want to feel like it was patched.There have been quite a few reports of the exhaust pipes cracking at the crossover location. I feel having the crossover rigid at that spot from having the crossover shims installed could put added stress to the joints, mainly due from expansion and contraction of the exhaust system and engine.
I installed my own shim just on one side of the crossover and used the stock Guzzi graphite crossover seal on the other. At least this way, there is still alittle give on one side and hopefully it will prevent any cracks from forming.
Mike
-
If you mean the pipe cracked near the cylinder head that's strange. Nice to get old-school help fixing it at the shop.For some reason my right headpipe cracked all open, about 3 cm from the end(the mounting on the engine), using these steel shims. I changed them in July or August, and rode it very few kms until this happened. Maby more tension on the pipes using these solid shims?
It happened in September, some miles before I boarded the ferry from Gothenburg to Kiel, on my way from Norway to Mandello. Not the best start on my trip! It was late and no garages open, and also I had no time for repair before boarding. I really made some noise inside the ferry.
I had planned to visit Polo in Kiel to buy a new rainsuit, and there was an auto garage just next door, "Stop and go". I was lucky, they could weld, so I went and bought the rainsuit, and the pipe was fixed when I returned! And he absolutely refused to take my money!
The weld is holding up just fine. And the steel shims are still in. And my engine is now completely cured of any sneezing, rough running and is all smooth, also +-3000rpm. What a bike!
Anyone else had problems using these shims? Maby one should wait with the hard tightening of the pipes until after running the engine for some time.
I noticed that the shims were very tight as I inserted them. However, the exhaust is still leaking a little, I can feel the engine pulses if I hold my hand near the crossover joints. But less noisy than with the loose crossover before.
-
Thanks SH. The crossover was pretty loose but I ended up removing the right header to clean/scoop out whatever was left from the fiber gasket. Had to do the same with the left header. Strange that I couldn't see the fiber gaskets that are supposed to go in the compression chamber--maybe there were the dark gray smooth rings inside that looked like they were part of the rim before the opening to the comp. chamber.I'd loosen up the clamp to the right exhaust pipe/muffler and right side of the crossover, pull the right head clamp away from the head. Don't take it all apart, just loose. See if you can slightly rotate the pipe away from the bike. The cross over will come out, and then put your cross over back, with shims in place, rotate the pipe back, and re-snug it, from the head back. I've done mine this way with no problems.
The problem is that I snapped the screw when I tightened back the left clamp on the crossover (though I didn't tighten it too much, definitely not more than the one on the right). For now it's tight enough just from the new steel shims and the tight clamp on the right. The rest of the screw with the head can't be extracted from the clamp, so I'll need a new one. Hope they're available.
-
Just got the Aaron Bard made steel shims
 (the crossover has become loose and leaks around the joints, with classical symptoms like exhaust popping at lower revs, running rougher and more vibey, etc). Now I'm looking forward to installing the shims.
Sorry for the dumb question, but what's the best way to do it? Gracias!
-
I never had a problem using the stand (including the sump spindle), except for one detail that others here have noticed as well: the span between the arms with notches that are supposed to hold the bolts on the bike is slightly bigger so the bolt heads aren't resting completely in the notches. Just be careful when you set it up. I remember some folks fixed this issue by pressing the arms together a little.
-
I need to change or at least tighten my rear tire valve stem. Somebody here recommended the Ariete:Hi All,
Got a 02 V11 Le Mans and during a recent tire change I want to installed a angle tire valve stem to ease the tire pressure check procedure at the gas station. My research suggest there are two stem size available, one is 11.3mm diameter for most Japanese bikes and the other size is 8.3mm that fits Ducati's and Triumph's rims.
I bought both to be sure and when my tire shop remove my tire stem both size's won't fit as the stock Brembo rims use a odd 6+mm size. I can not find any angle vavle stem in the 6mm size rang so my questions is that have any members sucessufully installed a angle valve stem on their stock rims? If yes, where did you get them?
Thanks
Frank
http://www.motowheel...or=&collection=
but they come in 8.3mm, not 6. Hmm. I still haven't gotten mine from the dealer. Keep us posted.
Edit: you might try contacting these guys too: http://www.motorcycleanchor.com/tire_valves/index.htm
-
Yes, that's the reality. I know most of them if not all don't even like any tire business, and that's why I always buy tires from the same shop that installs them (unless I mount them myself, which I do on the other bike). But one would think if there's such a small detail to check such as the valve, they would do it routinely. In fact they asked me if I needed the valve stem changed, but when they saw it was metal not rubber they said it didn't need changed.Buddy, Shops change tires and that's it. If they do ( and or smart enough to) more, you need to go back to THEM. If you can watch the service being performed , you can get an idea of the caliber of person on the other end of the wrench.
-
Since I'm having to deal with this problem (now waiting for a new valve stem): I strongly encourage you to check the valve stem for any leaks. Use some soapy water and spray around the valve stem while the tire is on and has pressure. That's how I found out my valve stem was leaking right above the nut on the outside. It may just need to be tightened, but for that the tire should be removed again. Or it may be that the gasket has aged and doesn't seal perfectly anymore. Anyway, easy to do, probably neglected most of the time. Don't count on the shop to do that for you.
-
Wally often also carries Mobil 1 Moto (both 10-40 and 20-50 at around $8-9/qt (granted still more than the Diesel oils) though sometimes not on the same shelves with the other motor oils.I suspect the zinc and phosphorus levels have diminished as well. Without a lab test of Rotella 15w-40 and the new Lucas product, we will not really be able to know.
The reason I recommended "diesel" oils is because they still have reasonable levels of ZDDP in them due to the higher peak loadings in a diesel vs. spark-ignition motor. MCN [American version] did an oil test sometime in the past decade where the Rotella [non-synth] version came out tops in key areas [ash content, ZDDP, etc.] and the synth version has performed even better in any bike I've run it in [longer b4 the shifting gets clunky, in shared-oil x-mission bikes...]
The reason diesel oils can get away w/ still putting in the ZDDP is they all display "Not to be used in pollution controlled vehicles" on the warning label. And WalMart carries them, unlike special motorcycle lube, which wouldn't sell in high enough quantities to interest them.
-
Thanks. Good to know. Couldn't open the direct link but went to the main page and also found the Marchesini (out of stock/sp order), about half the price of Arieta:Arieta is the way to go.
http://www.motowheel...or=&collection=
What's the plus for Arieta? Did you have any experience with them?
I replaced my stockers when I changed tires. Real quality product and with the 90 degree stem makes adding air a breeze. Different colors add bling.

They look great and seem to be well made. The Marchesini 90º seems to be identical, minus the finish. I also notice they have a different (more simple) way of attachment to the rim than the straight one:

-
Thanks. Good to know. Couldn't open the direct link but went to the main page and also found the Marchesini (out of stock/sp order), about half the price of Arieta:Arieta is the way to go.
What's the plus for Arieta? Did you have any experience with them?

Front wheel spacer loose
in Technical Topics
Posted
My axle doesn't thread into the fork leg. It is hollow and threaded at the right end (not like in the manual) and is tightened by a large nut. I'm sure it was designed for bikes that have a damping adjustment screw on the bottom of the fork leg hence the notch at the opposite end.