
edge
-
Posts
250 -
Joined
-
Last visited
-
Days Won
1
Content Type
Profiles
Forums
Events
Gallery
Community Map
Posts posted by edge
-
-
I'll be doing the polished thing too. Mine are getting pretty fugly between the padock stand abuse and Luigi's poor pre-paint prep. The paint seems to be lifting in chuncks... Just a matter of time before I say enough

-
I ran mine direct from the battery with the positive pulling through the fuse block. There is an empty spot in your fuse block that can be tapped into by adding a fuse. I did not make my installation "switchable" with the ignition and have worried about that but have not failed to turn it off after a ride so no battery issues. There is a couple of threads here that have different recomedations as to power source. "heated grip" search function ought to turn up something. A good oportunity to change grips to gels too (if you have not already).

-
-
There is always a chance but if this is the first time off, you should have no issues, as long as you are gentle witht he let-down. Going back on with the old will be fine with a very light coat of oil to the clean faces. About a dozen allen head bolts and an oil line on the rear of the pan are all that need to be removed to drop the pan. Careful not to over torque the allen bolts on assembly due to the alloy case.
Here are a few threads:
http://www.v11lemans.com/forums/index.php?...028entry61028
http://www.v11lemans.com/forums/index.php?...opic=5996&st=15
http://www.v11lemans.com/forums/index.php?...topic=264&st=15
-
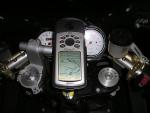
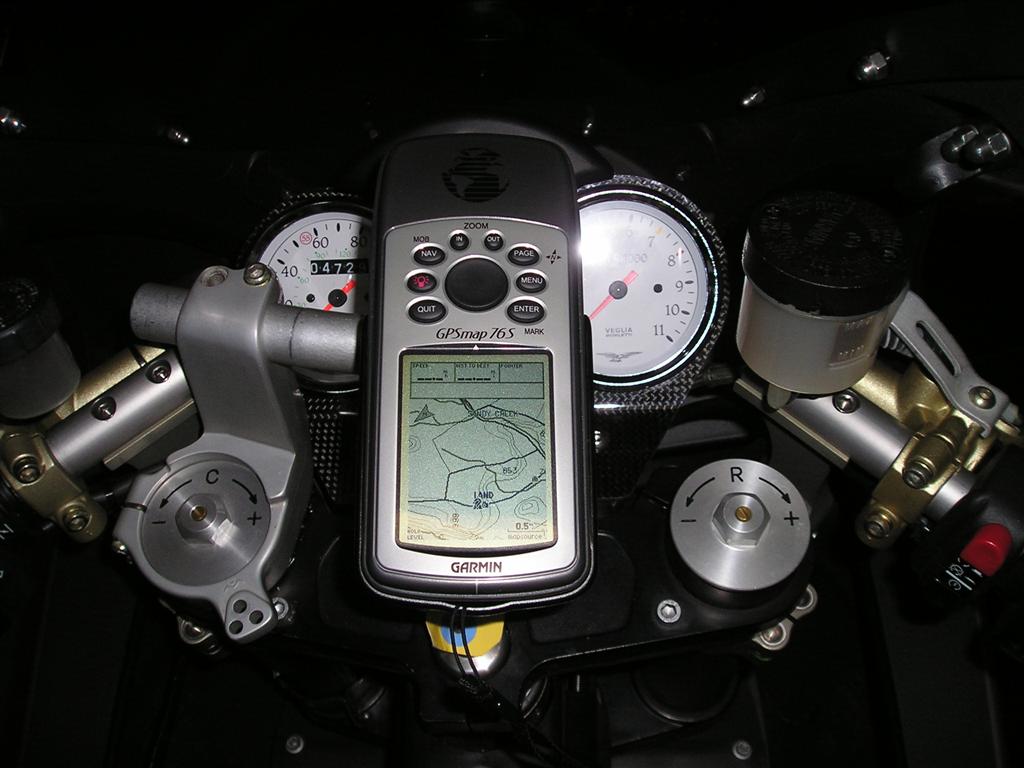
I already had a Garmin GPS (76S) and adapted it to the bike with a Sport clip-on riser, a bar segment and a Garmin bar mount. Since I am using TBR bars, I had some real estate up top to mount things. I have a couple thousand miles on the rig and it works for me. Picture is deceiving but speedo and tach are visable and keypad on GPS works fine with gloves. Ignition key takes a little effort but is fully acessable with mount in place. The mount allows to the GPS to be removed in a couple of seconds too just leaving the bar.
-
I would drop the pan being your first oil change on the bike. With the pan off filter removal will be no issue. The other benifit of droping the pan is to allow you to make sure Luigi has not left anything behind in your new bike and to clean out any sediment from the pan bottom. You should be able to reuse the original gasket if you are carfull when lowering the pan to ensure nothing gets hung or fouled in the process. You can do a search here re. pan removal, there is much collective wisdom, especially on the new bikes. Some do it every change too.
I would caution you on the old screw driver through the filter while the pan is on due to the potential of damaging threads on the manhole cover or a scavenge line on the inside. With the pan off you get to see the internals too.
hope it helps,

-
-
-
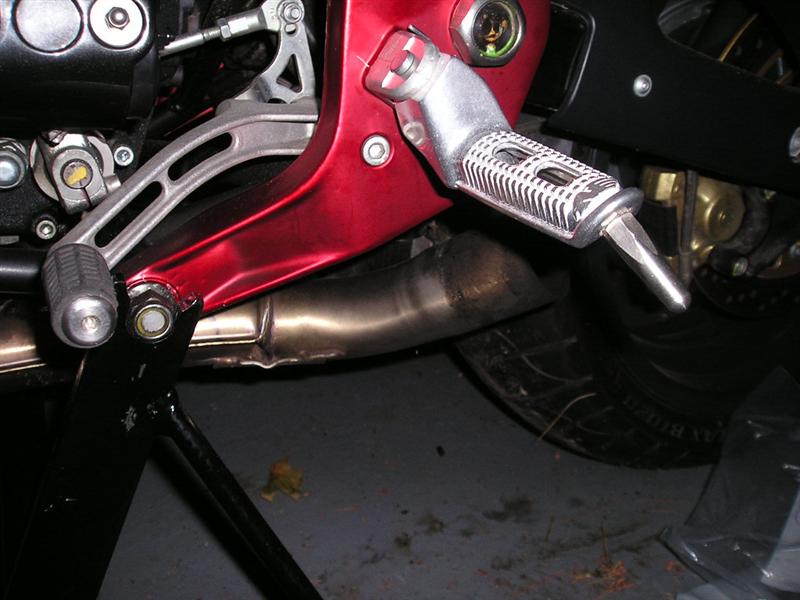
Yes they do, there two ways to do it that are covered in the thread below. You keep your mounts stock and use shim stock or you can drill out the MG brackets and use HD stock which I do not recomend due to diameter of the HD pin, besides it's more expensive.
Only drawback is the are a little wider at the mount where you place your feet. AL R did a nice extension on the shifter to compensate.
This is the thread that will tell you what you need to know about the foot pegs.
http://www.v11lemans.com/forums/index.php?...ell++foot++pegs
Takes a litlle work but IMHO, it's worth the effort every day I get on the bike, especially when your doing the miles

-
-
Concur, stay north: Wife and I did a couple days in Como and stayed at a pension right on the lake. Another highlight of the trip included a wonderful wine full night on the town being driven around on the back of a couple mopeds by Itailian youth that adopted us. Go and and enjoy

-
When I got back home I got a level, set it on the gas tank, and sat on the bike until it felt balanced (with the engine off of course).
Lo and behold, the bubble in the level was nowhere near center, but all the way to the right (so bike is leaning left), re-enforcing the perception that the bike is imbalanced.
I am not sure the straddled bike with a level on the tank is a method the the will tell you much
I think you are an the right track by eliminatin gthe gross and obvious with tire pressure and handle bar allignment. I think I would stay focused on the front end to make sure that it is truly "alined" (i.e. fork set in tripple trees, etc.) Make sure the bars are not bent from shipping or retention straps. Other than that there are not many adjustments. There is an extensive thread here for rear alignment measurements and procedures. I also think your MI needs to get you satisfied too being new (assumption) and under warranty. Good luck and welcme
-
Guzzi did well in the January 06 Cycle World too. Had a good write up on the Grisso as being the "best yet" and a couple of full page adds for Gisso and 1100 Breva.
Looks like Piagio $$ has finally turned the corner for MG

-
They are both great ideas but its true Edge's solution is much nicer and easier to install. The mud flap looks like you almost Need to remove the rear tire to install it properly. Also those big ole flaps aint that cheap either. Edge's took 15 seconds and I moved around nothing but my magic fingers. Well worth the money but if he's out of bizness or youre in a pinch graba guard and bodge yourself to death.
Thanks guys, Interesting solution and loooks effective too.
Update; I did receive another batch of plastic and have been making my way through anther run for for those that have already requested pieces. I got a little behind this week feeling a bit under the weather (thanks to my grand daughter
 ).
).I should have everything done by next weekend. I can't get to them any sooner due to a business travel next week but they will ship out soon.

-
This is a pretty good review on Conti Road Attacks.
http://www.canyonchasers.net/reviews/acces...road-attack.php
I will be replacing my Bridgestones this winter for them. Several board members running them too with favorable reviews. There are a couple threads here someplace on tires, and yes, there are many opinions and subjective assesments. You plobably can't go too far wrong with any quality sport tire and if your not happy, you get to move on after several thousand miles
good luck

-
There is NO WAY I am taking my baby out in this sh*t we have a foot of snow its below freezing and they use some kind of Mutant hybrid salt that'll eat the track off a cat. They don't care about the cars just the cars not sliding. It'll be spring b4 she see's the light again. But I can't wait either.

Sounds like my neck of the woods

-
 def; He, who frags the Scura clutch, peals the 02 engine paint, fades the pork chop, sucks the tank, and cups the tire. Cracks the down pipe, assembles with out lube, shims bearings short and coughs and sputters at will. Also known to consume massive quantities of fuel while leaving half of it in the right side of the tank. A master of unsolvable electronic nightmares that have no cause or solution. Not to mention the creator of the "flat spot" phenomena at mid range. If given the opportunity, will loose the small part that you just had in hand. He will miss-guide the bolt and bugger up the aluminum threads during reassembly. One who allows synthetic oil to seep from every seal. Not to mention mis-guide the grease gun as it tries to service the forward grease nipple (he calls it a zerk). There are a thousand other contributions that he has made but he is not to be honored for the chalenges he provides
-
Last time I swapped a brembo lever I seem to remember a little piece at the switch area that was prone to getting loose and lost?? can't rembmeber what it was but I do remember disasemble with care or you'll be sharing floor space with
trying to find the part. -
Doc, Is that photo untouched?? What I mean is have you wiped it down or cleaned that area from oil? You mentioned a "HUGH" leak and I am not impressed quantity or flow of what you are pointing out

In aviation we would call that a seep or a weep, and not to be confused with a grounding "leak"... Anyway, as you tighten those allen heads (not too much as to strip the aluminum case), I would look very closely at the frame attaching point(s) (both sides) and make sure the engine case was not cracked in that vicinity during the drop and the resultant crack being the true source of your seep vs. the apppent case seal weep. I don't see any evidence of a cracked case based on your picture but I would take a very close look at the area between the leaking bolt you pointed out and the engine mount bolt just to be very sure.
To make you feel beter, I too have a couple oil wet spots on my crinkle paint in the vicinity of the case joining points. A little synthetic oil will bleed into the black paint and make it look a lot worse than it is. The advice of others to clean and seal bolts ought to fix things and then it's just a matter of "fly it and watch it"
-
Instead of the out riggers, here's one for the front!
http://www.pcracingusa.com/motoski.php
Ride safe
-
Did you really mean to say that??
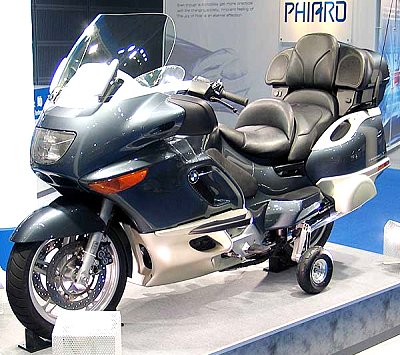
Maybe they could add training wheels for the Sweeds like on this beemer it would be purrfect.
http://www.bmw-motorrad.co.za/bikes/news/default.asp?Id=391
Jaap, feel free to jump in any time now that we escalated to international finger poking


-
Please don't take offense at the obvious but did you really check the pet cock?? The manual fuel shut off (at the pet cock) are extreamly stiff (on 02s anyway) and difficult to get at, make sure it is open position.

Im thingking during the bikes recovery process maybe it was closed for transport. There is also a very distinct difference in fuel pump sound with the valve closed.
-
You’re too kind my friend,

As far as making a living... I don't think so... after the time and money invested in this project... let's just say we are doing it for the group and to keep the Mrs. from stopping my folly while I toil in the garage enjoying a good beverage and staying off the streets at night!
Now, if I were making these things for Harleys, that would be a whole different story. I suppose one could make a handsome living out of them but I would have to change a few things; 1. They would need to be made out of chrome plated scrap steel, 2. They would retail for a hundred bucks each before installation (HD=Hundred Dollar part)!, and 3. They would be manufactured in China because I couldn't keep up with orders for 100s of thousands of the damn things when they became the next thing at the lemming lot
, and oh yeah, number 4. I would have to loose my self respect in process knowing that in 6 months the things would metal fatigue crack at all bolt holes, chrome would lift due to poor plating and rust pit on the visible sides  The problem with my the HD business plan is... Some how they managed to get a some what proper fender on most of their rides negating the need for plastic bits
 Not bashing HD, too badly anyway, just jesting at the low volume MG niche by comparison and the difference of purpose.

Ride safe,

-
Thanks Gio,
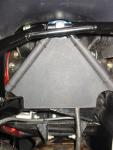
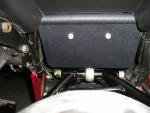
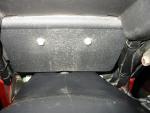
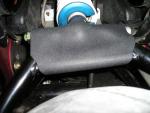
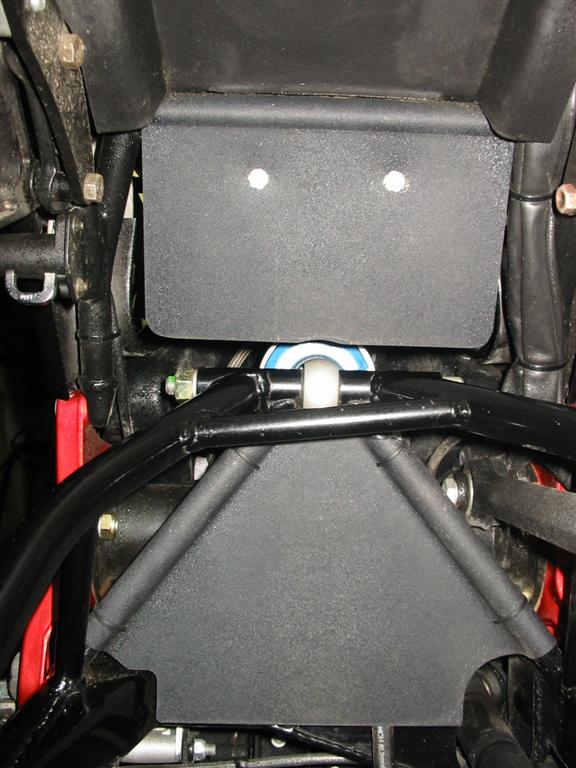
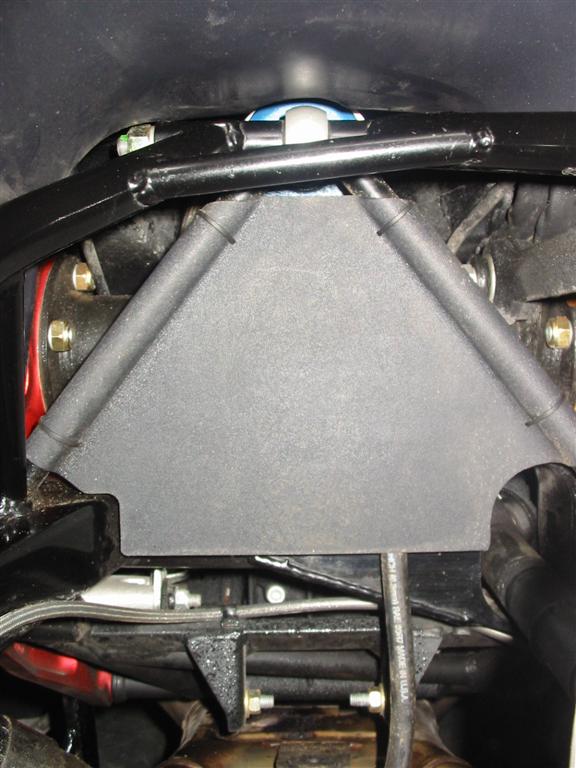
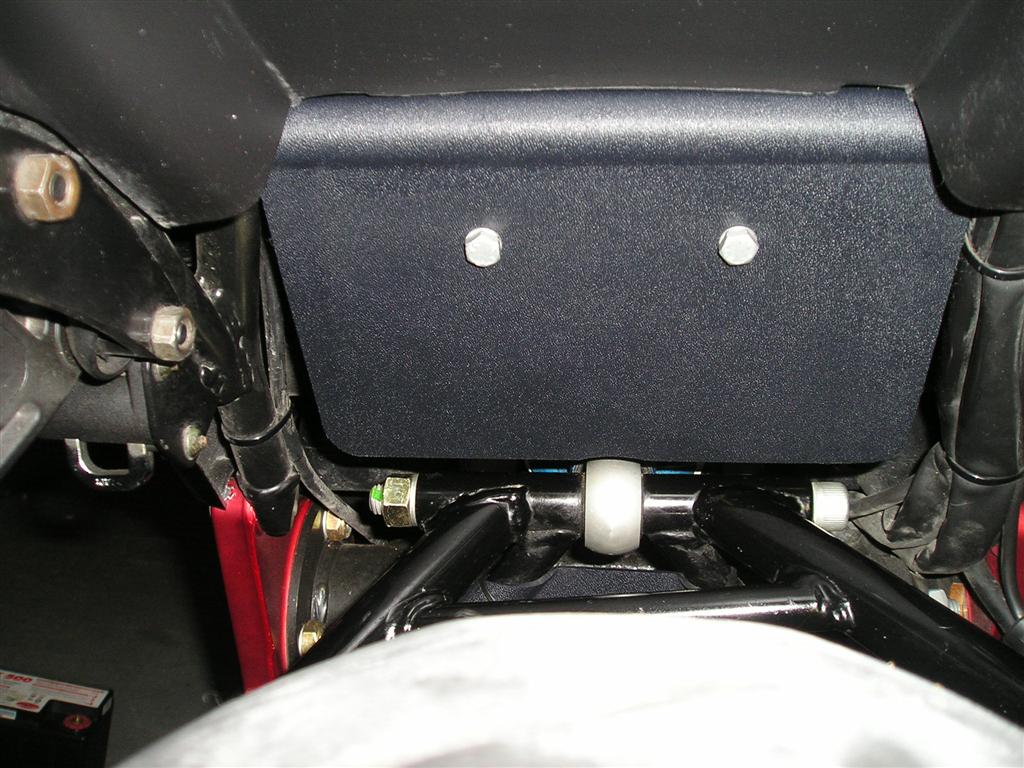
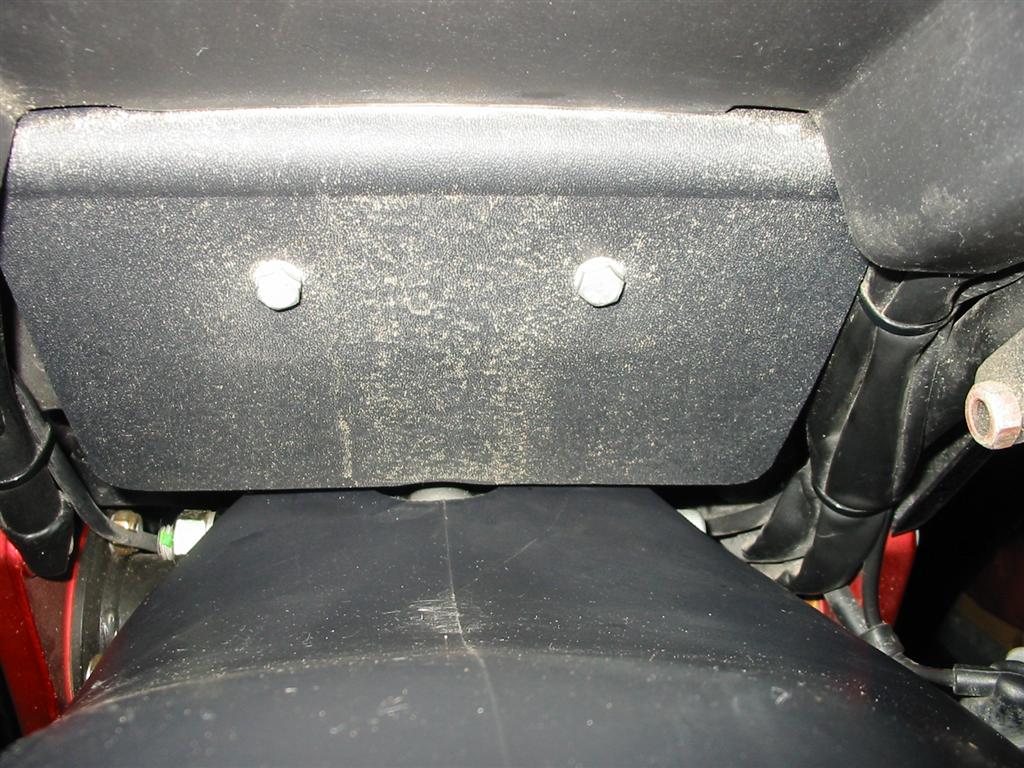
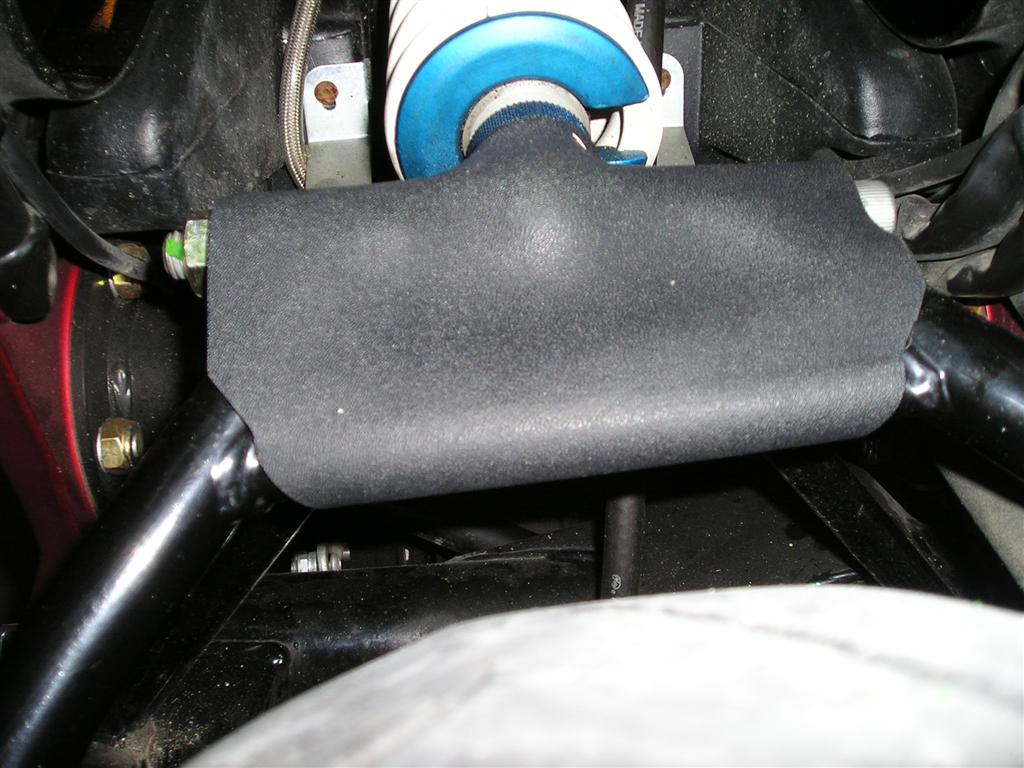
Just an update on these "gards". I haven't made any lately due to demand but have just gotten a couple requests and I will do another run of the pieces. It will take about a week to order and receive the plastic and another week to git-r done. I will order enough Kydex to make all 4 pieces: the original "A" piece Edge-Gard that covers the transmission area, the battery cover (2 versions; one for OEM Hugger and one for without OEM Hugger), and a new aft shock lug cover (so far I have the only one
). If there is interest from anyone for any of the pieces you can PM. I'll judge by interest how many I make so I don't have to peddle them on eBay to get them homes 
I have attached updated pictures of the pieces so you can get an idea of what they are. I did not have a picture of the "lug" cover installed with the other two pieces and OEM hugger but it all fits (The lug cover snaps in place and does not require any hardware to secure it).
I will be pulling my bike in for storage this weekend due to the snow has arrived in Northern New York
and I will try to get a few more pictures when I start making more pieces as they are hand formed-fitted on the bike.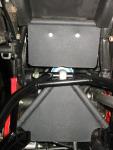


GAU-2B Chain Gun
in 24/7 V11
Posted
These are the most common in the "GAU" familiy. Rates of fire can vary depending on where you look, what model and what it is applied to.
GAU-2 7.62mm 2,000-4,000 RPM
GAU-8 "Avenger" 30mm 2,100-4,200 RPM
GAU-12 "Equalizer" 25mm 3,600-4,200 RMP
GAU-13 30mm, 1,030 RPM
GAU-17 7.62 2,00-4,000 RPM
One thing in common, they all will give you religion one way or another when fired!