

Camn
-
Posts
154 -
Joined
-
Last visited
-
Days Won
4
Content Type
Profiles
Forums
Events
Gallery
Community Map
Posts posted by Camn
-
-
My V11 song: "All Mighty Blues". Starts like a V11 and drives on like one... The guitar palyer in the middle is a Finnish guy, Ben Granfelt.
-
 1
1
-
-
Seen both in Helsinki whenever possible, father the last time in 1988 (RIP) and son 2014...
https://www.youtube.com/watch?v=B9DqykUsqRY
-
V11_Accessories_04.pdf
They are from the accessories -list.prototype (or optional?) F/R foot-pegs and rear master cylinder cover
-
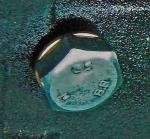
One more millimeter puts it at 7/16", so I'm thinking of just tapping it to 7/16-20 and putting in a bolt and crush washer. Anyone tried this?
I’ve done this with a help of a guy who I trusted. It is difficult to keep the bore 100% upright: if the bigger bolt is not level with the gearbox it is difficult to get the plug tight. I used copper gasket.
Oil out + open up the side cover as when changing the shift lever “magic spring” => it’s easy to clean everything up.How would you keep the chips out of the transmission case
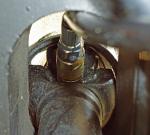
The moisture on the picture does not come from the bolt ("new plug") - the reason was the front side of the back flange of the gearbox. This is why I ruined the threads from the plug in the first place. I thought the plug was leaking.
-
And here's the parts list needed to change from a Scura single plate to a twin plater:
-
Only the official (original) model name will be displayed at the Piaggio "recalls" page. This can be helpful also if the bike has been changed a lot later. As far as I know, only the official dealer can get the orignal manufacturing date with the VIN.isn't there a way to determine date of manufacture by entering numbers online
Is it so that only Scura has the number badge on the upper triple clamp and the first series of Rosso Mandello had the number on the side cover? Others not, allthough more rare models were manufactured (like LeMans Nero Corsa, LeMans Tenni, Scura R and Coppa Italia).the bikes with number badges
-
how do you clean up
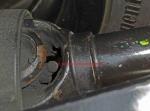
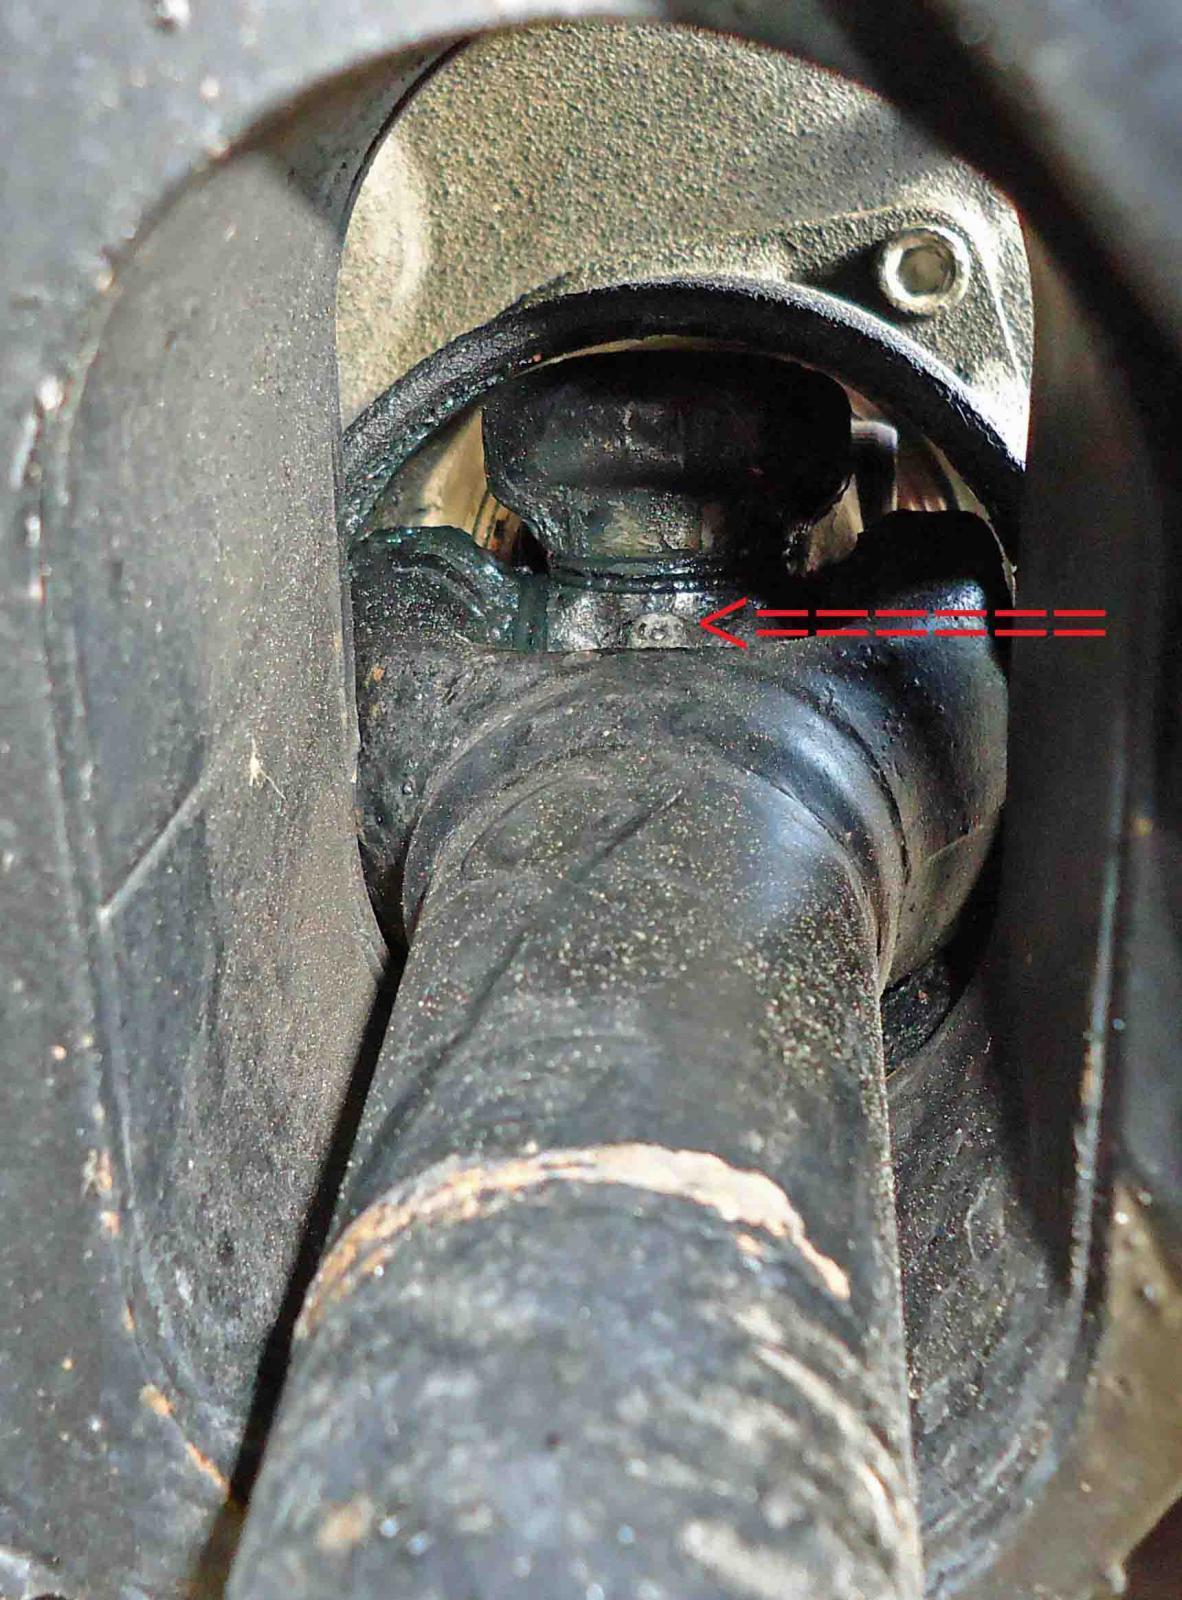
I have used paper and rags. To keep things clean it is advisable also to clean after greasing and not to grease too much. I remember reading from the German V11 site that the "shield collar" came to Daytona for safety reasons. It was added some time during Daytona years and stayed after that. A pic from the rear one (I assume that it is exactly the same as on the front).
-
Rear wheel removed, Guzzi on stand: many of us do not need to remove the wheel as stated before, "on stand" is enough. Here's a pic of the grease nipple.remove the rear wheel
-
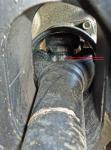
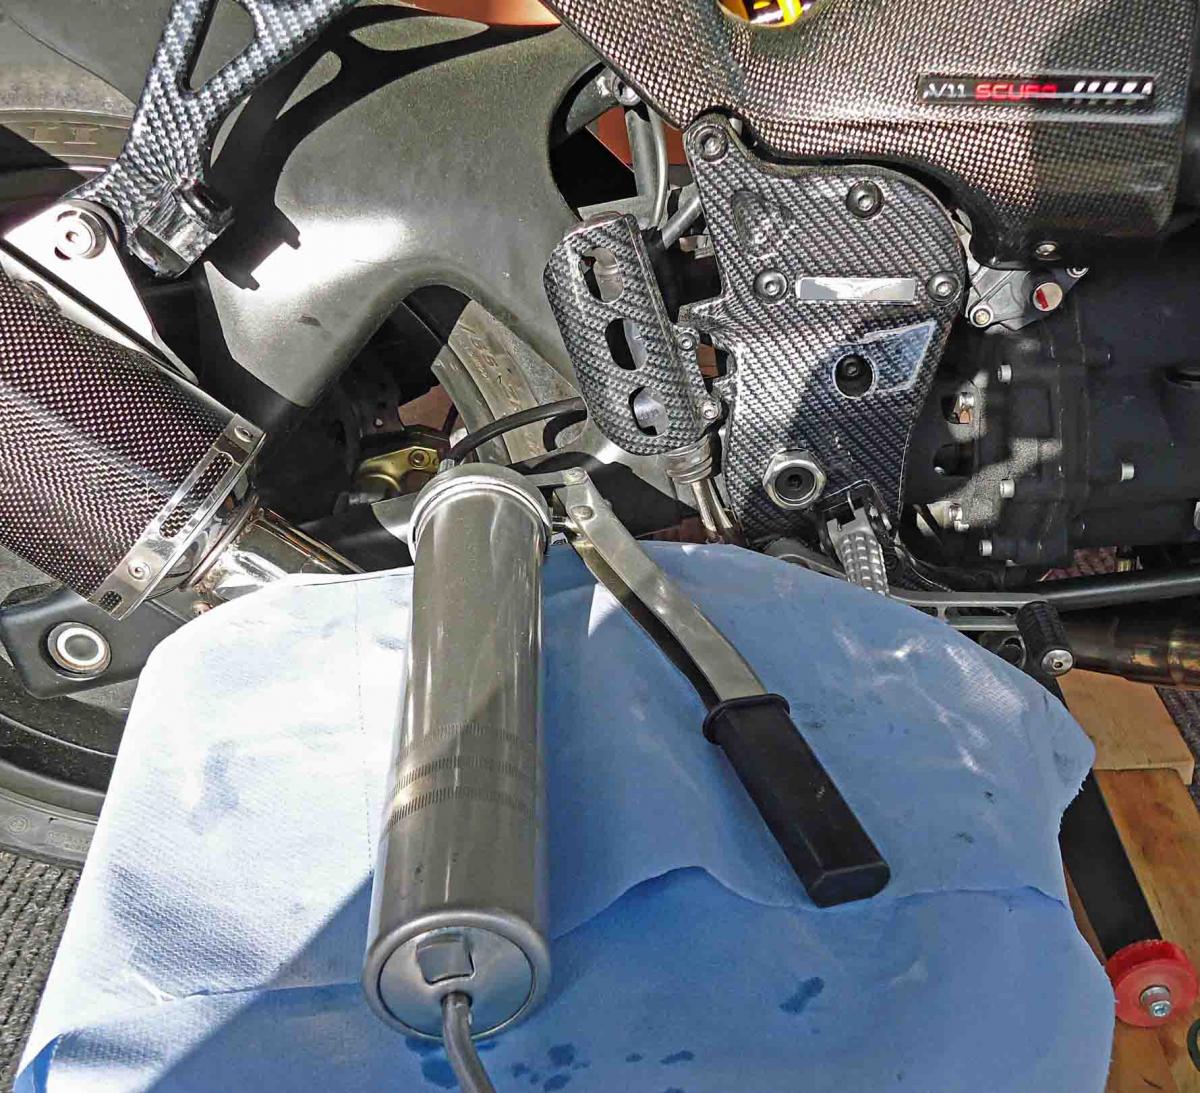
You've got it ! I do it once a year allthough the workshop manual says "every 2 years or 20.000 km". I can barely manage with a standard grease gun (it takes time to get the grease gun tip on/off). The earlier photo was taken when the grease gun was at this position (photo - nothing dismantled, only rear lifted up with the original tool). How I managed ? No one told me beforehand that it can't be done and I seem to have more room for the grease gun tip.The procedure is sort of like an unpleasant exam
First rehearse with wifefind the nipple -use finger for that

-
 1
1
-
-
I have understood that this is a question if you have Öhlins shock at the back or not. Some years ago I saved a text from some thread at this site:
"
The Ohlins is 26 mm longer than the Sachs and has 10 mm longer stroke. Just popped into the garage to have a look and it seems that the mounting points are identical for the Ohlins and Sachs. My Ohlins bike is, in comparison to a Sachs bike, jacked up at the rear. The bike is visibly higher."
I don't know about the exact or valid measures but I guess there is just more room for the grease gun tip on the "Öhlins bikes".
-
put in the effort/money to get your suspension set up WHATEVER it is
This is part of the pleasure when riding. Start from the factory settings and adjust according your feel (weight) within safe limits.
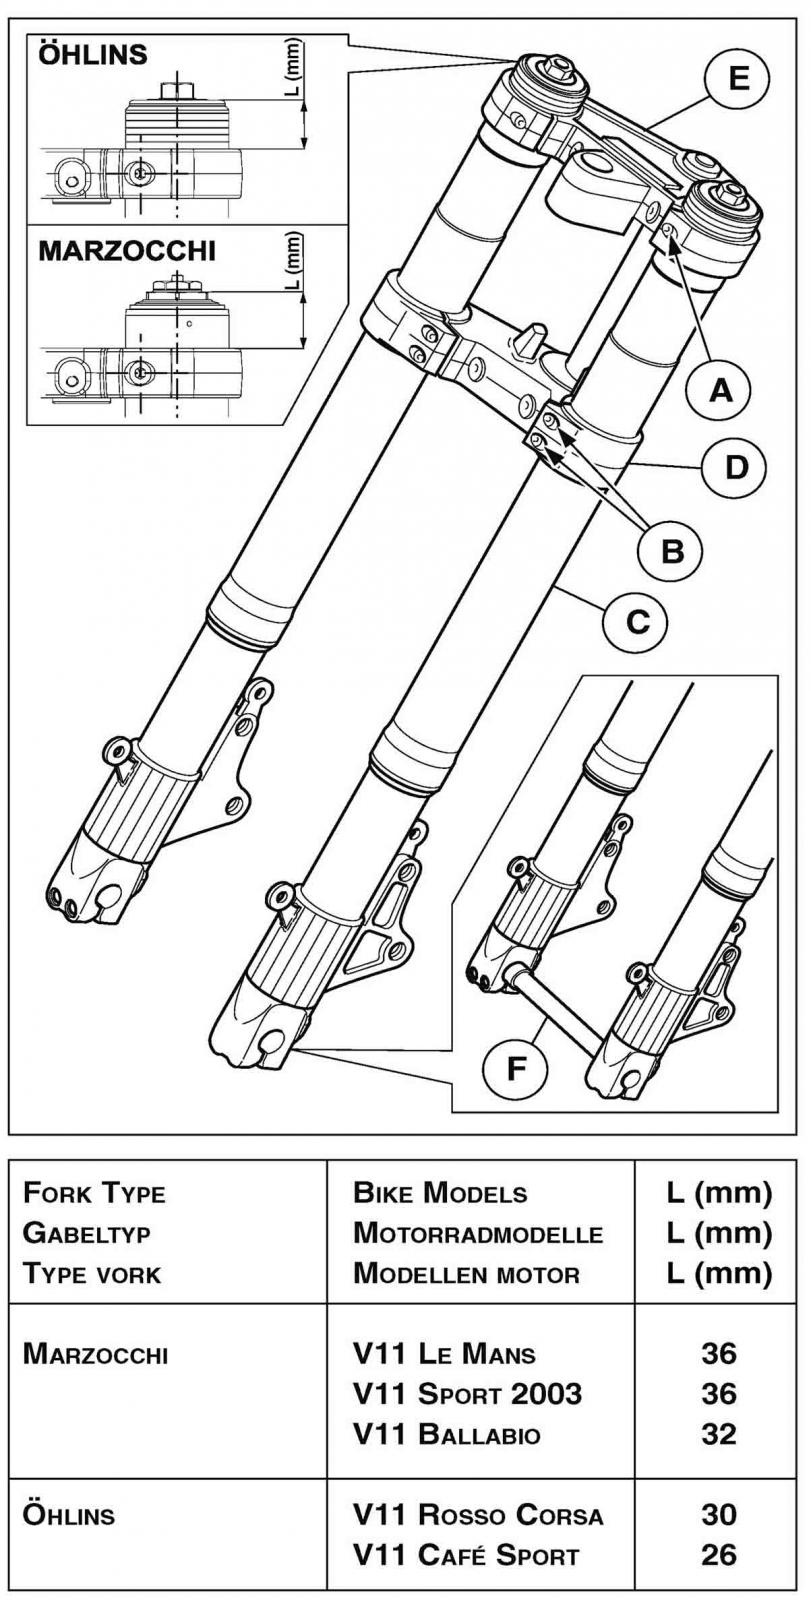
Different models have different factory settings (different shocks?) allthough the front suspension is made by Öhlins. Rosso Corsa (Nero Corsa) 30 mm, Cafe Sport (Coppa Italia) 26 mm. I do not have exact notes but if I remember right, if measured like on this drawing (Workshop Manual 04/03), the Scura instruction meant also 26 mm (the "clip on" part of the handle bar needs 20 mm).

-
"
Posted 31 May 2014 - 06:11 AM / Sloppage sheets
Just had another run done so if anyone is interested they are currently available.
Email me direct: motomoda.roper at gmail.com
Pete
"
I wonder if I should install one... I've filled 4L oil to the sump, as many V11Sport.de -members seem to do to keep the red light out when accelerating. With 4L I have never seen the red light during a ride (or exess oil in the air box). But we have no mountains...-
1
-
-
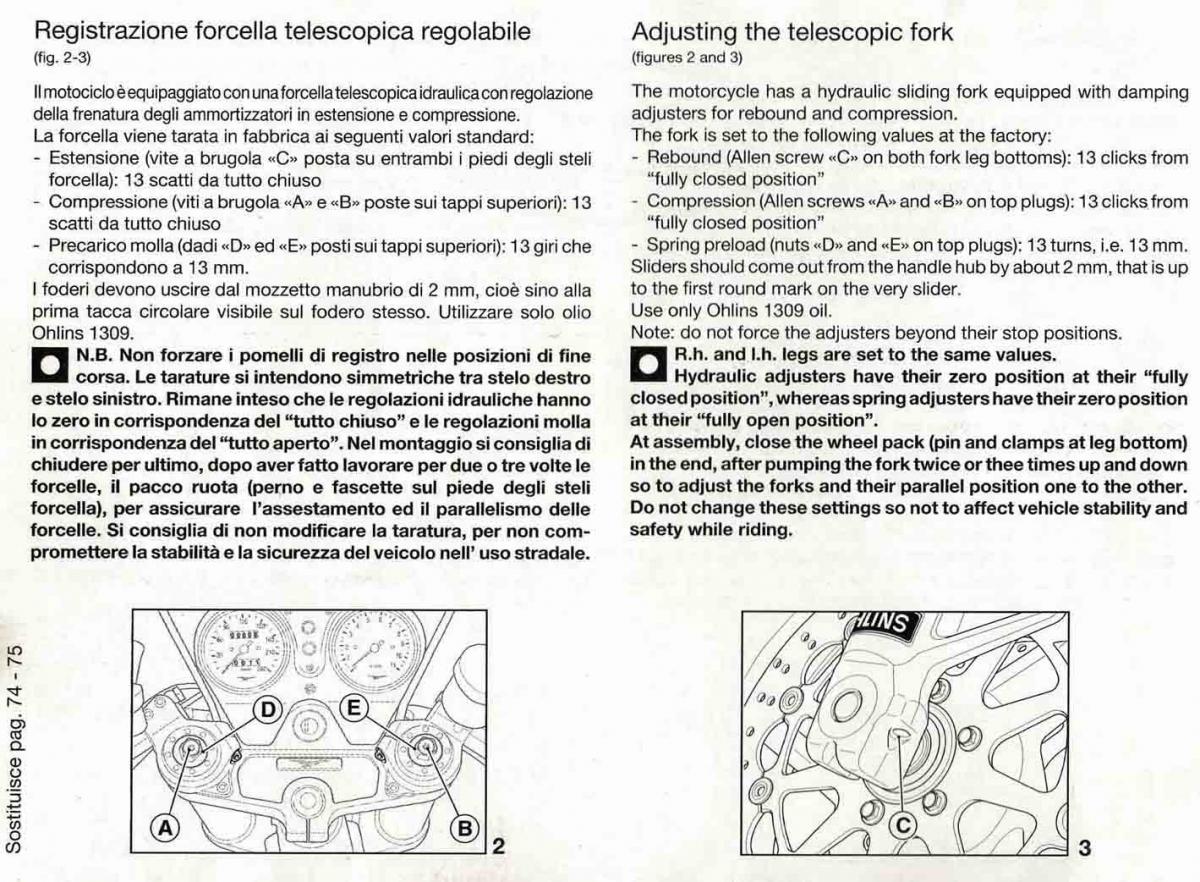
My forks were already set with a touch over 2 rings showing (not sure what factory spec is)
Here is the original text of the Scura Öhlins supplement booklet:
“Sliders should come out from the handle hub by about 2 mm, that is up to the first round mark on the very slider".

-
Factory spec sheet for the forks (FG8470), which said the recommended stock setting for the fork spring pre-load is 13 (out of 15).
I have the small supplement booklet “V11 Scura owners manual”, which came with the red "main manual". It is actually only the same “Öhlins” -part, which is also on the later Workshop Manual. This “original Scura manual” also states: “Spring preload 13 turns, i.e. 13 mm.
But… the “Italian thing” is, that if you compare the Guzzi instructions to the original Öhlins FG43 owners manual, there is a critical mistake on the Guzzi manual about the rebound and compression adjustment. Right is: rebound adjustment screw is “B” up at the triple clamp, in the middle of the Öhlins shock. Compression adjustment screw is “C” down at the front wheel shaft level. The Guzzi instructions states the opposite.

-
1
-
-
I prefer stability over quick steering
Mee too. I just try to achieve this goal according my abilities. Maybe I read too much... opinions... but also the Guzzi and Öhlins manuals. I go step by step and try to keep it safe.
sliding the forks up through the triple clamps which results in lowering the front of the motorcycle
Yes, this is what I have done. First as much as was needed to go back to the original handle bars (22 mm, to fix them) and after that more and more. I have no hesitation to go back if needed.
The only "Guzzi" hint about how much the front forks should come out (of the handle bars this time) I have found on the V11 Owners Manual 11/2003: “ Sliders should come out from the handle hub by about 2 mm, that is up to the first round mark on the very slider.” This means 22 mm through the upper triple clamp (measured without the handle bars). When I received my bike the front forks were only 12 mm through the upper triple clamp (with a “superbike” handlebar installed). With this set up the tendency to wobble was the worst. Right now I have the front shocks 18 mm more through the upper triple clamp than what is the “manual recommendation” (and original handle bars on).
-
@Scud
Thank you for the "summer" picture. I like those long mufflers – I have never have had them. Mine was equipped with a bit too short Bos Dampers (made for Thriumph Speed Triple originally) when I bought my Scura. It has been a very long time since I was "in the summer of California" we also do have a short “warm summer" (Jun-Aug), 3 Months more or less…
@luhbo
You write very fluent English, although I see more your texts on the German V11 forum. I mention this because the V11 population is quite notable in Germany and there are many commonly recognized Guzzi specialists over there. I once wrote down an opinion of one of them and it was something like this: “All V11 models without fairing have a tendency to wobble. This is due to different factors. It is very important to bring more weight to the front wheel. This brings stability. In principle it is not wrong to push the front shocks more through the triple clamps because you get a bit more weight to the front wheel. The wheel base gets also shorter but the front wheel receives also more weight.”
So when testing different ways to get more stability, I have tested also this (front shocks all the way up). Everything else has been checked earlier. New bearings everywhere, all bolts tight on the chassis, the suspension fully serviced, went back to the original handle bars. Next summer I will install the original Brembo Serie Oro brake discs (1,65 kg). I tried a very lightweight set of “Braking” discs (1,30 kg) and the difference was notable (worse). I now have worn-out Brembo discs, which weigh somewhere in the middle. But our max speed limit is 120 km/h… so officially I have no problems here... only on German freeways... -
6/2015 I took the front schocks up as far as possible (lowers the front) and compensated this partly by tightening the spring preload more. My thought was to have a possibility to lower the front even more by loosening the spring preload (I don't like the slight tendency of my Scura to wobble at speeds over 120 km/h).
Spring 10.0 N/mm
Spring preload 12 out of 15 (possible) turns (on mine). First to counterclockwise (“fully open”) as far as the nut goes and then 12 turns to clockwise (1 turn = 1 mm spring preload) 12 turns.
Front Fork (travel = 120 mm)
Free sag F1-F2 = 40mm, without rider
Ride height F1-F3 = 48mm with rider (target 35-50 mm)
So this should mean, that when 1 turn = 1 mm, I can go from (within the target ride height) 48 to 50 by tightening 2 turns (12=>14) and from 48 to 36 by loosening (12=>0) to "Zero" = the 10.0 N/mm is the right spring for me.
PS.
No time to go for a test ride here.. (10 - 1,4 Degrees Fahrenheit) -
No. I know I'm quoting Pauldaytonas text, but ecu does not give out accurate values enought at this area (GuzziDiag shows what ecu gives out). Has something to do with the way of digitalization chosen back in those times when 15M ecu was new. 150mV basic setting always with a voltmeter.With GuzziDiag is possible to check if TPS is at 150 mV
-
no need to play with the other eccentric adjuster at this time
My Guzzi has been manufactured 28.06.2002 (model KS) it has only one eccentric.
-
just a matter of figuring out a methodology
Who am I to give any suggestions, but this is how I would try to do it first (as the Beatles said: ”number nine, number nine, number nine” - Revolution 9, White Album)…
I adjusted the ”main eccentric” (Nr.9) which the Guzzi manual also describes, when I had the gear changer cover in my hand (all parts assembled). I moved the gears up and down (1-6) and searched the right position for the eccentric. My conclusion was that if it is too tight, the gear change pawl sticks to the eccentric and the movement stops, "gears stick" (test with all gears). When you give a bit more room (by turning the eccentric to the opposite direction) so that the gear change pawl moves (klick, and it is released from the "stuck" position by itself) , the adjustement is now OK.
So I would try to adjust the eccentric Nr. 9 with the gear change cover bolted to the gear box so:
1. Mark the eccentric adjustment head position accurately (to be right back where you started from if needed)
2. Loosen the lock nut
3. Turn the eccentric to different positions and find the position where the gear change pawl sticks
4. Give a bit play for the gear change pawl (eccentric a bit more away from the pawl) and tighten the lock nut.
5. Test many times back and forth (1-6) that all gears change cheerfully
-
http://www.nettimoto.com/moto-guzzi/v11/1707921pics of a RM for poor old me to drool over
-
Found it. On the spare part book for the V11, Cafè-Ballabio 2003-2005 (Coppa Italia on the cover): 9=GU04237800 Eccentric pin. 32=GU01234030 Adjustment eccentric. Even for the last models there has been two different covers, it seems. C1 and C2.
-
I meant the Company of my earlier link: http://www.seby-poly.de/dow_e.html
-
I'm sure the Germans don't need a sample. Only I do not know if they are interested in making only few small parts.


Will seats swap from year to year?
in 24/7 V11
Posted
I picked this up from the V11Sport.de -site once.