F344
-
Posts
112 -
Joined
-
Last visited
Content Type
Profiles
Forums
Events
Gallery
Community Map
Everything posted by F344
-
Hi Enzo, I rechecked the link and it works for me. Try right clicking and saving the file locally then playing it. Can't say much about performance, I didn't dyno the bike before I did this. The bike has run rich since the day I bought it, and I am hoping this will help to fix that. It sorta feels like I have more power, but I haven't been riding much lately, and I found that a better sounding bike feels stronger to me, so it is probably my imagination. Frank
-
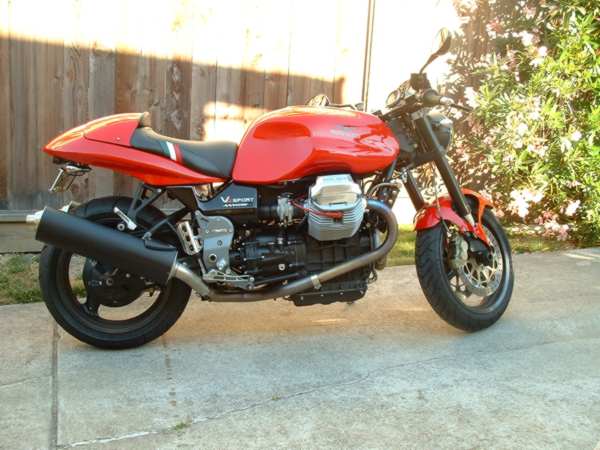
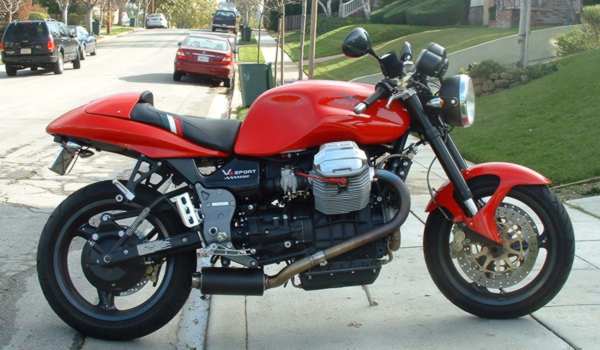
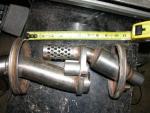
Here are some before photos. For those of you that have expressed interest. The guy that did this for me is named Enzo Fatica, his email is: enzometalmania@sbcglobal.net He said if you email him to be sure and mention Moto Guzzi in the subject line so he knows it isn't spam. He'll need the bike at his shop in San Francisco. He had my bike for about 6 days, but he has a regular job, so you will have to see what his schedule allows. For "dlaing", I'll be in and out all day tomorrow, you can call me at 650 344 0637 if you want to come by. I am giving Enzo my salt water aquarium and we'll be moving back and forth between his place in the city and my house in Burlingame most of the day, so setting up a time shouldn't be a problem. Frank
-
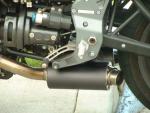
Hi Guys, A buddy of mine has reworked my exhaust system for me. If you want to hear it, I've posted a .wmv file at http://www.frankschaffer.name/V11%20modded%20cans.wmv Frank

-
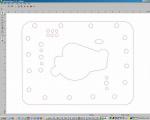
Glad you found it helpful Enzo. You might want to make the first one out of plastic. It might be cheaper and you can still check the fit. I'd use a gasket for the initial dimensions, that gives you most of the layout. eMachines might have somebody to help you get the drawing right the first time. Keep us posted! Frank
-
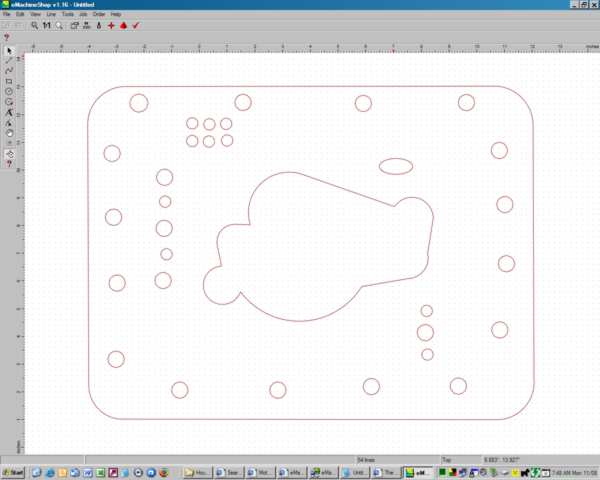
This looks like the perfect type of project for these guys. http://www.emachineshop.com/ I did a rough sketch with their software (See photo) and it came out to about $700.00 for 10 of them, or $1000.00 for 20 of them. That is in .157 steel FYI Frank
-
I did it because everybody else does it. Other than that, I don't know why. Funny, isn't it?
-
Mathieu, The turn signals came from: http://shop.arlenness.com/store/productdet...+Product_ID+497
-
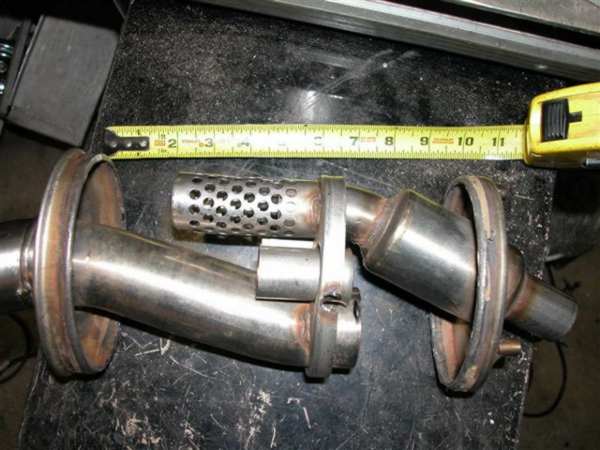
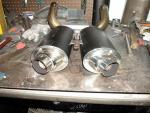
Hi robbrugg, Sorry but I just saw your question. These are the same cans. After I did all that unpacking, I still didn't have the sound I wanted, so I drilled out the ends of the cans and the ends of the caps. Now they sound pretty good. I'm still waiting for my TI to arrive. they tell me they have left the factory.
-
and with the brakes on...
-
I'm sorry, I can't remember where I got the turn signals. It was from a store in Livermore California. But I'll warn you , they are a little too small to look quite right. I'd look for some that are about 1 3/4 to 2 inches in diameter. Mine are about 1 1/2 inches, and are kinda small. Anyway, Here is what the lights look like on/ brake off.
-
Another view.
-
OK - I got some new and brighter LEDs from JC Whitney. If you are interested Part #12 4336P http://www.jcwhitney.com/autoparts/Product...ZX/appId-529860 although, you might want to try Part # 12 4335B. http://www.jcwhitney.com/autoparts/Product...ZX/appId-149568 I might have used that if I'd thought of it. BTW, the web page and the item shipped aren't identical; so read the descriptions carefully to be sure you are getting what you want. Also, I couldn't get the LEDs to go on dim for running and then bright for Braking. I used 2 sets of LEDs and wired one set into the running light circuit and the other into the Brake circuit. I sanded the back of the housings thinner and mated them, and then screwed them to the plastic under surface of the tail. Here are the last (I hope) photos. Frank If anyone knows how to do this properly, don't tell me because I don't want to do it all over again. It's still not as bright as I'd like, but I think is might be OK.
-
Thanks Robb. I'm waiting on a few more parts, mainly the TI cans and chip form Moto GUzzi, but soon I'll be done. One last thing, If you look really close at the photo above, you can see where I drilled out the cans.
-
I thought the front of the seat was too high, too rounded on top, and the whole thing was too soft. I also think the material that both Corbin and especially Rich use, feels, and looks much nicer. Now I have more useable room on the seat, and it feels like my bike in an inch and a half shorter. That is from both the lower and narrower changes in the seat. Frank
-
I live in the San Francisco Bay Area, and we have a lot of twisty roads. I never ride far... and now, with this new riding position it feels like a tank of gas lasts FOREVER!
-
Rich's seat.
-
Now that I've had the weekend to to ride Rich's seat, I can say that I definately prefer his to the Corbin, although I prefer them both to the stock seat. Rich's seat gets me lower and is more comfortable. And I like the material better too. Lastly Rich was able to do the Italian flag thing, and the Corbin guys said they couldn't do that anymore.
-
From above.
-
For those asking for more info...
-
I just ordered these from J.C. Whitney. ZX123032W 20-led Third Brake Light $14.99 $14.99 ZX124336P 16-LED Third Brake Light $11.99 $11.99 ZX127650A Stick-on Third Brake Light $13.99 $13.99 http://www.jcwhitney.com
-
I forgot to add in my first post that the polished license plate frame is from Custom Dynamics. I also added a couple of extra little red leds wired into the brake circuit, and the Custom Dynamic integrated brake light on the license plate frame. Brake light visibility is good in the dark, but unacceptable in daylight. http://www.customdynamics.com/illuminatorz...20Plate%20Frame
-
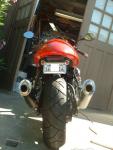
Rear view. BTW, The FBF brake light is about 1/4 as bright as my stock brake light. As soon as I can find a replacement I'm going to fit a brighter light.
-
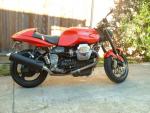
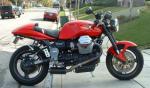
Side View
-
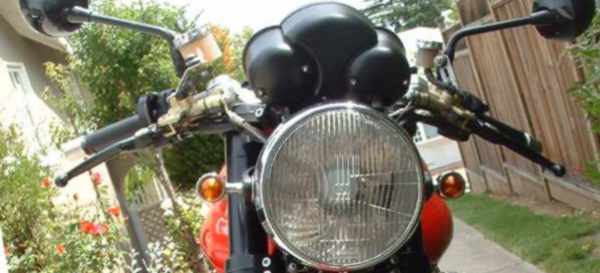
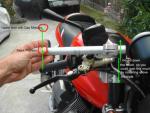
Front view with Das Mototec bars in lowered positon.
-
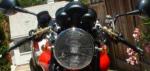
Front view - stock config.