polebridge
-
Posts
235 -
Joined
-
Last visited
-
Days Won
1
Content Type
Profiles
Forums
Events
Gallery
Community Map
Everything posted by polebridge
-
Transmission failure on my Coppa Italia
polebridge replied to polebridge's topic in Technical Topics
OK, I got it! After taking a very close examination of the entire assembly I figured it out. On the top gear there are several evenly spaced notches in which a bearing on the end of a small arm ride. Most are evenly spaced but in one case there is an extra notch between two of them. I figured that this was the notch for neutral. So that took care of the top gear. For the lower gear I noticed that underneath there was a small indentation where the neutral indicator switch sits when the bike is in neutral. That took care of the lower gear. After some fiddling I got it back in place OK. I hooked up the battery to check the neutral light and everything was OK. That is when my real nightmare started. During installation I lost one of those four C-clips. After some internal debate I decided that I would be OK without it. Then I found it on the floor of the garage. OK. I removed the assembly to install the clip and holy #@#%. I forgot to disconnect the battery and major sparks. I could instantly smell rubber burning and before I knew it the positive battery terminal bolt was GLOWING RED and HOT. No kidding. It was actually RED. OK. I pulled the starter cable away to stop the sparking and waited for the bolt to cool enough so that I could remove it. Before removing I turn on the ignition and NOTHING. Crap. I figure I fried my electrics. I removed the bolt and checked the fuses and none were blown so off to a dealer I figured. Oh well! In the meantime I figured I may as well finish the job. I put in the extra c-clip and bolted everything up. Put it all back together and re-attached the positive terminal. This time, when I turned on the ignition I heard the fuel pump and the lights came on. Hit the starter and the engine kick to life. The electrics seem OK so I think I dodged a bullet on this one. Time will tell I guess. Anyone else done something this STUPID!!! If so please share your experience and knowledge as to if I should be checking something in the electric system. Thanks to all for all the help. This forum is a real Godsend for us Guzzi folks. -
Transmission failure on my Coppa Italia
polebridge replied to polebridge's topic in Technical Topics
Thanks Tom. OK, now I am getting a little scared here. Got the spring in the mail. Took apart the assembly as described and replace the spring no problem. Now I am putting it all back together and it occurred to me that those two large gears probably need to go together in a very specific way. I did not mark them when I removed them and now have no idea how to line them back up properly. I had the bike in neutral when I took the assembly off. Now what?? Time to load it on the truck and off to a dealer that is hours away?? -
Transmission failure on my Coppa Italia
polebridge replied to polebridge's topic in Technical Topics
I am a new to this also. I got some good pictures from the FAQ section on this topic. Check out these links: http://www.v11lemans.com/forums/index.php?showtopic=2778 http://homepage.mac.com/davidboyd1/GuzziRe...otoAlbum28.html Hope this helps. -
Transmission failure on my Coppa Italia
polebridge replied to polebridge's topic in Technical Topics
OK. I took the advice I found in the FAQ section and called Bonnie of Cannon Race Craft ( http://www.cannonracecraft.com ) at (405) 524 7223 and ordered two (one spare) of their improved springs (very nice people by the way). They priority mailed them so I hope to see them soon. I'll post back on how the installation goes with these. In the meantime, is it true that I do not need any type of gasket when bolting the shift assembly back to the trans? Should I at least use some kind of liquid gasket or something? Seems like it will leak for sure if I don't. Thanks. -
Transmission failure on my Coppa Italia
polebridge replied to polebridge's topic in Technical Topics
OK. I got the thing off and sure enough, I have a broken spring in there. I measured the post that the spring rides on and it looks like it is actually a bit smaller that 15mm (assuming my calc is right. 25.4mm = 1 inch right?). Now I just have to make sure I order the right replacement and wait I guess. I think I will order two of them just in case. Thanks everyone. I'll update this post when I am finished or if I have any other issues that I need help with (of course). -
Transmission failure on my Coppa Italia
polebridge replied to polebridge's topic in Technical Topics
Ah..another hammer trick! Did not know they made them in plastic. Is that a special Moto Guzzi tool? Thanks for the tip. I'll give that one a try tonight I hope. Has anyone figured out yet how to carry a hammer in their Guzzi's tool kit? -
Transmission failure on my Coppa Italia
polebridge replied to polebridge's topic in Technical Topics
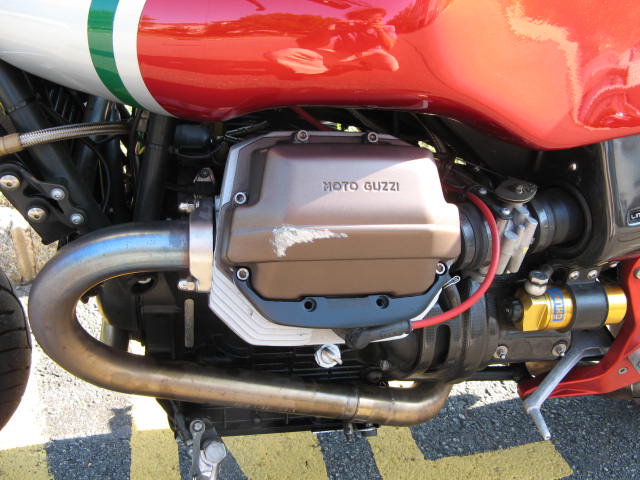
Thanks everybody. Progress so far? Let's see. I went out and bought a cheap torch to attempt to heat the X-Pipe and remove it. No luck there. I think if I ever want to replace that thing I will have to cut it off. I even tried the suggestion to remove the header pipes and drop the whole assembly but that doesn't work either. So...I bought a pneumatic hand tool for pipe cutting and a small bench mounted vise (about time I owned a vise I guess). I clamped an allen wrench into the vise and viola! I was able to cut it down no headaches. Using this I was able to get all eleven of those allen bolts removed (although, even with this modified tool, that lower left one is a real PITA. Wish I could get that X-Pipe off!). By the way, that advice to give the bolts a light rap with a hammer is great. That really made them much easier to remove. Thanks. So here is were I am with this. I got all eleven bolts out but the shift assembly doesn't seem to want to budge. Did I forget something or do I need another hammer trick?! I feel I am getting close here! This Moto Guzzi ownership thing is quite an adventure! If it wasn't for this forum, especially giving the lack of dealerships, I don't know how I could possibly navigate it. -
OK. Had my first major problem in my first four years as a Guzzi owner. My 2004 Coppa Italia stranded me on the road when the transmission failed. At first it would not shift at all and then it would downshift only. I went down into first gear at a stop sign and that was that. Could not get out of first. I had to park it, get a ride home and get my truck. After searching the incredible collection of wisdom available on this forum (thanks everyone) I have figured it must be a broken pawl spring. Seems like a common problem it turns out. Here are my issues that I would like some advice on. I removed the shock reservoir , starter motor, and shift linkage. Started to remove those allen bolts and boy are they on TIGHT! My big problem though is the allen bolt in the lower left side of the cover. Both the exhaust x-over (FBF) and a bar that bolts to the engine cases are in the way. I noted that someone else had this same issue and resolved it by cutting down an allen wrench so that it would fit. I have two problems with that. One, I have no idea what kind of tool to use to cut one of those (seems like it would be pretty difficult) and two, even if I did I don't think I could get enough leverage on the thing to loosen that bolt. Again these things are TIGHT!!! I attempted to remove the X-over pipe but can't seem to get it loose from the front tubes. Any suggestions on that? I was thinking that maybe heating the female side of the pipe with a torch might get the metal to expand a bit so that I could pull it off. Don't know about that idea. Plus I don't really feel like buying a torch. Another question I have is should I try to remove the steel frame bar that bolts to the left side on the engine and is right in the way of getting at that allen bolt? That looks like a big PITA too. Any suggestions would be greatly appreciated. Thanks
-
Well, I crashed it - parts fiche for V11 LeMans?
polebridge replied to Repeater's topic in Technical Topics
Here are the prices that Todd quoted to me (don't know if they are still valid so you should contact Todd and find out): Upper Sump (Black): $134.24 Left side footpeg: $55.65 Shift lever: $150.43 Left front directional: $24.25 Left spark plug cap $23.09 Clutch lever: $134.84 Left cylinder guard: $24.70 Front Faring (the nice tri-color Coppa Italia one) $439.76 Left valve cover: $136.60 Gaskets for middle pan, $8.00 each, x2 Hope this helps. -
Well, I crashed it - parts fiche for V11 LeMans?
polebridge replied to Repeater's topic in Technical Topics
Sorry to hear about your crash. I did the same thing. Left side. Broke the side stand mounting same as you. This forum is the best and they will have you up and running again. Trust me. See my thread on this very same thing: http://www.v11lemans.com/forums/index.php?...15&hl=crash I got the upper sump from Todd at MPH Cycles. If you read down the thread for my postings/replies you will see my progress on the repairs to my bike. By the way, I got mine back on the road in short order and it is running fine. No cosmetic issues anymore either. Good luck with everything. The important thing is that you are OK. -
K&N Pods - connect directly to throttle bodies?
polebridge replied to Bbennett's topic in Technical Topics
Bbennett...or anyone else how has made a similar mod. What part number are those K&N's. I have a 2004 Coppa Italia and have been considering just such a mod. Thanks. -
OK. It took me 10 minutes to install the levers.With some practice I can probably get it down to 5. Levers are really nice by the way.
-
Then let's hope it's a short winter! I am glad to hear that this is an easy job but, although it may be five minutes for you, I am sure it will take me considerably longer. I guess I'll have to time myself. Anyway, I went ahead and order the levers so I will be testing your theory soon. Wish me Luck.
-
Thanks, Just ordered then through your web site
-
Thanks, Now all I have to do is pick a color. I am thinking gold since the Coppa's handle bar is a gold color. Either that of black I guess. This is going to be one of my winter projects. I also have a set of wave rotors (originally on my Aprilia Falco) that I think will fit the V11 front wheel so maybe those will emerge on the Coppa next spring also? Thanks again.
-
I can't seem to find the V11 Cafe Sport listed in any Pazzo levers application guide. I recently crashed my Coppa Italia and have fixed everything except the clutch lever, which still works but is a bit scratched up. What model levers are you guys using? Thanks
-
Hey Sean, those look like nice saddle bags. What brand are they and were did you get them? Nice bike by the way. I have a Coppa also. I crashed it a few weeks ago but I have got it back to just about 100%. Still looks great! Mike
-
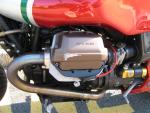
I just installed new gaskets into my V11 's front crossover pipe. The pipe is now nice and tight although I do still detect a slight exhaust leak I think. The problem now is that I can not get the alternator cover off. There is not enough clearance. Any suggestions? Anyone else had this problem? Thanks
-
Try these guys: http://www.mphcycles.com/ They're great.
-
Sorry to hear the news but I am truely glad that your Son has survived the incident and is recovering. My Dad called me last week to inform me that the wife of one of his step nephews was tragically killed in a motorcycle accident while on her way to a charity event. I didn't know her but I am told that she truely loved riding. My thoughts and prayers go out to your son Tom and to all of your family. I hope his recovery is speedy and complete. Mike
-
Any updates Thang? Got em installed yet? Just curious to know how you are doing with the mod and if you are satisfied with the results? Mike
-
Where did you get them? I need the same thing for my bike. Thanks
-
Thanks, What is involved in the stripping and polishing process? I assume you took it to someone. Was it a body shop? Got any pics? Mike
-
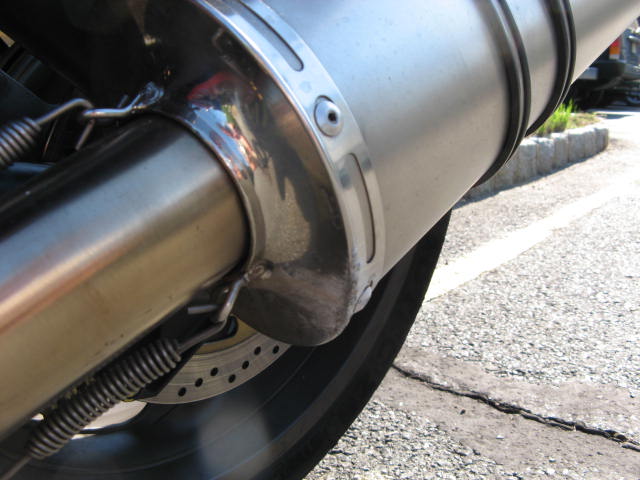
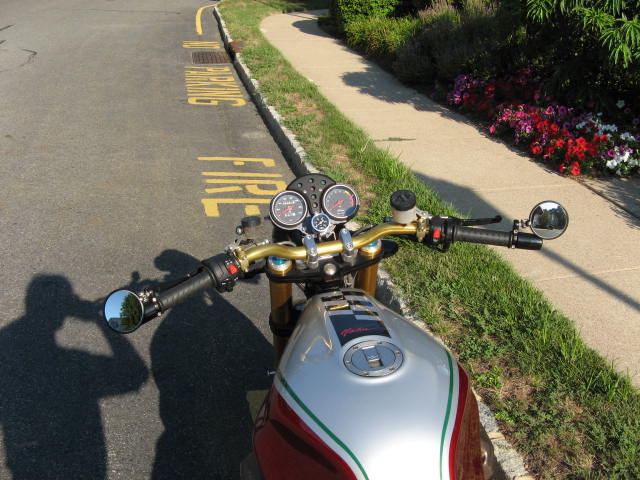
Finally, this minor damage to the left exhaust can. This one will stay as is also. Who knows, I may want to try some FBF cans someday anyway: Here is a shot of the 'naked' Coppa from the riders perspective if anyone is interested:


-
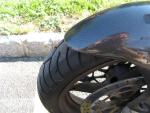
OK...now that I know how to upload pics, here is what is left of the cosmetic damage (not including the fairing of course): Fisrt, and this is looking like the hardest one to replace: Next is this minor damage to the front fender. This one will be left the way it is: I will attach the rest on my next post.