

Bjorn
-
Posts
192 -
Joined
-
Last visited
-
Days Won
10
Content Type
Profiles
Forums
Events
Gallery
Community Map
Posts posted by Bjorn
-
-
Good advise guys! I was thinking this over @ home with some info from this forum. And the things you guys address are on my list too! this makes me feel a bit more confident (as i really dont like electronics). I used docc's electrical flow chart in combination with the wire diagram to get my head around this.
Here is what I got:
-hand drawn so maybe hard to read
- Green = possible OK
- Purple = possible NOK/fail
- yellow= unknown/uncertain.

since i can hear the fuel pump, the kill switch must supply juice to both the ECU and INJECTION relays. The bike did start before so suspecting a bad connection somewhere. Sidestand switch, sidestand relay and neutral switch cant all be bad because of the power towards the KILL-ECU-INJECTION.
wish me luck

-
Man im sort of running low on patience with my italian. Here is the latest gremlin:
@work wanting to ride home for the weekend, motorcycle doesnt want to start. It did start but after stalling (my mistake) i cant get it running again.
Bike in neutral, switch on ign can hear the fuel pump but do not hear the starter solenoid when i press the button. Things i checked/tried:
- Checked the kill switch, ok.
- Lifted the sidestand and checked the switch and connector, no abnormalties.
- checked all fuses, ok.
- removed the clutch switch to inspect visually, no abnormalties.
I left it at work, hoping i can repair it tomorrow. Any advise?????
-
O yeah i forgot, local body shop abs welded it. I just need to put a sticker on it and make a extra support bracket.

-
I have been here before and have two options:
The first one is very easy to realize and helps to keep the graphite gasket intact and in the right position. Its very thin copper/brass you usually buy in sheets of a specific thickness. Google translates it to brass lamella. Simply cut it in narrow strips and wind it around both sides of the balance-pipe connectors. This ensures you can actually tighten the damn thing properly. I believe i wound it around 3 to 4 times round the pipe (depends on the thickness).

Second option involves welding. even though the above works, I just removed the whole thing. I know it does benefit performance (a bit) but i really didnt like the design of the couplings . Just cut the balance pipe off and you are left with a small hole, weld it shut:


and finally, a symbolic goodbye...


-
One more thing about the oil viscosity, i do know that the updated v11 manual specifies a different value than the first/original manual. Need to look it up.
-
congrats on a job well done. I reckon it all made sense once you got in there with it.
Yeah just like you said, its not very difficult but you just have to start.
-
I replaced the leaky oil seal this weekend. Thanks to the pictures/method of Andy I saved lots of time by keeping the engine and gearbox in place. The replacement can be done in one day, but is going to be a long one
Here's some pictures and short description in case someone wants to tackle this them selfs in the future:1. I have a centre-stand on my bike but could not use it because the RHS pork chop needs removing. Use something else like this small jack. First remove the rear wheel, bevel box and the swing arm.

2. Remove the pork chops by loosing the bolts on the rear side first (tip from andy). I cleaned the slightly rusted surface of the frame. Not much effort, and coated it with a thin film of grease.

3. Here's the leaky seal. Before you remove it, clean the entire surface around it. You dont want debris getting in the bearing. I used both a awl and and old screw driver ( small tip, sharped it) to first punch a small opening through the steel part of the oilseal. to protect the alu casting I simply bolted a washer to the housing. I never removed a oil seal (this way) before. Ones you get a opening in the old seal, you can use the screw driver to pry it out. Take your time and dont let the screw driver slip, and scratch the inner or outer facing.


4. Before fitting the new seal, make sure everything is clean, both the housing and the seal! I use a little gearbox oil on the seal before i pressed (tap with a hammer) it in place with a large socket.

5. take a look at your new seal, and cross your fingers you dont have to see it in a long time
 Reassemble in reversed order. Make sure you align your swingarm (search on the forum how to do this).
I just rode 100km back home, no drippings. Hope it stays like that for lots of KM's.
-
 1
1
-
-
Haha - there was some talk of your Guzzi work at our local riders' spot over coffee and breakfast:Time i would (now) rather spend on the road

"What do you think Bjorn will take all to pieces next?"
"Maybe he and his brother will make a new frame!"
"He could turn it into a Ghezzi-Brian. Those Dutch do things like that."

Glad to hear you are riding now!!
Lol thanks
 I like building stuff. There are always things left on 'the list' haha. But for now i want to make some miles.
 -
Mixture wise there was not a whole lot he could do to reduce the dip at this moment. ''Bringing the collector closer to the exhaust ports (like 50-60cm) and making two individual maps for both cylinders could reduce it a bit'' was one of his ideas. But this brings new fabrication issues like the actual placement of the collector. You would need headers with a very tiny radius and locate the collector next or under the engine block. Under the sump doesnt seem practical for a streetbike due to the ground clearance. Locating it next to the engine asks for equal length headers and a relocation of the oil cooler.
Dont get me wrong, i like challenges however it takes lots of time to do it right. Time i would (now) rather spend on the road
-
No the engine is 100% stock, only the exhaust is not original.
-
final piece of the puzzle:
Black is before
green is after the tuning.
So even with my dB killer im really happy with the power output

-
Kudo's for your perseverance!
-
VIdeos

Short run:
long run:
The goal of the session was to fine tune the fuel injection. The old setting was too rich, but not that bad. After making fuel and ignition adjustments and 5 test runs later, the bike runs great. Its smoother and reacts better to the throttle. Fuel consumption should also go down a bit, but I cannot confirm this yet. The ''typical'' 3500-4000 dip is evident, but I accept it. I dont find it annoying and definitely not worth my time and money trying to eliminate it right now (maybe in the future
 ) .
) .So to make this topic complete; The new exhaust did great, looks great,sounds cool and did not reduce the ''drive-ability''. I cant compare the results with the stock/original exhaust. However after the dyno session, im up around 2 HP and overall a happy camper
. Ill post the dyno graph tomorrow. -
1
-
-
Yeah the dyno session was great. See my other topic (2-1 exhaust) for more details.
-
Thanks for the tip andy.
RPMs at this ring are rather low, so I'd say the risk of a sudden and fatal failure is rather low, too. What if you just watch it another 4 weeks? "Some" years ago it still was a well accepted fact that one or two drops had to be under every hot machine.
HubertShort reaction on the rpms of the shaft drive. Since i had the bike on the dyno anyway, i found it interesting to see the shaft in motion. Since this is something you normally dont see when your on the bike. Spins pretty fast if you ask me

-
Today I visited the dyno
Had a great day, learned a lot more about FI systems. The guy from the shop really knows his stuff and talked me through the entire session. Here some pics for now, the rest of the pictures, videos and details comes later.My giant car


-
So andy, was it easy to get the old seal out? Did you pry it out with screw drives like you intended?
How did the surface of the output-shaft look BTW, no corrosion or anything?
-
Thanks for sharing andy! ill send you a PM.
-
When I got my 02 Lemans the trans oil was leaking onto the mid-pipe and smoking. At first I though it was the seals, then I decided to change all the fluid on the bike and drain the shaft/trans oil and refill it to the proper height and it is dry ever since. I think the previous owner or from Guzzi Factory overfill the shaft oil and I think the excess will drain from overflow valve? It was dripping onto the mid-crossovers and burning (smoking), my brother thought my bike was on fire
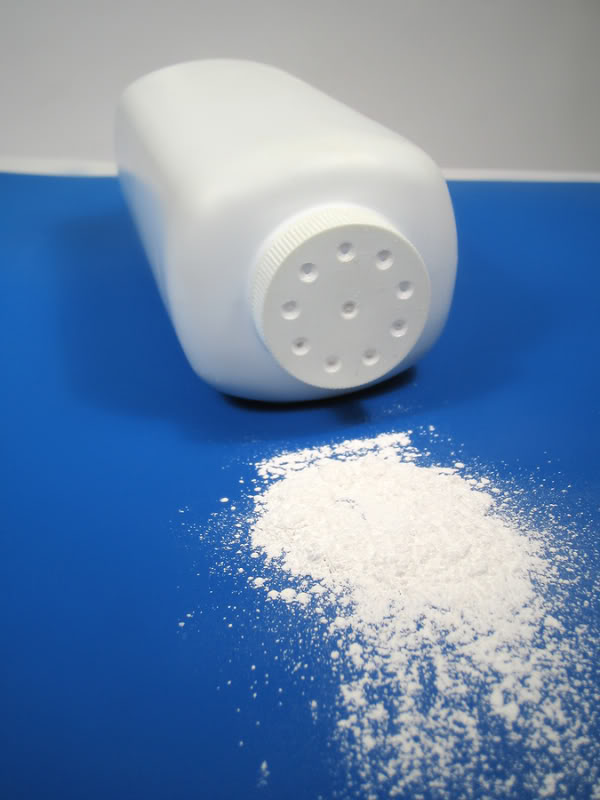
Anyway, drain the old oil and fill with new to correct level and hope that's the problem.speaking for my situation: the oil level is the correct. By cleaning the gearbox and using talcum powder im 100% positive its the output shaft seal. Mine was not ''burning'' but i did found cooked oil stains on the collector similiar to your findings.
-
Thanks for sharing andy!!!
Was it (easy) possible to remove the cover with the engine still in place?
-
My question back to you Bjorn is " If you could not pull the cover, how would you get it out"?
anyway thats what old busted screwdrivers are for. Heat, grind, bend till you get it in the shape you need for the project at hand.
And be very carefull prying it out----don't want to scratch or gouge the shaft
 . It is dooable tho
If i could not remove the cover, probably using a hook, old screwdrivers or some parkers. But I have run into some seals where the steel reinforcement ring (usually present in oil seals) remained in the housing, only prying out the plastic bits.....
Dont know yet how this particularly seal is build up and if its stuck as a m*otherf*cker or just falls out. But im still leaning towards ''removing the cover'' if that is possible
 .
.For tracing the leak, i used talcum (baby) powder. Take it out for a medium long spin and check it regularly!
-
Looking forward to your findings and pictures andy!
But how would you replace the seal without getting the cover off...? pull it out with parker screws or something?
-
Sounds like you know what your doing andy! Second time you need to replace this part? Mabye you can take some pictures, combine everything in one topic?
Note that i have not done this repair before, however looking at the workshop manual it doesnt look like there are lots of parts housed in the cover.

''pulling the gearbox'' sounds scary....
-
Have you tried this :
engine not starting
in Technical Topics
Posted
Getting home = -->>
-->> 
Keep you guys posted!