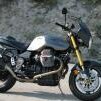
tmcafe Posted May 10, 2008 Share Posted May 10, 2008 While the tank, airbox and shock bolts are out, and I'm waiting for a temp. replacement shock, I was thinking of doing some preventative maintenance, of the unofficial kind (the ones that Luigi forgot to mention in the manuals . I'd appreciate your thoughts on the list: - untangle, secure, protect electrical cables (looking at the maze of squished/choked wires, I almost can't believe the bike has worked without a hiccup) - grease the famous forward U joint nipple (if not even attempt to grease the U-joints like Greg mentioned in a post not long ago--by removing the shaft and greasing the U-joints separately) - check/grease rear wheel bearings - possibly check the cush drive EDIT: the left cylinder hose you can see below has some superficial cracks. I'm thinking of replacing the hose as one of the To Do items. Anybody knows about it: Suggestions welcome! Link to comment Share on other sites More sharing options...
dlaing Posted May 10, 2008 Share Posted May 10, 2008 clean and protect wire connections. check for leaks at spine frame oil connections. Check for deterioration of line running from spine above coils to top rear of engine. Replace Air filter element, fuel filter and fuel lines if anywhere near needing doing. What shock are you getting? Link to comment Share on other sites More sharing options...
Tom M Posted May 10, 2008 Share Posted May 10, 2008 Bleed your clutch and bleed/clean the rear brake caliper. Link to comment Share on other sites More sharing options...
mznyc Posted May 10, 2008 Share Posted May 10, 2008 I had my rear bearings fail a couple days ago,only 14K on bike,waiting on parts.Tom M gave a link for a grease fitting to aid in greasing the shaft.But they only come in packs of 10.I'd be more than willing to donate one of them to you or anyone who wants one. Swing arm removal /inspection/grease. What would you guys recommend for hose replacement as Guzzi's rubber is shite? Mine look like the picture. Link to comment Share on other sites More sharing options...
tmcafe Posted May 10, 2008 Author Share Posted May 10, 2008 Thanks everybody! As a consolation, I'm telling myself that this is just about the best time of the year to be wrenching. Summer inside garage: 100+ with no air circulation; winter: dark and freezing cold. In either case, my competence (or lack thereof) doesn't improve the quality of the experience. clean and protect wire connections.check for leaks at spine frame oil connections. Check for deterioration of line running from spine above coils to top rear of engine. Replace Air filter element, fuel filter and fuel lines if anywhere near needing doing. What shock are you getting? An OEM Sachs (thanks Greg ), until the house of Piaggio will have my Ohlins fixed or replaced. As for the air and fuel filters, bike has a little over 1300 miles, so I'm assuming those could wait? Bleed your clutch and bleed/clean the rear brake caliper.Bike has a little over 1300 mi. Changed oils--motor, tranny, and bevel box, at around 1k mi. I'm assuming Moto Intl. had clutch and brake filled up with fresh fluids--they still look fresh. Should I still bleed clutch and rear brake? I had my rear bearings fail a couple days ago,only 14K on bike,waiting on parts.Tom M gave a link for a grease fitting to aid in greasing the shaft.But they only come in packs of 10.I'd be more than willing to donate one of them to you or anyone who wants one.Swing arm removal /inspection/grease. What would you guys recommend for hose replacement as Guzzi's rubber is shite? Mine look like the picture. Yeah, I remember your post. I'll check rear wheel bearings and swingarm. Not sure about the rubber hose, but if I find out I'll let you know. And sure, I'd be grateful if you could spare an extra grease fitting for me Link to comment Share on other sites More sharing options...
Ryland3210 Posted May 10, 2008 Share Posted May 10, 2008 Replace the plastic head temperature sensor with a brass holder, and fill pocket with conductive copper based anti-seize. Greg Field can supply the holder. Permatex brand has a higher copper content than others. Check the FAQ section for tipover valve orientation to avoid the dreaded "tank suck". Check the wiring to the taillight. On some bikes, including the '04 Cafe Sport I own, it was pinched by the steel bracket. This has been known to eventually short out. If the hoses to the bottom center of the tank were fastened with crimp on clamps, cut the hose about 10-12 inches below the tank, and use a splice with two hose clamps so the next time you have to remove the tank, it will be easier. Check the aluminum insulation glued under the tank to see if the glue is coming loose. Elsewhere in the Forum, a 3M product was recommended to keep it fastened. I found it: it is 3M Super77. If you decide to take off the airbox cover and hold the filter in place with an aftermarket kit, the Guzzi glue has been reported to come undone, and the insultation drops down to block flow to the filter. Link to comment Share on other sites More sharing options...
tmcafe Posted May 10, 2008 Author Share Posted May 10, 2008 Replace the plastic head temperature sensor with a brass holder, and fill pocket with conductive copper based anti-seize. Greg Field can supply the holder. Permatex brand has a higher copper content than others. Check the FAQ section for tipover valve orientation to avoid the dreaded "tank suck". Check the wiring to the taillight. On some bikes, including the '04 Cafe Sport I own, it was pinched by the steel bracket. This has been known to eventually short out. If the hoses to the bottom center of the tank were fastened with crimp on clamps, cut the hose about 10-12 inches below the tank, and use a splice with two hose clamps so the next time you have to remove the tank, it will be easier. Check the aluminum insulation glued under the tank to see if the glue is coming loose. Elsewhere in the Forum, a 3M product was recommended to keep it fastened. I found it: it is 3M Super77. If you decide to take off the airbox cover and hold the filter in place with an aftermarket kit, the Guzzi glue has been reported to come undone, and the insultation drops down to block flow to the filter. Thanks John! I thought about the temp sensor and will do it. Also recently I've seen a pic you posted on this forum of how the hose and tipover valve must be positioned (kind of hard to figure if you just look underneath the tank). I'm thinking of securing somehow the tipover valve in its correct position so that it won't shift because of vibration/shocks. The tank insulation looks perfect, except for the sides, where it's just started to peel off a bit, so I'll glue it back to be safe. I checked the taillight wire a while ago, and it seemed fine, but I'd like to make sure it won't rub against the plastic hole in the horiz. panel under the rear cowl. Link to comment Share on other sites More sharing options...
mznyc Posted May 12, 2008 Share Posted May 12, 2008 Hi tm, Grease fittings are in,Pm me with ya info and I'll getcha one.Anyone else? Michael Link to comment Share on other sites More sharing options...
tmcafe Posted May 12, 2008 Author Share Posted May 12, 2008 Hi tm,Grease fittings are in,Pm me with ya info and I'll getcha one.Anyone else? Michael PM sent. Link to comment Share on other sites More sharing options...
Steve G. Posted May 12, 2008 Share Posted May 12, 2008 While the tank, airbox and shock bolts are out, and I'm waiting for a temp. replacement shock, I was thinking of doing some preventative maintenance, of the unofficial kind (the ones that Luigi forgot to mention in the manuals . I'd appreciate your thoughts on the list: - untangle, secure, protect electrical cables (looking at the maze of squished/choked wires, I almost can't believe the bike has worked without a hiccup) - grease the famous forward U joint nipple (if not even attempt to grease the U-joints like Greg mentioned in a post not long ago--by removing the shaft and greasing the U-joints separately) - check/grease rear wheel bearings - possibly check the cush drive EDIT: the left cylinder hose you can see below has some superficial cracks. I'm thinking of replacing the hose as one of the To Do items. Anybody knows about it: Suggestions welcome! The hose in the picture that is cracking? This is what I did. Take the hose off, spin the fitting out of the intake manifold on both sides, and throw them in your tool box. You will need to spin them back in temporarily when you decide to syncronize the two injectors. Next, get a allen head [hex head] bolt the same thread as the fittings, spin them into the threaded holes, DONE! One less un-needed hose, in an effort to untangle the mess these things have underneath the tank. The front universal joint greasing procedure will require the removal of the rear wheel, and the dropping off of the rear hub. This will allow the front portion of the drive shaft to be dropped "carefully" down to gain access to the grease nipple. This prodecdure will be a good time to grease the splines bewteeen the wheel and the hub. In fact, if this has never been done [and there is strong proof it was not done often at the factory] you may have alot of trouble sliding the wheel off the hub when the rear axle is slid out. The grease gun I use is made by Plews & Edelmann http://www.plews-edelmann.com/brochure.cfm...ocation_id=2723 , and I use the variable position adapter 360 deg swivel fitting http://www.plews-edelmann.com/brochure.cfm...ocation_id=2726 and have it on a flexible hosehttp://www.plews-edelmann.com/brochure.cfm?brochure=2239&location_id=2726 . Steve Link to comment Share on other sites More sharing options...
Tom M Posted May 12, 2008 Share Posted May 12, 2008 I had my rear bearings fail a couple days ago,only 14K on bike,waiting on parts.Tom M gave a link for a grease fitting to aid in greasing the shaft.But they only come in packs of 10.I'd be more than willing to donate one of them to you or anyone who wants one. Packs of 10? I think you ordered the wrong part. Eeek! Hope I didn't steer you wrong there! Part # 1090K47 is the grease gun tip that I thought I recommended, $13.15 each, at Mcmaster Carr. I apologize if I screwed up the part number. http://www.mcmaster.com/ctlg/DisplCtlgPage...MMainWidth=1068 Link to comment Share on other sites More sharing options...
mznyc Posted May 13, 2008 Share Posted May 13, 2008 Packs of 10? I think you ordered the wrong part. Eeek! Hope I didn't steer you wrong there! Part # 1090K47 is the grease gun tip that I thought I recommended, $13.15 each, at Mcmaster Carr. I apologize if I screwed up the part number. http://www.mcmaster.com/ctlg/DisplCtlgPage...MMainWidth=1068 Nope Tom ,you had it right.I got 1095K47 a 90 dg male fitting,still may come in useful. Thanks, Michael Link to comment Share on other sites More sharing options...
Recommended Posts
Create an account or sign in to comment
You need to be a member in order to leave a comment
Create an account
Sign up for a new account in our community. It's easy!
Register a new accountSign in
Already have an account? Sign in here.
Sign In Now