PhillipLarsen
-
Posts
144 -
Joined
-
Last visited
-
Days Won
2
PhillipLarsen's Achievements
Guzzisti (2/5)
225
Reputation
-
1964 Redframe 299 miles
PhillipLarsen replied to PhillipLarsen's topic in Special place for banter and conversation
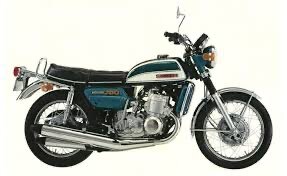
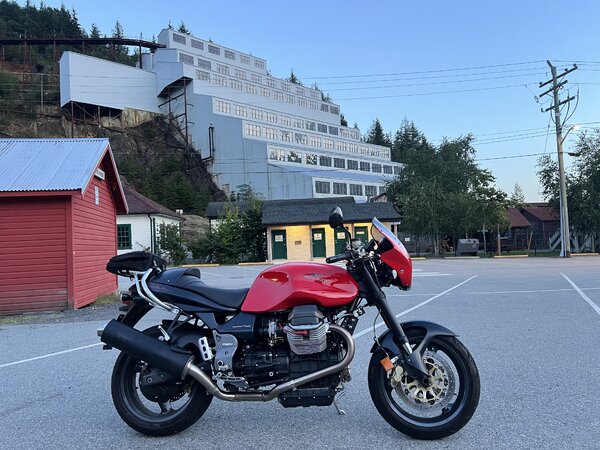
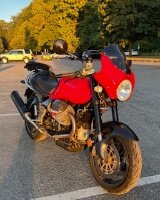
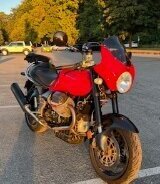
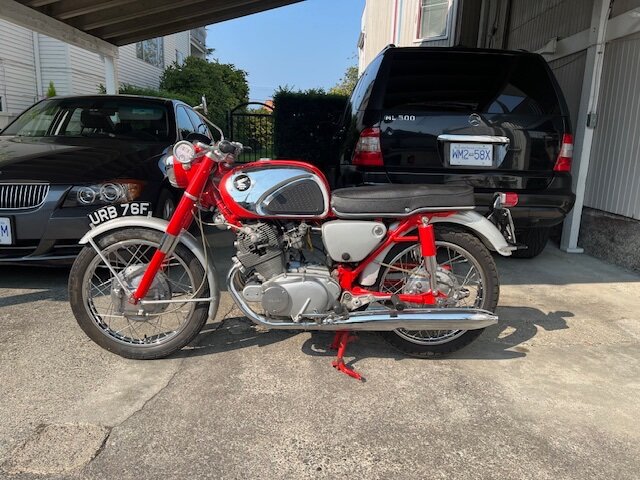
@footgoose love the vintage advertisement of the family of Honda’s @alannn That Pirsig bike is legendary. Second picture is in Vancouver Canada where museum had put the bike outside the museum during vintage bike meet at the museum before I got it. The CL77 next to it is 1966 used, unrestored and on its way to my friend and former colleague from airline industry. We will be riding them to local bike meets and shows to display together! -
1964 Redframe 299 miles
PhillipLarsen replied to PhillipLarsen's topic in Special place for banter and conversation
Yes it is a 1964 305, The early years like this one have the speedo / tach that both sweep Clockwise. My first ever ride on a motorcycle, as a passenger was on a brand new red one of these in 1965. I really wanted one badly but when I turned 14 in 1967 the best I could afford was a used 1965 Honda 50 Sport! Where I lived in Canada we could get motorcycle license at 14 at that time. it was a long wait to finally get one! Apparently Cycleworld test ride got a two way average of just under 105 mph top speed in 1962 What read is Honda built them from 1961 to late 1967, At that time there were no date of manufacture on the frame, only SN. Many places show date first registered as the model years so you see them sold as 1968 model years for the late 1967s. -
Been waiting 57 years for this to show up and for it to be new is incredible. Museum bike going to be ridden. In my house today! I think I feel 14 again.

-
@SierraTango That Lemans sure looks nice!
-
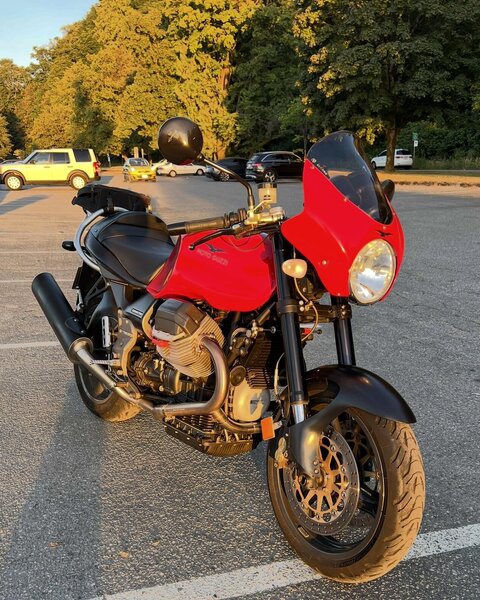
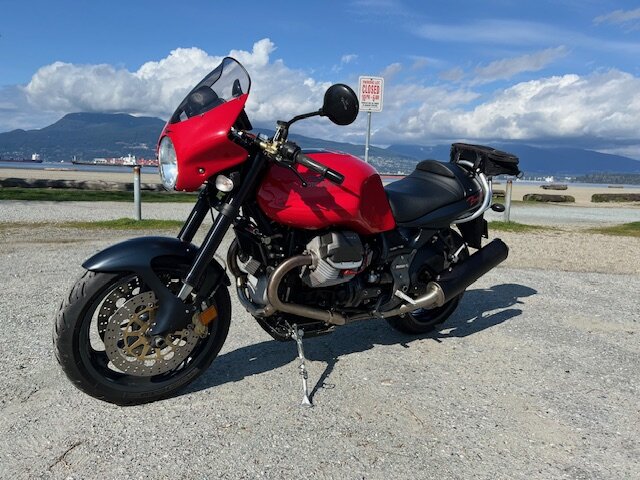
@SierraTango I for one love my 2004 red Ballabio. Of my current 8 bikes it is my favorite and of the nearly 30 I have owned it is my favourite. I currently have the Lemans bars and upper triple plate on it, but have been gathering the parts to reinstall the original bars which I have. I do like the Lemans clipons, but for long rides the neck arthritis doesn’t like it.
-
@audiomick thanks for catching my error, it is .za rather than .nz. Need to use my glasses more!
-
Correction: North east of Lecco
-
@docc The promotional information came from motorcyclespecs.co.nz Coppa Italia specs just reference it as being a celebration of Moto Guzzi participation the Italian Naked Bike championship in 2003 The commune of Ballabio where the hill climbs were apparently held is about 6 km north west of Lecco, very handy and close to the Moto Guzzi factory.
-
Yes I think it is promotional material based on the 2002 Hillclimb 2005 Moto Guzzi V11 Ballabio V11 Ballabio — Named after the Italian Hillclimb Speed Championship, Moto Guzzi introduces the V11 Ballabio. Higher handle bars for a more relaxed riding position. The latest 90º V-Twin with added crossover pipe and increased compression ratio to 9.8:1. Brembo Gold Series brakes. 180/55 17″ rear tire. Available in Red and Black. Making racing history “Ballabio-Resinelli” is one of those names that are burned into the annals of motorcycle racing. The Ballabio is a true test of a bike’s speed and its rider’s prowess, a hillclimb around tortuous bends that bring out the true character of man and machine. To have any chance of winning, a machine must have bags of power at low revs, must be flickable and compact, and must have suspensions to match. This meeting of tradition and technology, an event that after 29 years has become part of motorcycling history, is one in which the machines of Mandello del Lario excel. To celebrate its victory in the Modern Open Class of the 2002 Ballabio uphill, the third race in the Italian Hillclimb Speed Championship, Moto Guzzi is giving this legendary name to a new model, the V11 Sport Ballabio.
-
PhillipLarsen changed their profile photo
-
If ever getting new ones made, consider that for those with a Roper Plate installation it needs to be modified to accommodate the thickness of the plate and additional gasket.
-
Gratuitous Pics of Girls + Guzzi
PhillipLarsen replied to sign216's topic in Special place for banter and conversation
A smiling Ballabio! Not just a pretty lady, but a business lady who over the last 20 years has ridden her BMW650GS up to 13 hours a day, from 34F to 105F days. For shorter rides she used her new Ducati 800 Scrambler!
-
The crossover was just to complete the iconic happy smiling face look of the later V11s coming at you on the road😃
-
The Original “Water Buffalo”!