

audiomick
-
Posts
2,993 -
Joined
-
Last visited
-
Days Won
62
Content Type
Profiles
Forums
Events
Gallery
Community Map
Everything posted by audiomick
-
No, I don't believe so. The shaft is one that I got from someone in the German forum that I trust implicitly. The original shaft in my Le Mans had a dud uni joint. Changing the uni joint got complicated, so I took the replacement shaft. It has allegedely only about 30,000 km, although the mileage should not have any bearing on the issue in question. I think. I'm really bloody frustrated, actually. I went to have a "quick look" in July, and the bike has not been rideable since. I thought I was on the way to getting it going again, and now this...
-
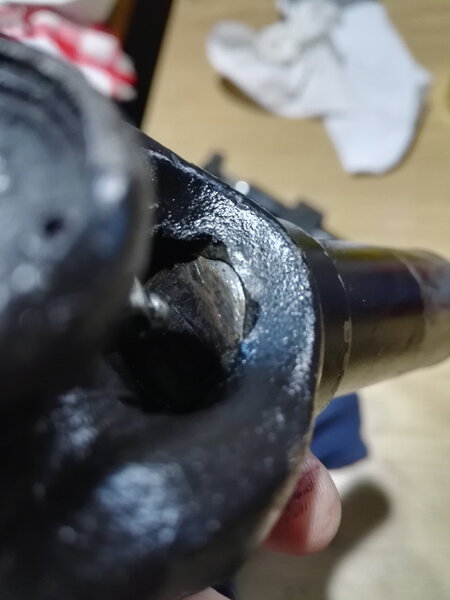
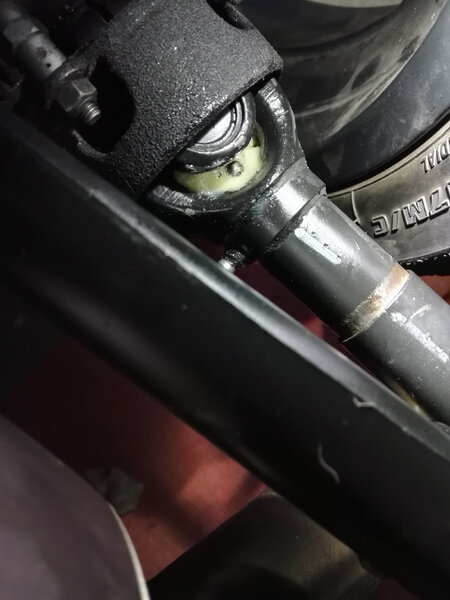
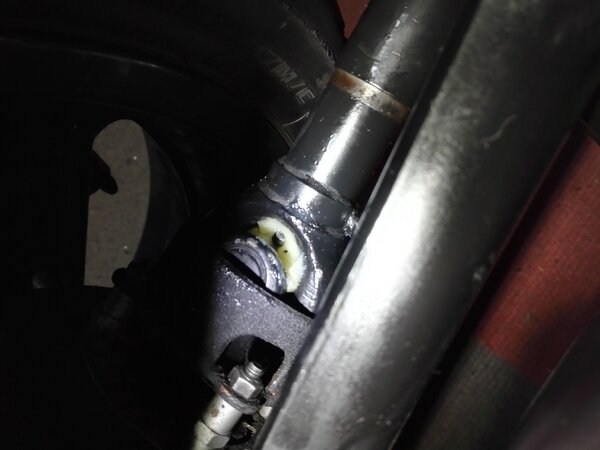
I've had the rear end out recently. Started out as "having a look" and ended up with new wheel bearings, swing-arm bearings, spacer in the wheel between the bearings, getting the rear shock serviced, a new axle, and a replacement shaft because one of the uni joints was faulty and I got a replacement shaft quickly and cheaply. But.... I put the shaft in with well-greased uni joints but not much grease in the spline that compensates for the changes in length that happen as the swing-arm goes up and down. Today, I tried to grease that part of the shaft via the grease nipple on the shaft. I am not talking about the nipples on the uni joints, just to make that clear. After I figured out how to use the grease gun such that grease actually went in to the nipple, I thought I was doing well. And then I saw that this was happening: I was expecting to see grease appear sooner or later at the join between the two parts of the shaft. Instead, it came out through the yoke towards the uni joint. It is apparent that the rearwards part of the shaft was bored out and machined to create the spline that the forwards part of the shaft mates in to. Looking at the yoke on the shaft side of the rearwards uni joint, it is clear that there is a bung there to seal off the hole. Apparently this bung is not sealed on the shaft that I have in the bike now. So, the following questions: Has anyone else seen this happen? How bad is it? Do I have to assume that as a result of the weak spot, the spline is not being sufficiently greased via the nipple. or can I ignore the problem? Is it possible that I sprung the bung myself by pumping too much grease in? I really can't imagine that this might be the case...
-
From the album: audiomick
-
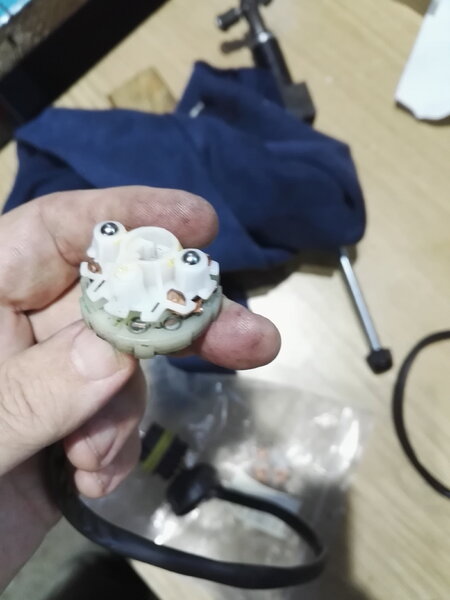
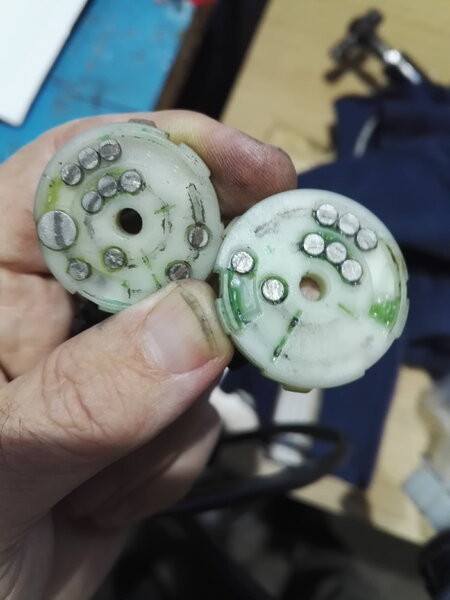
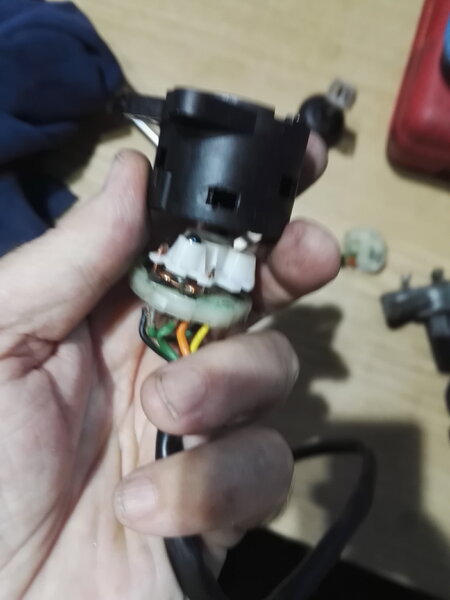
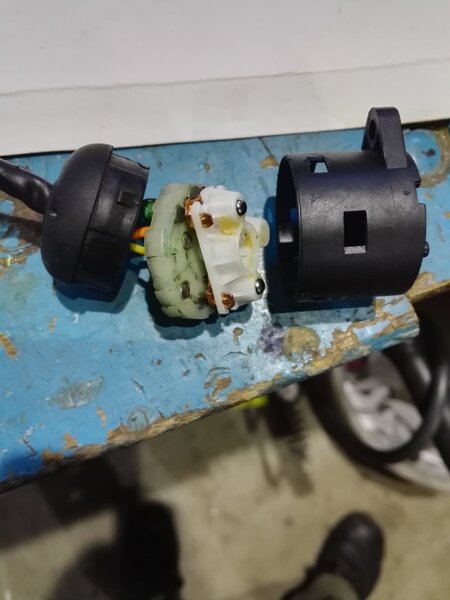
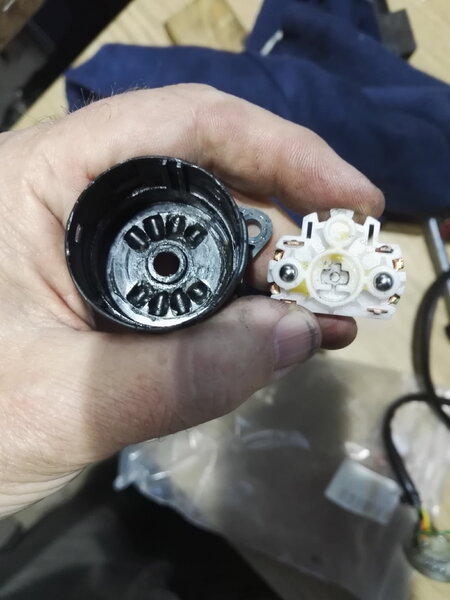
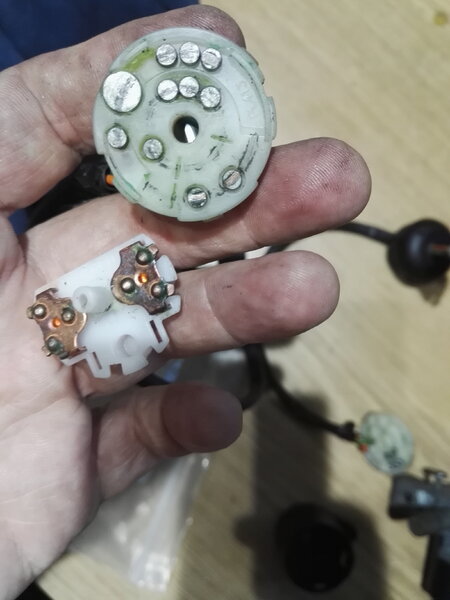
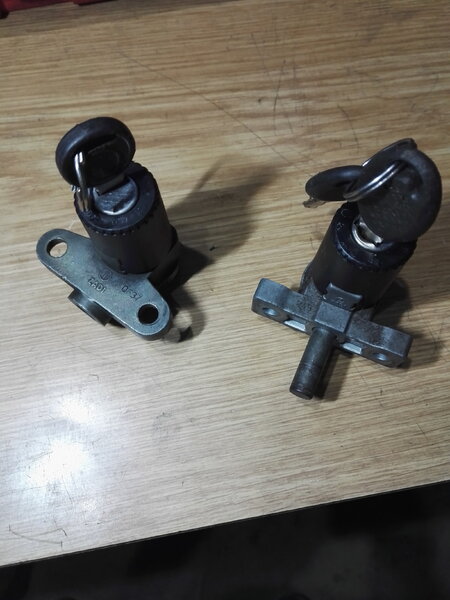
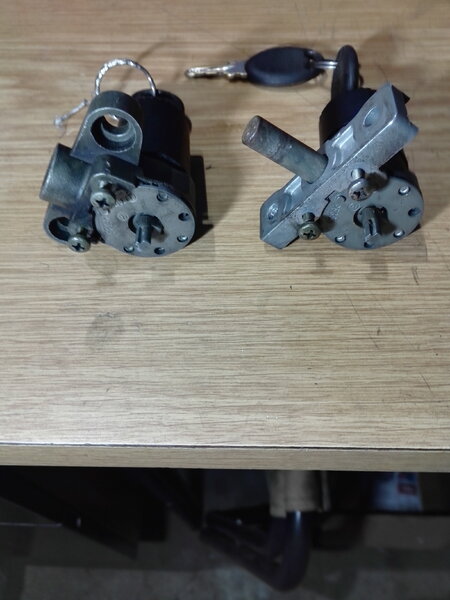
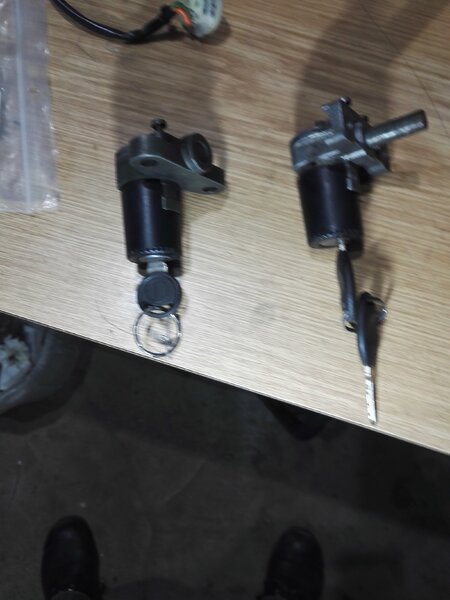
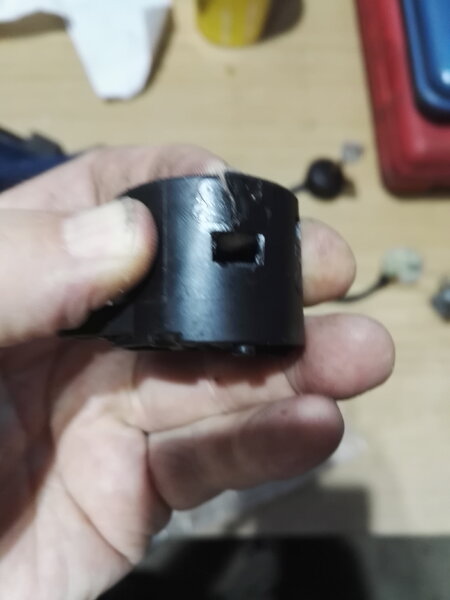
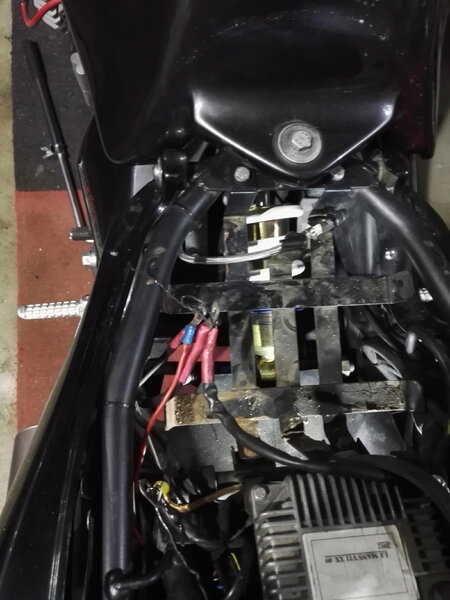
So, I said I'd take some photos. Here they are. Some of them are a bit dodgy, but most will know how that is. Greasy hands taking photos with a telephone in the garage... I mentioned further up that I got a replacement housing as part of a complete ignition switch from an Aprilia scooter. I think the model was S50. Here is a picture of the switch plate from the contact side. On the left the plate from the V11, on the right from the scooter. It is the same bit of plastic, but the V11 has a couple of contacts more than the scooter. This is the bit that makes the contacts from the contact side here, that bit is sitting on the contact plate, and one can see the ball bearings that provide the detente for the switch position. The following picture shows the inside of the casing with the indents for the detente visible. This picture and the next one show the order in which the bits go back together I wrote further up that one must work on the "visually obvious" retainer to get the switch plate out of the housing. This is the visually obvious hole for the relevant retainer. The other two retainers are in plain square holes. Here are a few pictures of the key lock from the V11 and from the scooter. The park lock is clearly visible on both; on the V11 lock the bolt is retracted but it is clear where it comes out, on the scooter lock the bolt doesn't retract any further than it is in the photo. The lock from the V11 is the one on the left, and the scooter the one on the right., And finally a picture of the housing that I broke whilst disassembling it. I suspect that the break is typical. To avoid breaking the housing, take your time, think about what you're doing (twice) be patient, and don't try to release all of the retainers. Get the obvious one free, and then rotate the switch plate out of the housing. The replacement I got was from an Aprilia scooter. The model was, as mentioned, I believe S50. That is not critical, though. I have been reliably informed that Piaggio / Aprilia / Guzzi used the same type of locks for pretty much everything they built in that period. My Breva 750, for instance, also has the same thing in it. As far as I can tell, the same housing was used pretty much everywhere, and that is what is likely to break when dismantling the switch to clean it up. The scooter switch I got only had two positions: on or off. Without knowing for sure, I rather suspect that there was only one version with "park, lock, off, on" as in the V11. The trick is finding out what else had that in it. If it wasn't a Guzzi, the part would probably be cheaper...
-
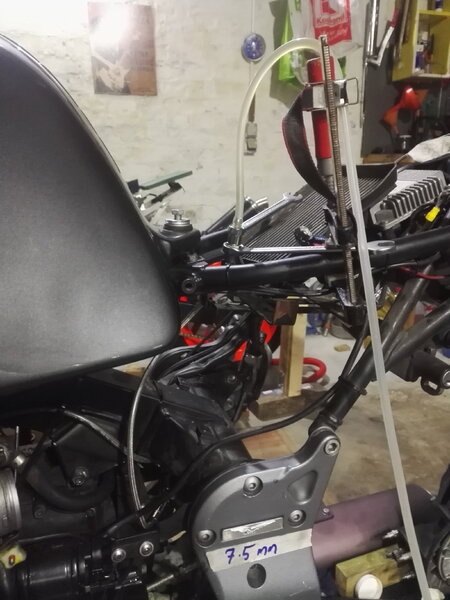
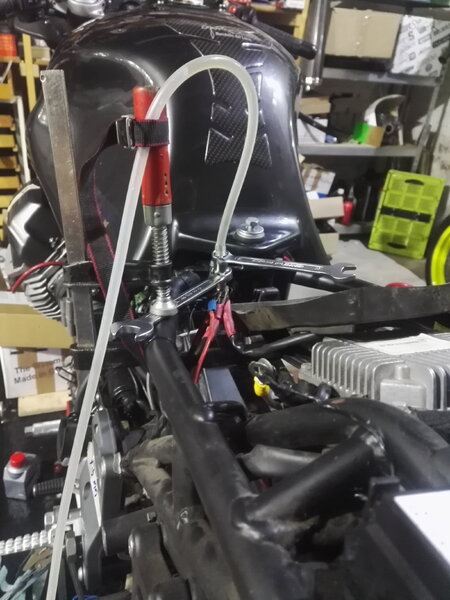
I installed the "remote bleeder" for the clutch from the Griso, Breva and what have you the other day. Part #12 here, buy the screw and the seals with it: https://wendelmotorraeder.de/kupplungspumpe-breva-1100-05-07-ex-30_3006_300611_30061110_3006111024.html Bleeding the clutch was very comfortable after that. I had to buggerise around a bit to fasten the end of the extension, but once I had that I could bleed the clutch in a comfortable upright standing position, one hand on the clutch lever, the other on the spanner on the bleeder. It remains to be seen what the permanent solution for the upper end of the bleeder extension will be. For now, it will be secured somewhere out of the way with a cable tie. The first attempt at bleeding involved a carpenters clamp. As I mentioned, a bit of dicking around to get it set up, but it was worth the effort.
-
From the album: audiomick
-
From the album: audiomick
-
From the album: audiomick
-
From the album: audiomick
-
From the album: audiomick
-
From the album: audiomick
-
From the album: audiomick
-
From the album: audiomick
-
From the album: audiomick
-
From the album: audiomick
-

From the album: audiomick
-
From the album: audiomick
-

From the album: audiomick
-
From the album: audiomick
-

From the album: audiomick
-

From the album: audiomick
-
From the album: audiomick
-
From the album: audiomick
-
From the album: audiomick
-
From the album: audiomick

