
leroysch
-
Posts
203 -
Joined
-
Last visited
-
Days Won
5
Content Type
Profiles
Forums
Events
Gallery
Community Map
Posts posted by leroysch
-
-
I swear I'll take a shower next year...errrr......I mean...y'all are slow!

-
You know it!
Even considering washing and waxing the bike. Might even scrunch down and take a swipe at the wheels......
-
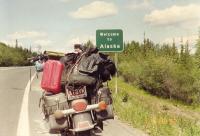
Wandering in the vicinity of Cedar Vale,...took a break from the traffic in Sedan, KS.

-
 2
2
-
-
Appreciate the thought, Scud.
I tried that first with my best simulant of a RAM ball (some washers on an appropriately threaded bolt). Using what I had..and doing the eyeball extrapolation....I wasn't convinced getting a stand-alone ball was going to allow the GPS (Garmin 66X) to clear the fairing.
-
Found some room to mount a GPS. Clears the fairing and no interference lock-to-lock.


-
Yuck. That's gonna take some abrasives, not just spray and lube. The main wire to the battery has a rubber boot on my bike (at starter as in your picture), maybe you should put on boot on that cable while you're at it - helps to keep the Vaseline/DC-4 (or whatever you use) in play.
What's the plugged hose?
Mine had the boot too, but between the magic ointment on the connections and, perhaps, an ill-advised spritz of silicone spray to the boot itself to keep it pliable, darn thing won't stay put.
The plugged hose was discovered after I took the starter cover off, just laying on the starter. It's a mystery (to me) for now. It passed my critical inspection (hmmm....screw's in there pretty good...if it's meant to plug the end, it's still doing its job) so I just zip tied it to something stationary and moved on!
-
After somewhat routine winter maintenance (valves, fluids, tires, fuel & air filter, relay replacments) and in the midst of a GPS/Voltmeter install I decided to check and see if the patient still had a pulse. Welllllll, no current draw to the starter, but some chatter at full handlebar lock. Took the ignition switch apart without mangling it too bad, lubed it with my preferred non-conductive ointment, then moved further aft:

Ugh! And, the 12V trigger, removed in the pic, was marginally attached. Between this. a battery suffering from a winter's worth of disuse, and a loose positive connection at the battery I'm hopeful the patient can be removed from life support (trickle charger) soon.
-
Oh man, my ECU is upside down.
It never stops.......


-
1
-
-
..and thus..bar-end mirrors were born.
-
3
-
 1
1
-
-
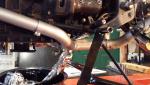
Looks like fun. The bracket and studs on the spine are for an external fuel filter - they serve no purpose if you have an internal fuel pump and filter. I don't know what the extra wire harness connector is (was) for.
It truly is a labor of love...not nearly as intensive as your endeavors...
leroysch, can you get a look at the wire colors to that connector?
Orange, orange, red w/black(blue(?)) stripe, black
Surprising amount of corrosion on/about the relays...


Have the Omrons at the ready...interesting difference in two of the spades' width

Greased the clutch switch bullet connectors by the frame neck (LH side), was able to make out most of the crankcase breather once I stopped relying on the parts manual depiction. Need to take the airbox completely off to visualize it completely...I stopped at replacing the filter...found that one of the screws holding a side panel on went MIA. Surprisingly, sourced those M5 flat nylon washers online from WalMart for cheap..with free shipping.
-
1
-
-
Pushing 11,000 miles, I decided to put the knowledge I've gained from the forum to good use. New rubber, front and rear, and...voila...

Didn't bust a thing. Best tip was to relieve the fuel pressure by separating the two electrical connectors coming out of the fuel pump (2004, internal) and turning the engine over briefly. Didn't do my homework, though, cuz while I have a new fuel filter I don't have the fuel pump gasket.
Does anyone know the purpose of these threaded fasteners on the "spine"?

And one more....this is by the battery. Purpose?

While the tank is off I'm thinking I'll take advantage of the battery tender pigtail and run a line to the front for a GPS. Be nice to configure this as a sport-tourer for road trips.
-
Rear tire installed, valves adjusted (we'll see just how re-usable those elastomeric gaskets really are), and front wheel off for a new tire. Interesting process for axle removal (type I per the manual). Glad I had a 30mm socket and found that the steel bar in the tool kit which I presumed went thru the holes in the axle to worry it out was way too large.
Went a bit anal on the washers used on the two middle bolts going thru the head guards. Their OD wouldn't quite fit. Mr. Dremel to the rescue.....
-
1
-
-
Oh..and adding Al foil to shop inventory.....
-
I've gone this season with these:
https://realgaskets.com/product-category/motorcycle/moto-guzzi/
No leaks, but the recommended installation torques for the sump are pretty low. Had to buy a new torque wrench that I felt could do it reasonably accurately.
Doing off season maintenance at the moment. We'll see how re-useable they in fact are!
-
This is the kind thing that goes on when the Sport gets stranded on the lift. In another thread, there was a post remarking about the weight of the V11 rear wheel and rear drive. Might have been a shock thread, or maybe a build thread (?): " . . . think of how much work the shock has to do just with the unsprung weight . . . the whole thing must weigh close to xx." (or something to that effect.)
So, using a bone fide Fairbanks-Morse Physician's Scale, here is what I found:
(early V11) 4.5" rear wheel/ Pirelli GT 160 (1/4 life left): 35.5 pounds / 16,1 kg
Reardrive/ posterior shaft half/ axle/ fasteners 21.5 pounds / 9,5 kg
Gear oil (370 ml Redline SP-Lightweight) 0.9 pounds / 0,4 kg
57.9 pounds / 26,3 kg
Obviously, the later 5.5 inch rim will be heavier, as will 170 or 180 tires as well as other tire types.
You can always lighten it up like I do using sawdust instead of gearoil. Cuts down on those pesky leaks, but be sure to use only Western Cedar (or Eastern Red Juniper, in a pinch). Gives off a lovely pine scent above 100kph . . .
Very timely....
Just this AM waded thru the shims, spacers,and bearings associated with the rear tire replacement...don't know where tomorrow will take me but have the maintenance check lists at my side!
(Looking up the density of Western Cedar to nail the spec'd volume for the plain vanilla gearoil.)
-
1
-
-
Ditto
-
I'd stay away from 3 day weekends. How about 12 May? 19th?
Thursday night - Sunday morning. Seville Hotel?
Agreed on the 3 day weekend keep out zone.
Sometime before and NOT including Father's Day weekend are my $.02.
-
We’re going to hit the museum tomorrow and the bike show (Norton Commandos) then skeedaddle our of here, hopefully before the rain. Still has been a great trip and looks to be an interesting finish.
Sent from my iPhone using Tapatalk
Have a safe...and dry...return!
-
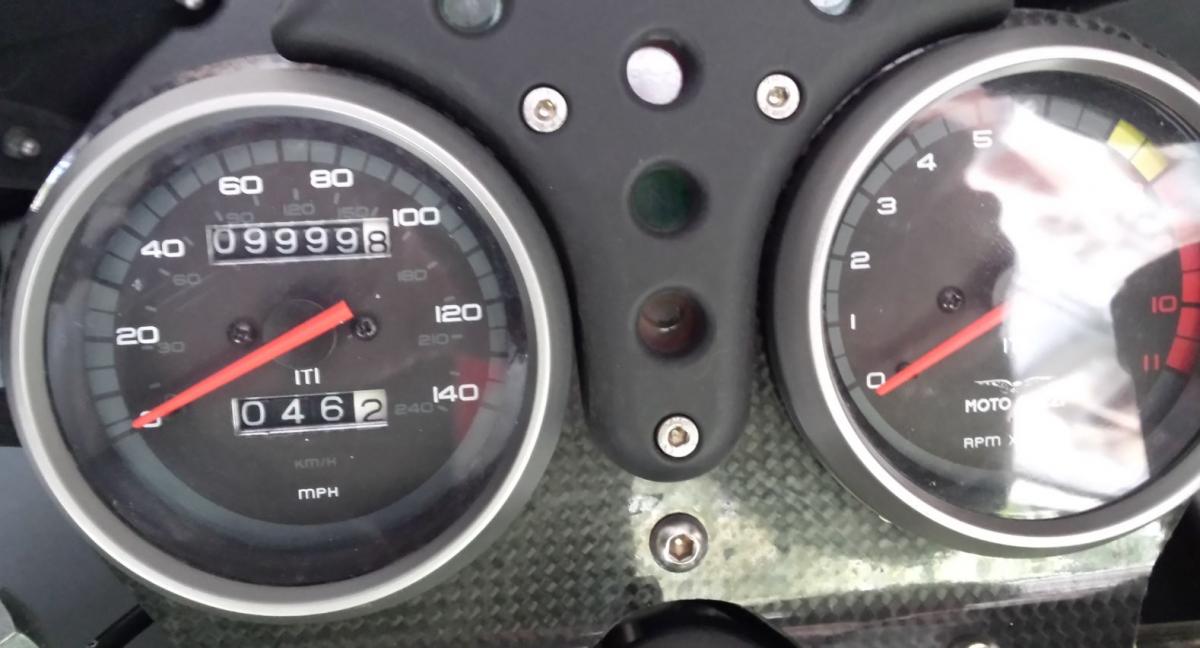
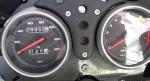 Could have celebrated the incipient milestone on the commute to work earlier this week, but was a lot more fun sport riding in a most gentlemenly manner today....
-
2
-
-
I have one of these...or something very similar...on the 916. Unobtrusive, and..as a side benefit....can verify the bike's radiator fan is functional when it changes from green or amber at idle to a flashing red.
-
Seriously, y'all?
No one in the entire world can source an EPDM 3mm square section O-ring seal (30mm ID)?
http://www.hitechseals.com/products/O-Rings-met.asp
PN 30031 is 3mm x 30mm ID. Context of the listing leads me to believe a square section/EPDM could be available.
-
Thank you!
-
FWIW, I had an erratically running/stalling motor in a bike which I had convinced myself was thermally related. Couldn't figure it out, sat down in the shop and stared at it for a few minutes..ok, ok..a lot of minutes....and the answer was right in front of my face. I had covered some tubing with a braided shield and the sharp ends had chewed through adjacent wire insulation of conductors in the signal path which fires the spark plugs.
-


 Wow.
Wow.
Okay, I Done Did It ...
in 24/7 V11
Posted
Enjoy...and welcome!