
Tinus89
-
Posts
342 -
Joined
-
Last visited
-
Days Won
6
Content Type
Profiles
Forums
Events
Gallery
Community Map
Posts posted by Tinus89
-
-
10 hours ago, gstallons said:
And what year is your bike ? These are coming out of the "pocket" ?
Yeah these were in the back of the "pocket". Good to know maybe is that when I bought the bike, the actual pocket liner was missing. I installed that myself. So maybe something has been inside that tail.
9 hours ago, docc said:Tinus89's Rosso Mandello is 2001.
And, yeah, what are those? The was nothing plugged into the connector on the left? And those yellow wire loops . . . from a previous owner?
Nothing plugged into either connector. The yellow wire loops were indeed. Your questions are already telling me this is fairly special, so I may actually have to go and trace the wiring after all.
8 hours ago, gstallons said:How similar are/is the wiring to all the other bikes ? It seems like there are two wiring harnesses . Tinus89 , do you have your wiring diagram with your owner's manual ?
Nope, I never got the owners manual with the bike, so no clue on the wiring harness.
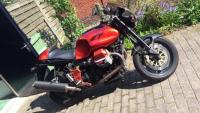
I don't know exactly how similar they are. My bike is a '01 with a short frame (red frame length) but with a black colored frame.There is a small button on my steering damper mount which obviously is not original, but does not do anything either. Possibly the bike has been fitted with an alarm system in the past, or PC?
I will go and investigate in the coming days and report back here.-
 1
1
-
-
5 hours ago, 4corsa said:
So you literally just spun it clockwise and it came out? Did you push or pull while turning? You didn't have to take anything else apart? Why did you have to remove it?
Literally indeed
 .
.
Because I removed the rear cover behind the gauges to solder diodes into my indicator idiot light for LED conversion.
-
 2
2
-
-
Today I started working in removing the Tupperware party Guzzi calls a rear fender
 .
.
Without starting a discussion on whether this is the way to go or not, I am doing it in such a way it can always be restored to stock .
.
Question:
In my tail, I found these two. Out of curiosity and without extracting the entire wire loom to find out where they go, Anyone knows what these are?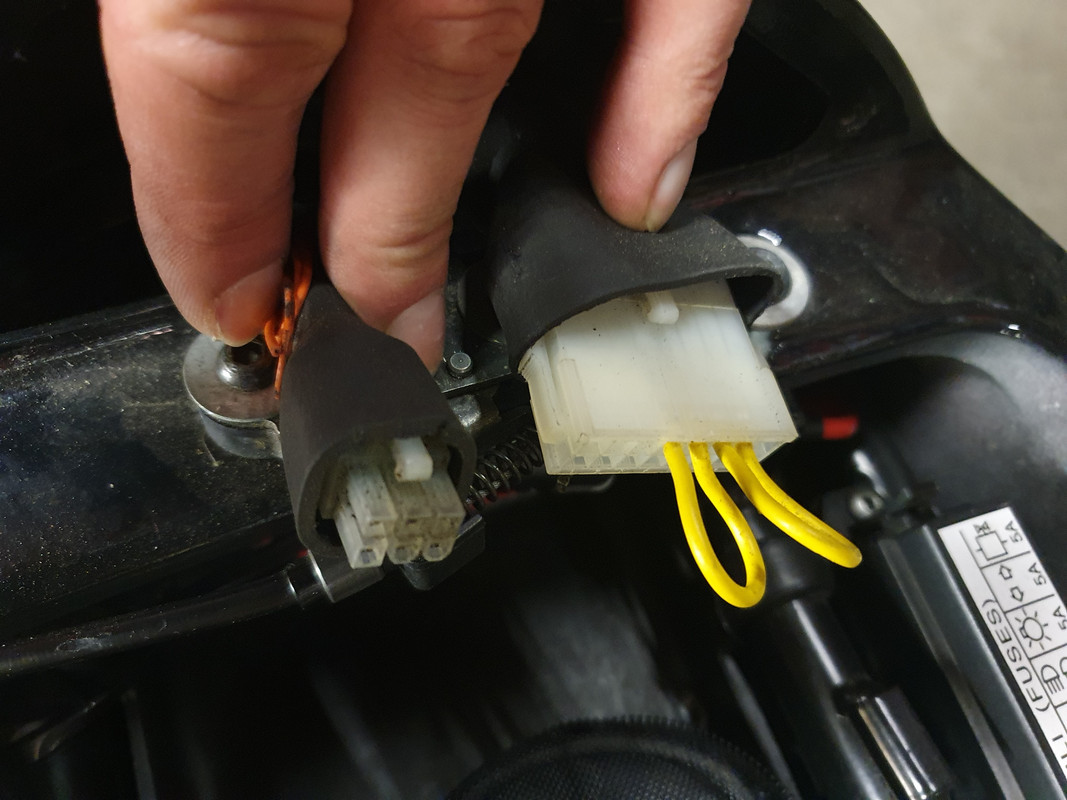
-
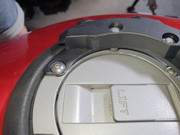
On my white face Veglia's on a 2001 Mandello Rosso (black frame, short frame) it spins cw to release. It is left-hand thread.
I know this because I actually had to remove it yesterday

-
2
-
-
10 hours ago, Lucky Phil said:
Never put off till tomorrow what you can do today. Every time I put something off it bites me in the arse.
Ciao
Normally I'm like that as well, however that meant ordering parts in Netherlands, which was in a snowstorm and therefore would take at least a week, keeping me from rebuilding her and therefore working on my other bikes due to lack of space...
As this bearing only sees minor movement, I'm fairly confident it will last another year or two (which usually is less than 5000km).
If you are referring to the rose/heim joints, I'm less confident but they are easily checked once in a while as they are out in the open.
-
1
-
-
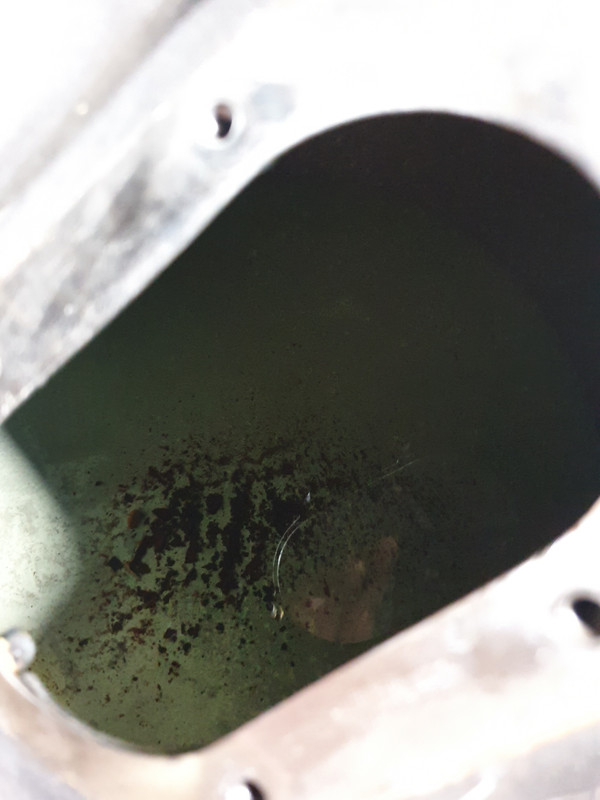
Soooo, pushing some life back in this topic.
Did my 2-yearly big maintenance including greasing of the driveshaft and checking the small needle bearing was on the list too.
Findings:
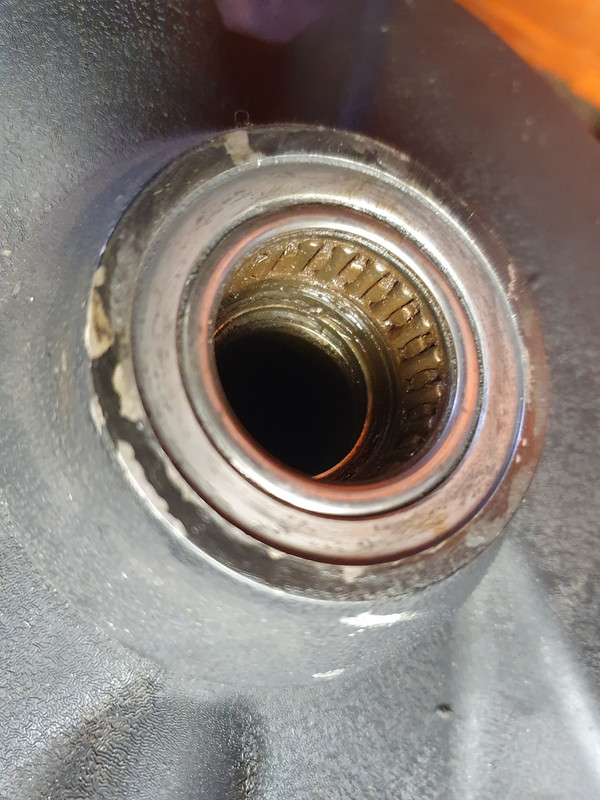
Bearing pre-cleaning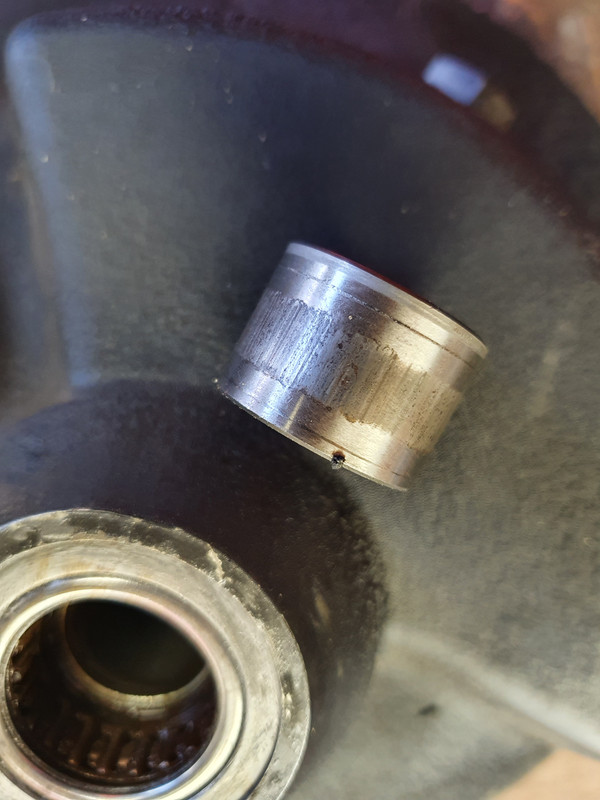
Bearing inner race post-cleaning
Bearing post-cleaning (flush with degrease & rag)I've considered cleaning up the inner race even more using scotchbrite/sandpaper, but voted against it for materials loss reasons. I've regreased and remounted the bearing for hopefully another 2years of service.
Question: should I expect to change this bearing in two years time? Or should I not expect it to last this long?
Also in the same subject/region: I've discovered I have some feeling play in the rose joints of the reaction rod on my bike (the lightened "sport" version of aluminium). I'll most likely have to replace that next year as well...
-
1
-
-
My V11 had a Yuasa YTX14-BS in it when I bought her (2nd hand). This worked perfectly for 4 years (plus the time it was in there before I bought the bike) and then died. No leaks, nothing.... My bike is stored in a no-heated-non-insulated garage.... On the Ctek trickle charger once a month.
-
1
-
1
-
-
Have you read my edited post two posts up? My explanation was fairly complete, right?:)
-
1
-
-
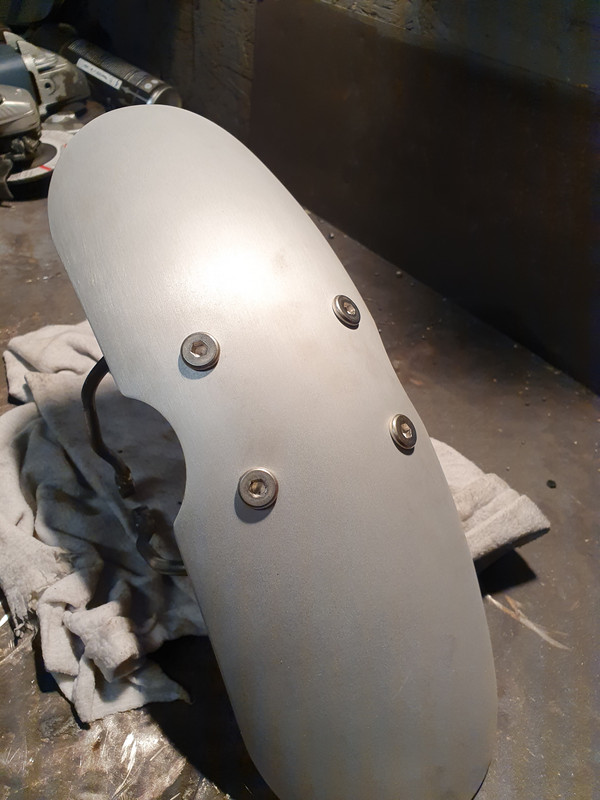
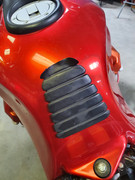
So the front fender is brushed aluminium, which I like. The rear one is rolled aluminium. Any idea how I can get the surface finish on the rear fender close to the front one?
-
15 hours ago, Chuck said:
That'll buff out.. but if you would want, they are rebuildable. Cheap.
Already have a new one installed. The old one was damaged beyond the outer races of the bearings and I did not want to try and resque it with the risk of hairline cracks or anything like that...
-
Yes indeed, the tank is big. I don't mind. Keep in mind the goal is a scrambler (less need to look fast compared to a cafe racer), it does not yet have shocks installed (yes to fotoguzzi, I will add shocks) and no fenders & exhausts yet. Also no carbs & filters. Adding all those will add to the body of the total bike and make the tank look smaller again. I'll update once I have those installed with another picture:).
Thanks for the tip on ACF-50, I'll buy that.
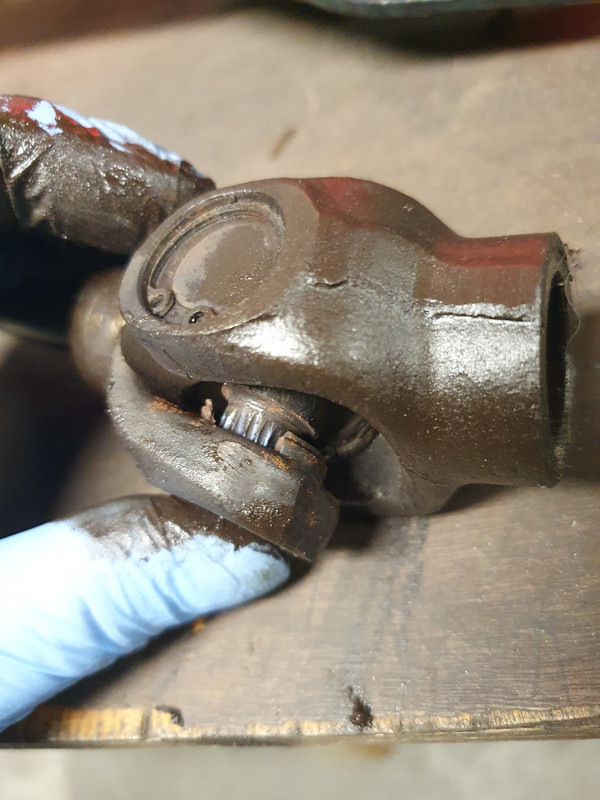
Also maybe nice to share: rate my u-joint. Discovered upon removal of the rear swingarm, did not notice anything during driving....
-
 1
1
-
-
Hi all! I have been FAR too quiet here, apologies for this! I'm checking in with an update on the build, which I should have done more. Apologies.
On the carbs, I will have them ultrasonic cleaned in the near future and have bought new choke plungers and a seal kit.
I know some people may very much dislike what I have done to her so far, which is OK, but do remind yourself that this started life as a hideous white Florida, so anything is an improvement....
I also have a question. I was thinking about keeping both mudguards in bare/brushed aluminium. How do you keep that looking nice?
This is the front mudguard:
[
-
1
-
-
Me neither... The Motoplat have long gone and been exchanged for Carmo Electronic ones. PO did that.
-
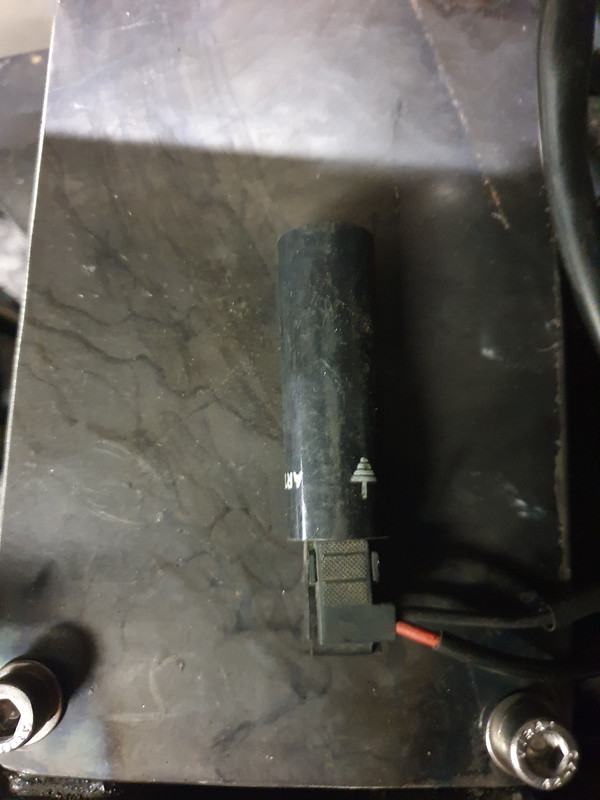
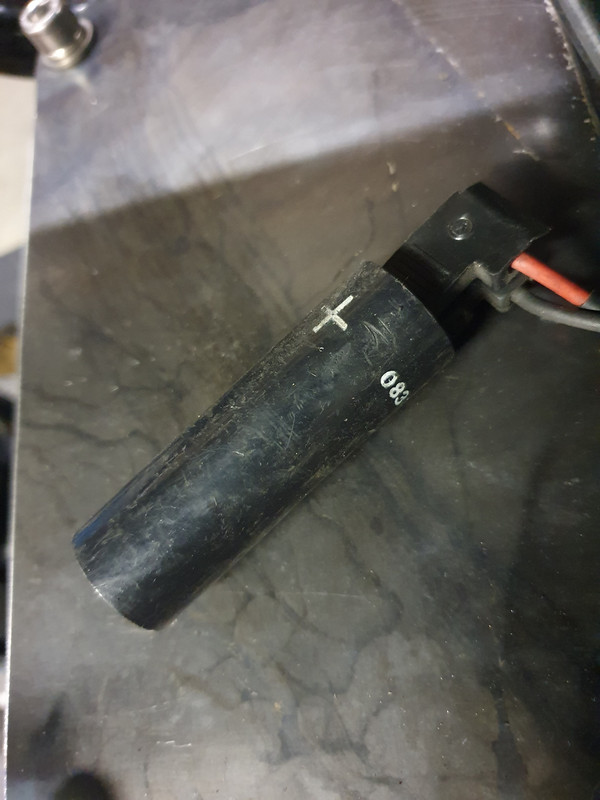
8 minutes ago, docc said:
Just to clarify, I am pretty sure this part is on Tinus89's V65 Florida and not his V11 . . .
I JUST edited the initial post to clarify this indeed... Part on my V65 Florida.
All it states on there are the letters "ART" and "083".-
1
-
-
Awesome...
Anyone who can shine a light on which part this is and it's function? I can't locate it on the wiring diagram...
Edit: it is a part on my V65 Florida, not the V11...
-
Thanks for the answers! It is now clear to me that my know-how of low-voltage DC systems is far to limited to fully understand the mechanics behind this, but my question on fooling the system has been answered.
I'm also not aware on how much the charging system on a V65 Florida (smallblock) is similar to that of the V11. I do have another question regarding the electric system on these bikes, but I need to take a picture tonight first before I can ask. Will update once done.
If this topic needs to be moved to "older models" for any further, V65 Florida questions, please do so.
-
Hey all,
I'm asking this not specifically for a V11, but it does apply to one as well, hence I am still posting this in the Tech Topics section instead of the motorcycle-specific one (older models in this case). Please move the topic if my "bending of the rules is not appreciated"
.
If I were to consider installing a Li-ion battery on my V11 (actually in my V65 Florida build), there is a chance the output of the regulator will be too high for the Li-ion battery. Where an AGM likes to charge at 14.5-14.8v, most Li-ions charge at a maximum of 14.5, preferably less then 14v. Normally the solution is a different regulator with a lower voltage output, but that is expensive.
BUT, could I also solve this issue by building some resistance between regulator positive and battery positive, such that the regulator reference voltage is e.g. 0.8-1.0v higher than the actual charge voltage to the battery? This way the regulator would charge at 14.5, but the battery would actually see 13.5v.
Am I thinking too simplistic? Or would the current flow (20-25A) make it impossible to find a suitable resistor? -
Indeed, please support the engine on the front when you do this.
It is doable by rotating the front subframe forward, BUT. I did this and snapped the inlet of the fuel pump right off. You don't really feel the resistance of the hose and it is very brittle.
-
1
-
1
-
-
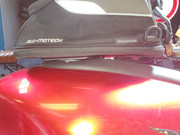
I did it on a 2001 RM with (soft) chinpad. I'll upload my pics and learnings tomorrow, now time for a beer first
Edit: So yeah, I bought a SW Motech daypack and Aprilia tankring (don't know which one, but it originally fits a 2001 ETV 1000 Caponord).
When installed directly, the chinpad prevents the bag from locking into place (as expected). So I made spacers (9mm) to raise the tank ring straight up. The bag fit perfectly! However the fuel filler cap would not open anymore, it hit the tank ring as it was now raised.
I removed the rear spacers and cut down the front ones (made from 8x1mm alu tube) to about 5-6mm of raise, essentially putting the ring on a slight angle. I then ground down the plastic on the inside a few mm in order to let the filler cap pass, as well as some of the metal ring underneath.
Keep in mind the bolt holes in the filler cap are recessed 6mm, so the actual length of my 8mm OD spacer tubes is 11-12mm on the front.Some pics:
-
2
-
2
-
-
I have managed to order these at https://www.schellen-shop.de/ for my Aprilia Caponord.
Do not forget these normally come with NBR o-rings, which does not do well with (modern partly-ethanol) fuels. They sell replacement Viton o-rings, suggest to order these and replace prior to installation.
I'm considering these for my V11 as well on the next tank removal, as my fuel tap is sh*t as well.
-
2
-
-
Out of curiosity (I am not experiencing any netative effects from the exhaust system), do you connect up the crossover connections using a sealing paste/gun gum?
-
13 hours ago, daviscr5 said:
1. After a few miles with the wick up, I slowed down at an intersection and the bike just completely died. I decelerated normally as I approached the stop sign and the bike completely cutout. I re-started it with a push of the starter and a blip of the throttle. I accelerated away without drama. The bike did this one more time at a different intersection. Died, re-started, then operated normally. Thoughts?
I've had these exact symptoms when hot. It seemed like coming down in rpm, she picks up just too late again and dies. Start again and she fires right up.
Does your idle rpm vary a lot from warm to hot? Because mine did. After normal riding for 30min it was 1250rpm, but after a spirited ride through town (lots of stop and go, lots of accelleration) or coming off the highway to a stop, she went down to 1000rpm, which she does not like to idle at.
I've solved this by mastering the Decent Tune Up as quoted by docc. Took me 3 attempts to get right, but the problem has been away for 2 years now.
On the shifting: indeed, sometimes happens to me as well when I ride too "sloppy" or "lazy". Take some time for just those shifts and it will get better. Mine does it now once every 10 rides or so, which does not bother me anymore.
-
1
-
-
Here is a picture of a well-maintained, indoors-kept CaliVin tank inside....
-
 1
1
-
-
Replaced the tank protection pad as it was letting go. Had a lot of doubts about the position of the new one, but chose behind the seat and am happy with it.
Old:
New:
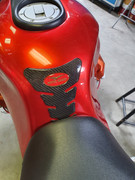
There was surprisingly little discoloration of the paint underneath the pad.
-
1
-
What did you do to your V11 today?
in 24/7 V11
Posted
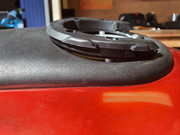
Did not get the multimeter out as I did not intend to remove these connectors, but I did follow them. The small one indeed goes to the unused button on my steering damper bracket, of which I took a picture for your entertainment:
The other one goes into the loom as well as to either relay one or two.
So it is fairly clear to me this indeed was a connection for an alarm, which has been disconnected. I suspect the two yellow wire bridges are the actual connections the alarm electronics would make when deactivated.
I think I will leave it as is, since my bike is running fine. Or do you guys disagree?
To entertain you guys again, I have a small riddle for you. What is strange on my rear tire, except for the fact it is almost worn?