Buzzard
-
Posts
63 -
Joined
-
Last visited
Content Type
Profiles
Forums
Events
Gallery
Community Map
Everything posted by Buzzard
-
Seems like a right nice fella, an enthusiast to be sure. Lots of nice bling on his Guzzi. Anyone familiar with his speedometer. The drive is capped on the RH side of gearbox, so it has to be an electronic unit.
-
If you want to to take the shock and swing arm out then you may want to look at something like this which you could use on the bar inbetween the pork chops. I built a rack out of 1 1/2"x1/4" strap steel that does much the same thing as this BikeTek stand. I use it with one of those large floor jacks with a 2'x 2' pad which raises up. Very stable. I would have bought this BikeTek if I would have known about it. The only misgiving I might have with it is the overall stability, due to lack of size of it's base. It is a very neat arrangement for working on the Guzzi, front or rear. I do prefer the rear swingarm lift for oil changes, nothing in the way of the intended work area. I just checked on eBay, the BikeTek lift is available for about $130 incl shipping. I imagine I would bolt the lift to a piece of stout plywood for steadiness, hate to have the bike roll forward or back while in the air. The ad states that the yokes are adjustable for width and heighth. Good for up to 13" width, the Guzzi is about 12 3/4" between, so it might just fit.
-
Stefano, Like you, I had to get a V11 LeMans to satisfy my lust. I had multiple starting problems. I ended up eliminating the On-Off switch, and the clutch switch, shorting the leads going to them. Bikes I had in my youth never had this stuff, and I survived. I did leave the sidestand switch, consequences of riding off with the stand down bother me. I also moved the fuel pump out from under the tank, where it resides above the LH cylinder. It cooks there, causing vapor lock. No problems since. If you have the time and inclination, build ten or so of the stands, and I bet you could sell them on this site!
-
I, too, spent awhile on FAQ looking for a "Good Dealer" reference, and didn't find one. Maybe it is on this site, but I didn't find it. I seem to own vehicles that require mail order parts (no local dealer), and have often overlooked really good sources of parts and accesories. Hence, my question. I do value the experience of the members of this site. I also deserve a poke in the ribs on occasion.
-
Isn't there a FAQ for this? "Harper's, Moto International, etc. etc." - did you even try searching this question? It comes up constantly... It may be in the FAQ, but situations change, owners change, the internet has changed things. I was looking for dealers who currently offer excellent mail-order parts service. If my question bothers you, please ignore it. But it must be hard to pass up a chance to set some idiot like me straight, huh?
-
Walt Disney goes to Hooters?

-
I am hoping to get some recommendations for Moto Guzzi dealers in the USA. I live too far from any civilized place to have a local dealer, and have to use mail-order for parts. I want a dealer who stocks most parts for the V11, and happily ships. A toll free phone # is a plus, as is knowledge of the bikes, and a pleasant attitude. Who is good?
-
Jeez, a thirteen dollar washer - what an idiot! I don't think my bike has such a washer. I felt good knowing about the spacer between the wheel and drive! Any chance you could give that washer a measuring (thickness, inner, outer dimensions) so's I can get the $.75 version?
-
Can you be more specific as to "going towards the bike"? I may need to do that if I end up stranded on the roadside. Certainly. There are two wires heading to the clutch switch, and they have push in (bullet) connectors which are located beside the frame, just behind the steering head. You may have to remove the tank to access them. If you disconnect the two push in connectors, two wires will be going to the clutch switch, and two will be going into the bikes wiring harness. Take the two going into the bikes wiring harness, and connect them with a short piece of wire, or strip the insulation and twist them together, and then insulate them, if this is an emergency. This will simulate the clutch switch making the connection when the clutch is pulled. But, it most likely will be possible to just tighten the sleeves on the female connectors, so they grip the male parts tightly, and assuming the clutch switch is itself OK, this will end the problem. I think that by percentages, these connectors being loose cause more no-start problems than the other potential causes. Take your right hand and curl your fingers, then take your left index finger and slide it into the curled fingers. This is what the bullet connectors are like. They are made of copper, or an alloy of, and if not tight, they don't make the connection. The sleeve part(your right hand) needs to be tight on the bullet(your left index finger). With repeated heating and cooling, vibration, and the elements in general, the sleeve just gets loose. This is not to say that relay base problems, or other electrical failures, are not the cause. But those loose connections to the clutch switch cause such intermittent trouble, and clear up whenever you move the bars left-right, wiggling the connectors. You can look at the relays connectors, and see if the spades are being gripped by the connectors in the base. They should leave a little scratching on the copper colored spades where they slid in. Also, if in a no start condition, with the seat off, wiggle the relay gently and see if it makes a difference. It will actulally take three hands to do this, hold in the clutch, push the starter button, and wiggle the relay. But that just may pinpoint a bad relay connector. I guess you could zip-tie, or use string, to hold in the clutch lever, if by yourself. McGuyver would probably use a shoe lace. I remember that on my LeMans, I could hold the clutch lever in, hold the starter button on, and swing the handlebars back and forth, and it would generally start. By doing this, I was wiggling the connectors going to the clutch switch. Hope any of this helps. You will feel good when you find the culprit. It is good to be able to have some confidence in your bike, knowing it will start.
-
Any ideas why a new relay would fail after 2 weeks? Any ideas where I can buy a new relay other than a Guzzi shop? It may not be the relay. There are several safety items in line, electrically speaking, before the starter moves when you push the button. Most often, it is the clutch switch, or more accurately, the bullet connectors alongside the frame, right behind the steering stem, which get loose. The clutch switch has to show the clutch lever pulled in(a closed connection on the switch)before the starter circuit will complete. With open connections at the bullet connectors, no starter. You can follow the two wire loom from the clutch down to the frame, and tighten the sleeves that the bullets fit into, and no more problem. If the switch is bad, you can short the two leads(the ones going toward the bike), and the starter will work again. I have had this problem, I know it well. Also to be considered, but less often the problem, are the on-off switch, and the side stand switch. With a new relay, I wouldn't look at it again without checking these other items. Good luck!
-
To my experience, the problem is the slide in bullet connectors, where the sleeve portion of the connector is wallowed out to too large a size, not making contact with the bullet part. I suspect that heat under the tank may even contribute to the sizing disparity.
-
Concerning the no-start issue, I have a solution, if you truly trust yourself. I eliminated the clutch switch, and wired around the on-off switch, simply by shorting the leads going to them. My on-off switch proved to be the culprit in the Guzzi cutting out as I cruised down the road. For all the time it took me to find the problem, I have never forgiven the nasty switch. The clutch switch has this awful ability to leave you embarassed in front of the guys you are riding with, and frustrated as well. I know. So it went away, too. I'm old enough to have ridden bikes for many years that didn't have these government mandated safety items, and never rocketed into the parked auto in front of me. I have, up to now, left the sidestand switch. Taking off with the stand down could get ugly, and it has not yet offended me.
-
Concerning the seat, I took my V11 seat and reshaped it. Very simply, I took off the seat cover and very carefully flattened the foam with a hacksaw blade, taking some off both front and rear. I then took a power orbital sander with 60 grit paper in it, and smoothed the foam, rounding the edges and so forth. Set the whole thing in the sun for a few moments, and stapled on the seat cover again. Getting rid of the forward rise in the foam is very kind to your private parts, and levelling the rear part gives you the full use of the rider portion of the seat. It's a cheap fix until you can afford the $400 or so a professional job will cost.
-
Have you recently over lubed the speedo cable? The oil will leak out the angle drive and ooze down the case. Don't ask how I know this.
-
It would be interesting to see what someone did to your forks. Internal parts can be expensive, and hard to find. You have to decide on a plan of action. I would think that there would be someone in your area that is competent to deal with these forks. Other than that, some pictures on this site would help all of us here to give an educated opinion. Knowing exactly which parts you are in need of would aid folks who have those parts to offer them for sale. I would think that some of the better Guzzi dealers would have some of the parts, up to, and including, complete forks, if contacted. I would certainly want to know for certain that I needed new forks before replacing them. The adjusters on top move a peg underneath the cap, this peg has a long hollow rod that fits over it, and the other end of the rod moves the actual valving in the internals of the fork. When turning the adjuster, the rod moves down or up about 6mm, usually moving a tapered valve needle. There isn't much more than a small o-ring that keeps the oil fom getting past the adjuster screw. Most generally, oil shouldn't be up there when the bike is upright. That is, when the oil level is correct. If I were you, I would definitely get the forks to a shop that works on these forks, has worked on these forks, a Guzzi or Ducati shop, that sounds confident that they know what is in these forks. Or send them to a suspension shop that does revalving, and knows Marzocchi, and let them have at it. I bet some on this site can recommend such a shop.
-
Roy, there is no way to accurately do the fork oil change with the fork legs in the bike. You need to remove the fender, wheel, brake calipers, and slide the legs out. It is a good idea to loosen the top cap while the leg is in the bike. With the fork leg out of the bike, and adequately supported, remove the top cap by unscrewing it from the cartridge rod top. The spring will then be easily removed. The cartridge rod will ease down, not to worry, you can lift it up, it won't disappear. (While this far apart, you can check and adjust spring preload if you please.) Now you can pour the old oil out, pumping the cartridge to help extract as much as you can. I like to spread out some news papers to lay the springs and other parts on. Cleanliness is absolutely required, no dirt or debris allowed in the fork. As far as oil volumn and viscosity recommendations from the owner/shop manuals, they are to be considered as starting point. There are manuals on just the forks, and they go into the various aspects of tuning the fork. Everything is changable, to get a desired result. Spring rate, spring preload, oil viscosity, oil volumn, and the height of the forks in the triple clamps, are all things you can easily change. The actual valving of the forks, shim stacks and passage diameters, are more invoved changes, but doable by the home mechanic with some knowledge of what to do. With the spring out of the leg, all the old oil out that you can get out, you may begin pouring in the new oil. By the way, cartridge fork oil is pretty special stuff. It is formulated to meet criteria such as lubricity, surface tension(which affects foaming, or lack of), compatability with other components(seals, wipers), viscosity retension under stress and temp changes, chemical stability over time and use, and so on. Buy a good brand of fork oil. Pour the oil in until you see it rising to about six inches below the top rim of the outer tube. Now exercise the cartridge quite a few times, until you cannot sense any air in it. Now carefully fill to the level you have chosen, say 110mm. I measure with a piece of hard wire, say a piece of coat hanger. I will mark the wire at 110mm, or bend it at 90 degrees with a 110mm leg, insert it into the fork, and watching with a flashlight, I can see when the wire reaches the fluid by making a dimple in the surface of the fluid. There are many expensive fork oil measuring devices to be bought, but if you aren't doing it for a living, don't bother. One tool I recommend is a large plastic syringe, with a piece of small plastic tubing attached to it, to remove any over fills. With the oil at the level you have opted for, you can now begin to reassemble the fork, put in the spring and spacer(the spacer is what provides spring preload), attach the top cap to the cartridge rod(caution here, in the middle of the cartridge rod is an extension tube that is acted on by the comp or rebound adjuster, it has to be correctly seated, look at it carefully when you remove it upon disassembly, get it back like it was originally.) It's a complicated job, but one that makes a lot more sense the second time you do it, and in a lot less time. I do have new springs ordered for my Guzzi. When I get them, I will take some photos of the installation, and try to record the process.
-
While I have not, as yet, gotten into my Guzzi forks, I do service quite a few dirt bike forks. The basics are the same. The oil level for each leg is measured, with the fork leg out of the bike, level, spring out, suspension collapsed completely, from the top rim of the outer leg to the surface of the oil within. One must cycle the fork numerous times to fill the cartridge, and work any air out, or the level will not be correct. The distance is also referred to as "air chamber", because the air volume above the oil acts as a spring, resisting the further compression of the fork as it nears the limit of it's travel. This air chamber is a tunable item, often given a range of say, 130mm-100mm, with 100mm being the stiffer setting. The oil viscosity is a tunable item as well, one can try oils from 2.5wt to 15 or 20 wt. I personally like to use 2.5wt and 5wt oils, then use the adjusters to stiffen as needed. There is also an issue of lo and hi speed damping, the adjuster affecting the lo speed, but that gets pretty complex, and varies by fork design, and how many beers you've had. Hope this helps.
-
I just installed the bar riser kit from MPH Cycles. First rate quality on the parts. It gives about two inches in rise, an inch rearward, and a couple of inches wider than stock. The kit does include a new brake and clutch hose, but does not include a longer throttle cable. You can use the stock cable with creative routing, but a longer one would be a nice addition. While at it, I installed a set of Hot Grips heated grips, can't be without. I give the MPH kit two thumbs up!
-
I doubt that anyone is going to say a Guzzi is as dependable as a Yamazuki. I will say that our local Japanese bike dealer has a full time driver who picks up stranded Goldwings, as well as other makes/models, to bring in for repairs to get them back on the road. I shudder to think what this dealer would do if a Guzzi rider needed this shops help. The guys at this shop would probably call me for help with it. They know me well. But this highlights the real issue: Can you work on your own bike? If not, maybe a Guzzi isn't the best choice. I guess that others on this forum, as well as me, are willing to tempt fate to have such a beautiful beast. I sold my perfectly good Yamaha FJR1300 to buy my V11 LeMans. What I got in the trade was the desire to ride what was in my garage, and to fire up my motorcycle habit. Bless this forum, using the info found here I have de-bugged my V11 to the extent possible, and have not had a failure since. I know, no guarantees. But then again, my dirt bike is a Husaberg, my car is a Jaguar XJS V12. I'm a glutton for punishment. I wonder if this forum should have a list of members willing to assist others while on the road?
-
Bocephus, I am confident that moving the pump out from under the tank is a good thing to do. The fuel filter isn't in the best place, either. I went with an MSD brand fuel pump, model 2225, about $100 on eBay. It is a bit smaller, making it easier to find a new home for it. I also went with a smaller fuel filter. Prior to changing the location of the pump, I was unable to stop and get going again, hot weather and high altitude. Vapor lock, I am sure. I have had no problems since the change. I love this Guzzi, but I have to say, it is a bit like a British car. It needs to be de-bugged and fiddled with before you can depend on it. Since I am a tinkerer, that may be part of the draw of the Guzzi!
-
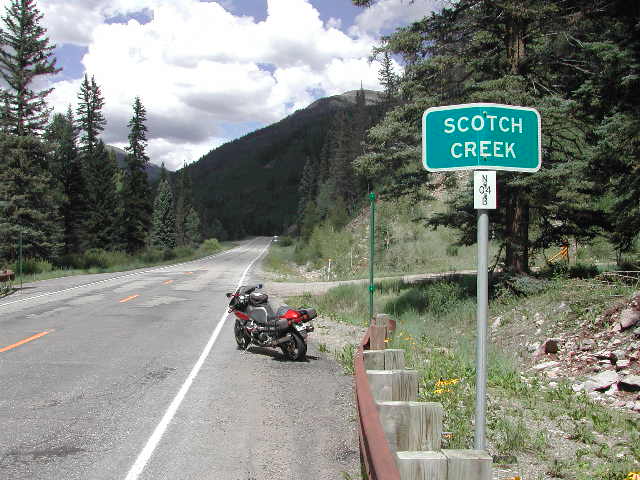
I'm wanting to install heated grips on my LeMans, and would appreciate any recommendations from others who have installed them, as to which brand/model works out best. Further, here is one of the advantages of riding in SW Colorado:
-
I recently bought a 2002 LeMans, the PO had just installed a set of Pirelli Diablo Strada tires on the bike. I have never had any exprience with Pirelli on street bikes, so I had no expectations with these tires. Three thousand miles later, I'm very impressed. They still look about like new, handle well, and have no annoying quirks. When replacement time comes, I would consider another set if price is not too bad.