

Lucky Phil
-
Posts
4,561 -
Joined
-
Last visited
-
Days Won
237
Content Type
Profiles
Forums
Events
Gallery
Community Map
Everything posted by Lucky Phil
-
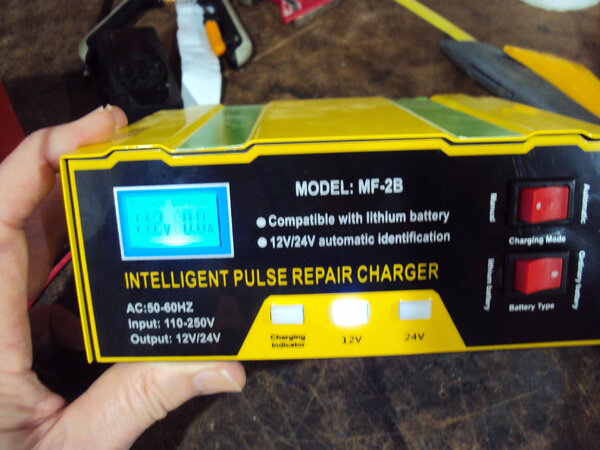
I only bought it for the Manual ability. I have "nanny" chargers that won't charge a battery if it's below about 10.5 volts which are annoying. Use this one on "manual" to get them back up to a decent state of charge then switch it to "auto" seems to work OK. Not sure about how or if the Lithium setting works on this charger as they require a constant amperage and variable voltage. Ciao
-
I recently bought this "cheapy" off ebay ( around $35AU so about 2 cents US) specifically because it had a "manual" setting. It's brought the Odyssey back up to full charge from 5 volts but the capacity seems poor. Now on manual it will punch 16 volts into it and just a few amps so I'm not using the manual mode anymore. I'm trying to drop the voltage down with a load and hit it again. It supposedly does Lithium Iron batteries as well. HMM not so sure about that.
-
From the album: lucky phils V11
-
A question for those more electrically inclined than I. My Odyssey battery has dropped it's bundle again I think due to inactivity and a faulty Reg. I noticed when I pulled it to install the Daytona engine it had been leaking a small amount of fluid. This also happened with the previous one as well and I thought I had solved the apparent overcharging with modifying the wiring to the headlight to prevent the typical voltage drop and the false voltage sensing experienced by the Reg. Apparently not it seems so I fitted the new ELE std wiring REG I already had and cleaned up the battery and installed it and it all seemed good. Looked at the battery voltage yesterday and it was 5 volts. I'll try and recover it per this thread and use it as a garage battery and buy a new one. So the question is when I do that i'll also try and buy an approved odyssey charger as well. I have an ac to ac step down adaptor I've been using on hand tool battery charges for years and it's rated as follows Input AC 240Volts 50/60 Hz Output AC 120 Volts 50/60 Hz Power 500VA I figure that this unit can support a 12 volt output 110V input USA charger and support around 41 amps current draw. Is this correct? Or am I mis calculating? Just confirming so I can look at the possibility of buying an approved Odyssey charger from the states. Ciao
-
Often especially for the round wire a small jewellers screwdriver is best or a pick with a similar flat end. A round pick on a round wire end doesn't work well although a pick or driver with a flat end on a round wire works much better. Ciao
-
Use a small pick (preferably brass) to pull the end of the wire out of the groove and with these you can carefully allow them to unwind out of the groove. Best if you can grab the end with a pair of needle nose pliers and guide it out as often the ends are just cut off and have a sharp edge which can scratch the alloy housing if not held clear. Or you can just slip a feeler gauge in there on the end to protect the housing as you uncoil it out of the groove. Hold the leg securely though and initially stick some masking tape over half the opening in case the initial action flicks it out. If its a flat section clip its a lot more difficult. Once you have one end out of the groove use a small jewellers drive and some protection on the alloy to gradually extract it . Bit like removing a tire, compress, wedge, compress, wedge. Usually by the time its half way out it can be released. Or once one end is out you can sometimes grab it with needle nose pliers and pull the end enough to get the ring to compress and feed it out. It has to be a fairly weak clip for this though. Ciao
-
I can't see the details doc but it looks like a wire not a circlip? In the video removing a large Circlip that way is just horrible. You almost certainly distort the clip so it cant be re used and at the same time bur up the edges of the groove it seats in. Big clips like that are tricky to deal with but here's a tip. The component in the video can be held down on the bench with a pair of simple padded QR carpenters clamps so you aren't chasing the thing all over the bench while dealing with the Circlip. Or you can use another methodology. I would have used a pair of straight pliers and when you get a portion of the clip out you just slide a loose feeler gauge down the side of the clip to hold it out of the groove and repeat if you need to. The clip needs to be compressed as much as possible so it clears the entire groove and then you extract it. Its often not that easy but a little patience and technique and you can definitely do it with more skill and finesse than that bloke. I'm honestly amazed at the level of skill and workmanship people put on the net for the world to see and not be embarrassed. Skill levels and standards out there are VERY low. Ciao
-
Yes a video on how to NOT remove a Circlip. Ciao
-
Or a RAM unit. Ciao
-
A mistake. Ciao
-
I personally wouldn't be doing that. Ciao
-
Looks like brilliant stuff but I bet it costs a gazillion dollars and you need to buy a whole roll. That's the usual scenario. Ciao
-
To answer the original question, I think I covered this in my improving the shift thread didn't I? In any case it should be done on the bench to give an even travel to the mechanism in both directions and eliminate/reduce overtravel in the system. It's not an adjustment for pedal travel or a fiddle to improve poor shifting performance. Ciao
-
Yes, why I'm not a fan of oil pressure gauges on a Guzzi or any other bike for that matter. The complexity/ risk of failure outweighs the application and just gets you thinking about things you probably don't need to. Ciao
-
Without a doubt. Ciao
-
Someone posted images here a little while ago of the 2 clutch types viewed through the timing hole in the crankcases so you can see the differences. I have engines with both so could probably provide images if the others can't be located. Ciao
-
Ok well maybe 24 hr Araldite then. There is probably better but if availability is an issue. As an aside I used to maintain Air Vanuatu aircraft a few years back. Ciao
-
You can from memory buy a decent Chinese repro version for like $60US or something so why bother? Chuck might chime in as I know he's bought one along with others. Check this ebay item 373086095240 Or https://www.mgcycle.com/index.php?main_page=product_info&cPath=37_159&products_id=4893 Ciao
-
I think you've left out cooling. Head temp is a direct result of combustion temperature and cooling efficiency (for many various reasons, like airflow and OAT in an air cooled engine and those and other variables in a liquid cooled engine plus oil flow and oil cooling in some cases). It's a complex equation with a lot of variables. Ciao
-
Sigh. Ciao
-
It's as simple as a batch issue docc, same as the crinkle finish cases. Some fall off and some don't. Ciao
-
I take a reading straight off the header pipes while it's idling. Don't really know why, or what real good it does just convenience. If I'm looking for engine temp to do the CO adjustment I take it off the area near the engine temp sensor. Ciao
-
It's generally called a "rod end bearing" or spherical rod end bearing. Ciao
-
For obvious reasons. Ciao
-

Need some guidance - V11 Lemans vs V11 Scura vs V11 Sport
Lucky Phil replied to bhattman's topic in 24/7 V11
After the short frame bikes they got fat, porky, and ponderous. Real men with big balls ride the "short frame". Old codgers tend to go for the fat lardy long frame version. Ciao


