All Activity
- Today
-
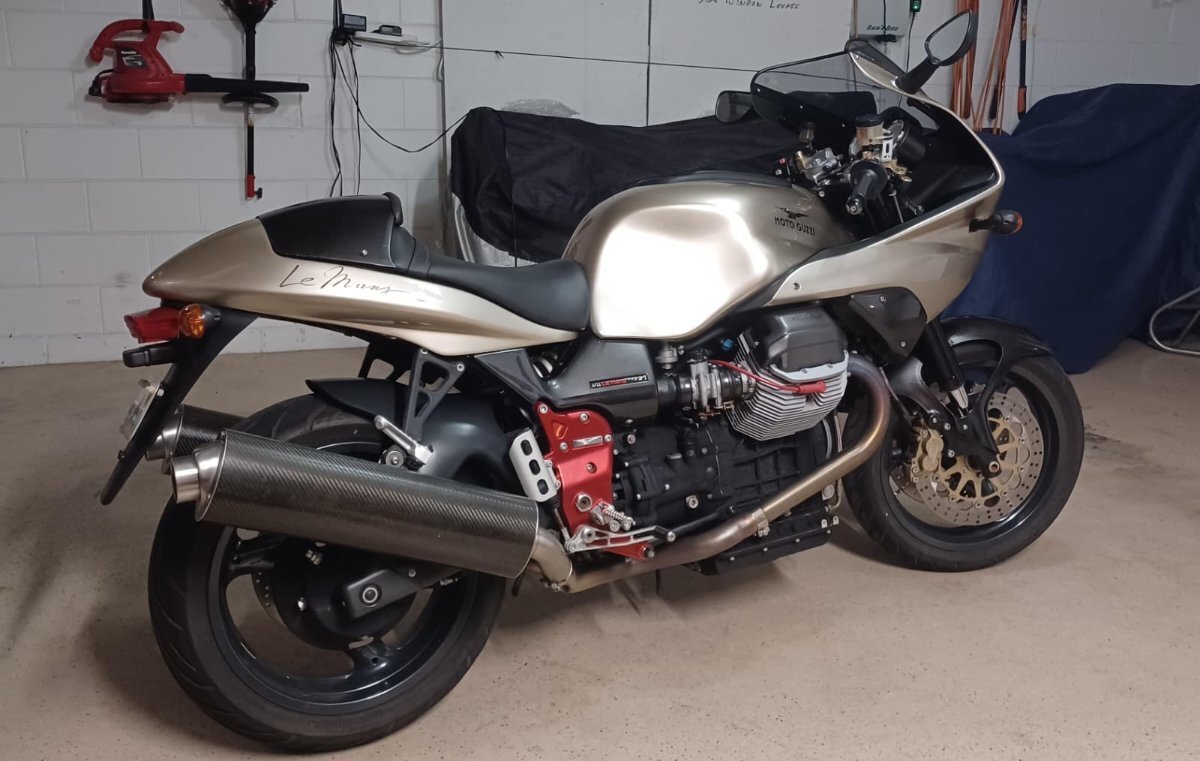
For the fools, including myself, who follow the owner's manual, but occasionally check for updates out there, and I include looking at car's as well, not just motorcycles. So far at 60K miles of use, the Norge hasn't blown up yet due to improper oil usage! Based on official documentation and owner discussions, Moto Guzzi has not changed the oil recommendation for the 2008 Norge. The manufacturer's specification has remained a high-quality 10W-60 synthetic motor oil. The original recommendation At launch, the official factory recommendation for the Norge was Agip 4T full synthetic 10W-60 oil. The reasons for this specific viscosity include: Air/oil-cooled engine: The air-cooled V-twin engines run hotter than liquid-cooled counterparts, and the 10W-60 weight helps the oil maintain its viscosity under high thermal stress. Higher film strength: The engine has specific characteristics, such as a dry clutch, that necessitate a high film strength oil for longevity. Updated guidance While the fundamental recommendation has not changed, the brand of oil has. Since the original Agip oil is now more difficult to find, Moto Guzzi recommends the equivalent Castrol Edge 10W-60 synthetic for its modern big-block engines. Considerations for older models Some owners of older Norge models have noticed changes in oil API (American Petroleum Institute) ratings over time. Specifically, some older formulations of Agip oil had a more desirable SG rating. Because newer formulations may have different ratings, many owners prioritize finding a quality 10W-60 synthetic oil with a higher concentration of zinc and phosphorus to protect the valve train. However, the 10W-60 viscosity remains the most critical specification.
-
Thanks, Phil. I'm aware that what is in the owner's or workshop book isn't likely to be the absolutely ideal option. Too many factors involved, and born out by having seen different recommendations for the same bike in different translations of the workshop book. To be quite honest, I'm also not looking for the absolute best solution for each of my bikes, but rather a solution that will cover all of them adequately. The old Guzzi bulletin seems to confirm that I can get away with one weight for all three. The reason is very simple: I don't have room to be keeping supplies of different oil for each motor and gearbox, and I also honestly can't be buggered. If I can find one that fits all without any of them exploding, I'm happy. I know that wont appeal to your engineer's sense of what is right, but I believe I'm justified in seeing myself to be following "the guidance for the wise", i.e. I consider it to be an informed decision. Hope I'm right.
-
On the main ground: looking for tha same approach you used on the timing chest ground: clean, remove any paint, DeOxit ( maybe a "star" lock washer to dog the connection in).
-
Update from yesterday evening: Plugged relay 2 back in. Battery terminals read 12.7 key off, 12.6 key on, 13.0 when I took it off the tender about an hour ago. Blue wire to harness 12.4v key on Red/black wire to harness 12.2v key on Re-attached harness black regulator ground. (Because the wire was not long enough to reach the regulator bolt, I attached it to the timing case bolt, from where my new 10AWG regulator ground goes to the regulator case). Next, with key on engine off, the headlight comes on, horn works, neutral light on, but no charging light or oil light. Main battery ground from gearbox seems intact, but there are a few sharp bends just before it attaches to the - terminal. I could try to eliminate the bends if it is recommended.
-

best place to get red valve covers & matte grey frame plates?
Lucky Phil replied to fastaussie's topic in 24/7 V11
Funny. Phil -

best place to get red valve covers & matte grey frame plates?
fastaussie replied to fastaussie's topic in 24/7 V11
that is exactly what i want to do. i want to have the valve covers changed to red, and the footpeg plate holders to the dark matte silver colour. so the valve covers would be the only thing red on the bike, and pop, like you said...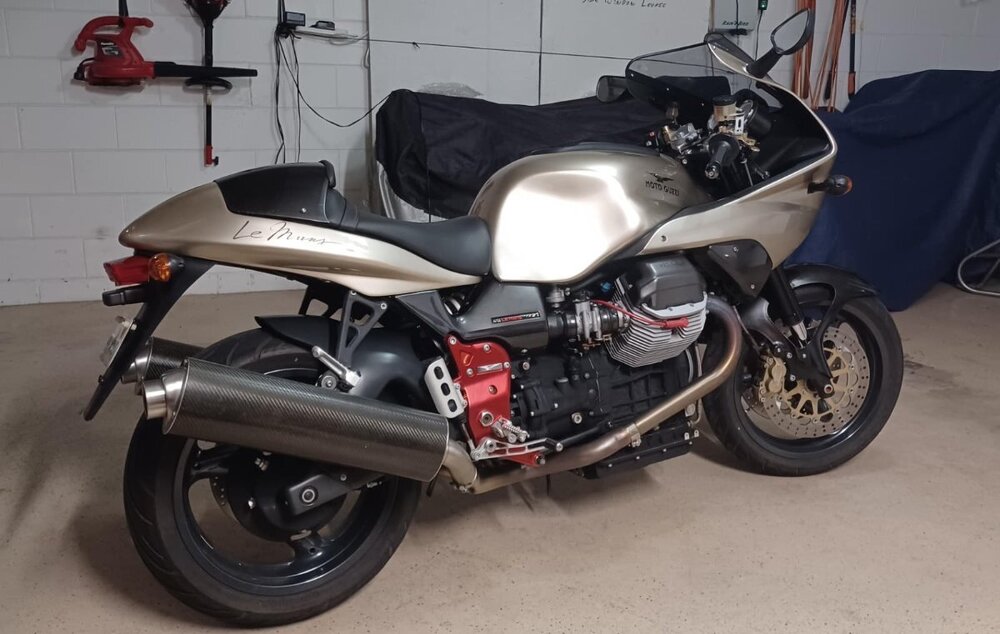
-
Relay 2 , when it is energized powers up the low fuel , oil press. and gen. lights. It powers up the tach and these lights and other components. When you install the #2 relay and turn the switch to run position the headlight should come on proving the relay circuit is working and the instrument lights mention should come on too.
-
Oh crap, Relay 2 was not installed, sorry about that. Will reinstall the relay first thing tomorrow, and redo the voltage tests on the blue wire, as well as the red/black wire from the harness. Stay tuned and thank you again.
-
 I told, y'all, already: "Boys, I'm goin' in " . . .
 - Yesterday
-
And that is with all of the relays installed? That harness red/black is the voltage reference to the regulator's black (input) wire. Should be battery voltage coming out of Relay#2 . . . edit: Both the blue and especially the red/black wires look rather kinked going into the back of that connector. If they are straightened, or "wiggled", does the voltage change?
-
Zero volts key off and key on, engine off.
-
I would take/post pictures but I can't hold a camera, light wiring harnesses correctly and press the button at the same time !
-
SanP , on my red frame the two red wires form one pin and they go into the red/green wire on the bike. The black wire goes down and grounds to the regulator mount.
-
Voltage on the red/black wire, KO/EO?
-
Zero volts on the blue wire. Battery terminals are at 13 volts
-
Well docc , the red/green wire is the wire that goes to F3. and I ASSUME the black wire is the ground to the battery. Let me go o/s and check my red frame to say yes.
-
I will fix this first thing tomorrow. Thx!
-
OK tomorrow morning I'll reconnect the original reg ground (leaving my new one in place) and inspect the main ground from the gearbox all the way to the battery. Then I'll see the charging and oil light come on when I turn the key. I also may fire it up and take a 5 min ride around the neighborhood to see if anything has changed. If not I'll pull off the tank. Stay tuned, and thank you again for all of your help!
-
According to wiring diagrams , the regulator has a ground wire coming out of the regulator and going to a GOOD engine ground and at the same connection a good ground going to the - post of the battery.
-
Cleaning and securing that main ground along with restoring the regulator's harness ground can't hurt. Next, we are going to have investigate the connectors under the tank.
-
Well it's intact at the gearbox, but I haven't inspected the wire all the way to battery -. I could do that if you'd recommend it....
-
This makes me wonder about the primary battery negative ground to the back rear of the gearbox. Has that been seen to?
-
Yes R-G is the old reg to batt + charging wire. If I remember correctly, the black wire is/was the regulator ground back to battery -. Since I ran a new 10AWG ground from the reg case mounting screw to the timing case, I assumed I could cap the old ground wire. I could of course reconnect it if needed.
-
Okay, voltage reference wire is intact, then. What are the two wires truncated (nutted) in the image? Red-green would be the charging back to the battery through Fuse#3 you bypassed. But the black wire? Even with the case grounded to the timing chest, there would be nothing wrong leaving that regulator ground connected to the battery negative terminal.
-
1.1 ohm with DMM set at 200 ohm 0 ohm with DMM set at 2K ohm