Leaderboard


Popular Content
Showing content with the highest reputation on 12/15/2020 in all areas
-
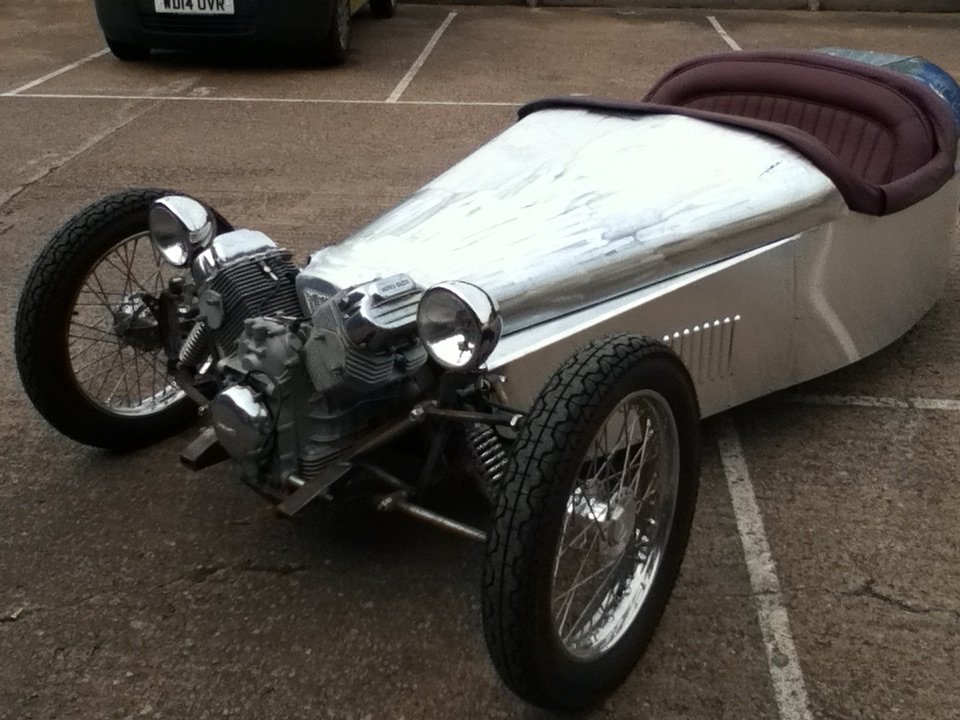
Thanks for your replies guys. Here is the unfinished project
 5 points
 -
If Guzzi is the Side Show, what does that make us?2 points
-
A recurring theme with running issues of the V11 Moto Guzzi is that a decent tune-up often effects an amazing improvement. It is The First Place to start. This past weekend, we collectively tuned two V11 in the garage of the South'n Spine Raid. Both bikes sounded fabulous after and the members have given good reports on the results. While the *suggested* procedure is fresh in my mind, I figured to get the basics down. There are several ways to achieve a tune-up on a V11, some more time effective and some more elaborate. This one strikes a balance that is approachable by most owners with a little effort and a few tools. ___________________________________________________________________________________________________________________ 1) Valves/ Plugs: When cool (after the bike is off ~45 minutes), remove the plugs, adjust the valves to 0.006"/0.008" (.15mm/.20mm), then gap and install fresh plugs. 2) TPS Baseline: Using a Casper's TPS Breakout Harness (or equivalent), disconnect the right throttle linkage, release the upward facing slotted screw for the high idle cam, back out the difficult to reach 2.5mm hex-drive right-side idle stop set-screw, and clean the throttle butterfly, throttle return spring, and the underside of the throttle bodies (if necessary). It is critically important that the throttle plate is COMPLETELY closed and all of the above have been seen to! Many say to even "snap" the throttle closed a few times (within reason) to seat the plate fully closed. Others "zip-tie" the throttle plate firmly closed. Otherwise, you can simply apply a firm, constant pressure with one hand to ensure the plate is COMPLETELY closed. This indexes the throttle opening to the entire fuel-ignition mapping and cannot be over-emphasized. Loosen the TPS fasteners only enough to tap it or budge it slightly, it is VERY sensitive. Changing the TPS fasteners to standard hex drives (from the factory Torx) simplifies the process (M4-0.7 thread pitch x 17mm long). With a quality voltmeter, connect the positive to the violet/black wire and the negative to the violet (the yellow is not used for this setting). Adjust the TPS to 157 mv (most accurate over the factory value of 150 mv). Realize the TPS value changes when it is tightened down, so just repeat until you're in range. Reconnect the throttle linkage and set the high idle cam so it just nudges the throttle when engaged [we will recheck this after the last step, "6) Idle Speed"]. Leave the right-side idle stop backed out. (Some have found using both idle stop screws gives a more stable idle.) (EDIT/May 2019): Having had two TPS go bad after 50,000-62,000 miles/ 79.000-100.000 km, it is simple enough to check the TPS when it is hooked up to the DVOM (Digital-Volt-Ohm-Meter) . Switch the DVOM to resistance in the 2000 Ohm range with the key off. Slowly and smoothly open and close the throttle body and observe for a smooth transition of increasing and decreasing resistance from the potentiometer (TPS). If there are jumps and glitches or drops and variations in the resistance, the TPS should be replaced. Be certain to set the DVOM back to > DC voltage < before baselining the TPS in millivolts or you'll think something is terribly wrong! 3) CO Fuel Trim: Using guzzidiag software interface (or equivalent), connect your computer to the V11 with the two necessary diagnostic cables. Available from several sources, be certain the OBD cable is properly FTDI chipped. >> Check the Fuel Trim/ CO. If it is deep in the negative double digits, adjust it to zero. That may not be the exact AFR, but it will be immensely better than negative double digits or more (values of -27 to -128 have been reported!). Adjusting the Fuel Trim/CO with Guzzidiag requires the motor to be at operating temperature; simply follow the prompts on Guzzidiag. (The CO Fuel Trim can also be set with TunerPro at any temperature, but that's beyond this basic procedure). >> Don't worry about any other shown values at this point. >> Lambda (oxygen sensor) equipped V11 must have the Lambda sensors turned off in TunerPro. 4) Air Bypass Screws: Turn the upward facing Throttle Body air bypass screws in all the way and back them out one full turn. It is quite common that the tips of these become very sooty along with the passageways. If you have the time and inclination, remove them and clean them and the passageways with some throttle body cleaner. Watch your eyes, Eugene! (There is only a captured O-ring on them and no spring or tiny ball waiting to exit the universe!) [edit/May 2023: These O-rings should be inspected due to their age. Deformed, torn, or damaged O-rings should be replaced.] 5) Throttle Body Balance: Bring the engine to operating temperature. Connect a suitable Throttle Body balance tool like "TwinMax," manometer, alcohol/Hg sticks or the equivalent to the vacuum taps at the junction of the heads. With the white Nylon knob on the left, balance the vacuum at two or three thousand RPM or so (not idle). Make certain the white knob does not interfere with the shock's reservoir or anything else. See that the throttle linkage rod does not foul the speedometer drive on the right side. If you open and close the bell crank of the left throttle body, be certain the cable seats itself back in the groove. [Consider a lock nut against the white knob per Dave Richardson/Guzziology.] Some like to fine tune the idle balance using the air bypass screws, one in a little, one out a little to show good balance at idle. 6) Idle Speed: Let it idle and adjust the 2.5mm hex-drive left-side idle stop set-screw (easy to get to) to put the idle where you and your V11 are happy. Technically 1050+/- 50, I find mine *happier* a little higher (around 1150-1200+). Don't worry over the *degrees of opening* or the TPS idle voltage; seriously, just put the idle where the motor idles nicely for your conditions and liking. Once Steps 1-5 are set, you can put the idle anywhere you want. But you cannot start here. [Be certain the throttle cable has the appropriate freeplay to not pull on the throttle linkage in the idle position. Finally, recheck that the fast idle cam is not making contact, but just nudges the right throttle linkage when engaged.] ___________________________________________________________________________________________________________________ That's a "decent tune-up." I prefer to tune *early & often* finding that even at 5,000 miles (8.000 km), the V11 runs sweeter after setting the valves, fresh plugs, and a throttle body balance. There is a lot that could be added here, and many well informed owners and technicians do things differently, yet this fairly concise procedure has been shown to give very satisfying results with reasonable effort. As always YMMV, for informational purposes only, and no small furry animals were harmed in the testing procedures.1 point
-
seems pricey and left outside https://atlanta.craigslist.org/nat/mcy/d/jacksonville-2001-moto-guzzi-rosso/7247320403.html1 point
-
The spherical bearing is worn. There should be no linier movement in the bearing. Spherical movement yes, linier movement no. Ciao1 point
-
I say we are "The Gladiators!"1 point
-
Mine has always clicked up and down in its bracket too (but I never use it)1 point
-
I remember mine was the same from new. You could take it off to check for wear1 point
-
As soon as you got going enough to scrub off the rust?1 point
-
Before pulling off the slave I'd confirm that's the area the sound is coming from.1 point
-
 Hello. Yes MY 2003 but made in 2002.1 point