PhillipLarsen
-
Posts
145 -
Joined
-
Last visited
-
Days Won
2
Content Type
Profiles
Forums
Events
Gallery
Community Map
Everything posted by PhillipLarsen
-
@Lucky Phil yes, so true. Had my CBX get too far over in my ground level basement while maneuvering it into its spot. Used my body to prevent it from lying on the floor and managed to get my phone out to call for help! They sure laughed at me! Six years ago at 65 I was looking after my personal 4 aircraft and Heli’s (Glasair 3, R22, C120 and Mini 500) 16 cyl., 14 motos 34 cyl. , and 2 autos 14cyl., and was working 50 to 60 hours per week at my job. Don’t know how I did it. Now at 71 down to 7 bikes and 2 autos and need to make that number smaller as too much work!
-
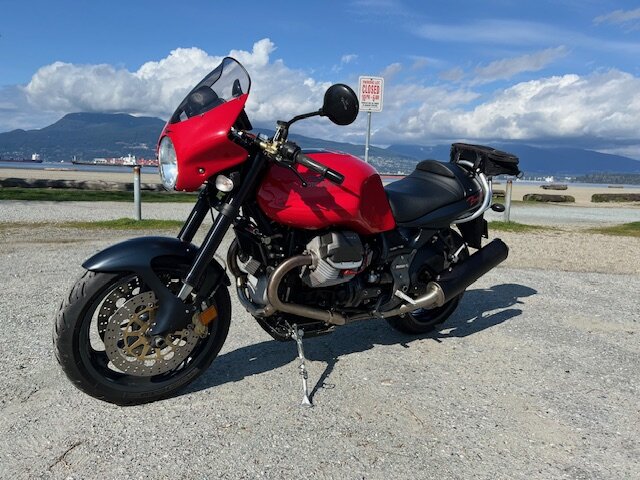
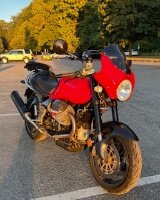
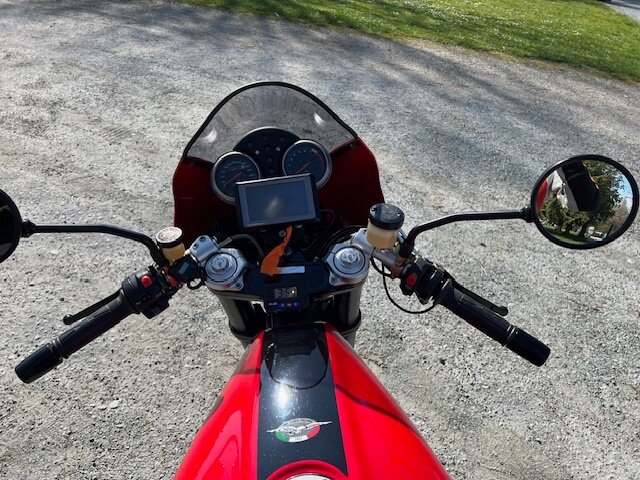
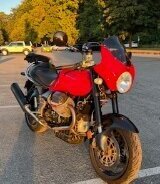 This is how my 04 Ballabio sings to me about being Special and demanding my Attention
 -
Did it run well previously? What has been changed since then that could cause running rich? Intake somehow restricted, mice moved into air box or something else restricting air box ? TPS has some issue?
-
Maybe, but because it is an Italian Mfg product I think they would not apply, but even so I face a 12 (5 +7) % federal and provincial sales taxes.
-
Love that low mileage like new Ballabio, wish it was closer to me as I’d love to have the two of them, just 93 sn’s apart. one with original Ballabio bars and mine with the Lemans bars and upper triple plate.
-
And thanks @Pressureangle, I will get the injectors serviced at next opportunity when can have the bike down without affecting my riding plans, just to ensure there are no hidden issues. There are several companies that service gas fuel injectors here in the Vancouver area.
-
Thanks Docc, Peter and Phil for your advice. Will do more checking to try corner the issue. The air filter is new, but fuel filter is not. I just happen to have a new one on the shelf so I will ride out the full tank of fuel in next couple days, pull the tank off and change it, see if any change by setting TPS back to 157 mv and trying it. The TB shafts do not feel like they have any play ( bike has just approx 26,000 kms on it). I use short bolts with copper washers to close off vacuum nipples holes when not in use.
-
Update. I did not hear anything back from HMB after I advised them that the cam chain tensioner does not fit my 2004 Ballabio. Wanting to take advantage of the riding season I went ahead with using the HMB tensioner wear pad and spring on my original tensioner base. The pad is near identical and the spring as well The HMB spring had a little more resistance than the original, likely because it is new. They look identical. I reassembled the bike, using new metal gasket on timing case, hoping to again have an oil tight bike. Ran the bike, checked spark scatter at idle and the 1750 to 2000 rpm range. Very slightly less scatter but maybe 20% less. Took bike for a test ride. Same issue of popping back into air box at that rpm range whether riding or in my stand. I am now convinced this is not the issue causing misfire / popping into air box. I set everything back to Decent tuneup setting 157mv, balanced TBs, CO =0, air screws 1 turn out, idle 1250. Extensive test in stand ( use my Hartzel dyno cooling fan) and riding showed missing and popping back into air box in the 1500 to 2800 rpm range (larger range than previous), plugs showing white / very lean indication. Also ran test in stand on left cylinder only and right cylinder only. Same problem both sides. There are no leaks on intake or exhaust. All sensors are new, plugs, etc. In desperation I decided to see if increase TPS setting would help. i did it initially in large increments to see if changed. Without going through all the steps which was spread out over 2 days I found as I increased the TPS setting the range of rpm where missing and popping got tighter until it was only at 1950 RPM. One more increase and it was gone. I then worked back down until it started and went up in small increments until it stopped. Took numerous rides attempting to get it to pop or miss. It doesn’t now, no matter what I try. The end setting that makes it run so nice with as low as I can set it with out inducing popping is TPS 285 mv, balanced TBs, air screws 1/2 out, idle 1250 RPM. Plugs show medium tan at various rpm runs. It doesn’t make sense to me that this works. Could it be fuel pump pressure? Or injector condition? I am very pleased to have it running so fine, and not worrying it may pop and stall when making a left turn across traffic at low rpm, but would really like to understand if something is not correct I have put on about 300 km now and it continues to run perfectly. Will be checking fuel consumption to compare to previous levels. I would really appreciate input from others that may have any ideas.
-
I recieved the HMB Tensioner today which HMB had assured me would fit directly with no interference problems of the Millepercento tensioner. Enthusiastically I went to work on it, only to discover the same interference issue with the pad and no way to modify the base of the HMB tensioner as the interference is where the pin is attached to a countersunk screw that holds the pivot pin to the base. The HMB tensioner does not fit ($ 248 Cdn for tensioner, shipping and import tax) So I now have two new tensioners on hand, neither which are useful with out removing about 4.5 mm from the entire pad area and in the case of the Millepercento an additonal hole drilled into the lowered pad to accomadate the protruning back side of the pivot pin. The tensioner arm that rubs against the chain and the spring look to be the same dimensions as the original tensioner so I am considering to use those peices of the HMB unit on the original tensioner base. I have advised HMB of the issue and will see if they have any solution. EDIT/posted june 12, 2025: Update. I did not hear anything back from HMB after I advised them that the cam chain tensioner does not fit my 2004 Ballabio. Wanting to take advantage of the riding season I went ahead with using the HMB tensioner wear pad and spring on my original tensioner base. The pad is near identical and the spring as well The HMB spring had a little more resistance than the original, likely because it is new. They look identical. I reassembled the bike, using new metal gasket on timing case, hoping to again have an oil tight bike. Ran the bike, checked spark scatter at idle and the 1750 to 2000 rpm range. Very slightly less scatter but maybe 20% less. Took bike for a test ride. Same issue of popping back into air box at that rpm range whether riding or in my stand. I am now convinced this is not the issue causing misfire / popping into air box. >[moderator note]: subsequent TPS and tuning discussion moved:


-
Thank but unfortunately it is not just the pin but the whole pad area that need to be relieved 4.5 mm and then an additional hole for the pin.
-
Thanks Pete and Phil, the additional information is great to know. I sure don’t want to go grinding out anything before knowing if there is something important in there. While I am waiting for the new HMB tensioner I have been looking at the original one closely and it seems to me that if the spring had somewhere around 3/8 to 1/4 less coil is would provide a lot more resistance to the tensioner pad. By shortening the spring and re-bending the end that could be accomplished, but not sure how it would affect the fatigue life of the spring. Looks like Chuck and the Engineers Handbook would provide the answer. A real solution to the weak spring on the later Guzzi Tensioner maybe a redesigned spring and continue using the Guzzi Tensioner, kind of like the gear selector spring issue.
-
Update, I contacted HMB. They sell both types of tensioners, their beefed up version of the MG one and the blade style. They recomend their beefed up one, but also say the other works as well. They said that the HMB design fits exactly as the original and no case machining or grinding required. I am ordering one to see what it looks like and will decide which way to go once I have both on hand in about 10 to 14 days. Thanks Phil and Pete for your expertise. Will post the outcome in a few weeks.
-
Thanks for the link Phil. That is exactly the issue, and although they show an older model Guzzi where the original tensioner pin attaches to that pad and the newer 2004 v11 the tensioner pin just rests against that pad, the pad needs to be relieved 4.5mm plus 2.0 mm for the end of the new tensioner pin. Looks like a lot of dremel work. I am going to check if the other aftermarket tension would avoid the need to remove material from the case. If I end up doing the surgery it will be like when getting an eye lens replaced, with complete sealed protection covering and enclosing the timing case area with only the area of work exposed to avoid any material contaminating the engine.
-
Thanks Phil, will go with sealant as you recommend. Any particular type you would suggest?
-
Thanks for the info Pete. The issue I am having is with the blade off the base / pin, when I go to place and bolt the base in place I cannot as it cannot lay flat due to the difference between the plane the base mounts on and the case pad under the aft end of the pin. About 4.5mm difference.
-
Thanks Phil, I had not seen that one before. It looks like similar layout to the original but sturdier, not clear what spring mechanism looks like. I am curious about whether the tensioner against the chain is stronger than the original. I will ask for more details and whether it fits in my engine. Have you installed one of these? Any case modification required? Yes I checked the gap precisely when I put the new pulse generator in during winter Mtce and checked it again yesterday ( it is a tight .8mm) within spec. I need to take it out again to seal it as even though I put new sensor, o-ring and shims it is already seeping very slightly at under 1000 km since installed. I guess will additionally use some sealant.
-
Looking for some knowledge about installing the Millepercento Cam chain tensioner I got from MG Cycle on my 2004 V11 Ballabio (about 26,000 Km) I have read all the information I could find on this site about installing the tensioner, looked at the pictures and took my bike apart (exhaust off, Tank off, front fender off, front upper sub frame 4 bolts out and pivot forward, kick stand and mount off) all to make for easier working environment. I had tested using a timing light on both cyclinders to see if the scatter of igition at steady low speed was large and it was moving irradically back and forth at steady engine speed from just off an idle to about 2000 RPM and missfiring occationally at steady speed around 1900 to 1950 RPM. It was doing this prior to all the work (listed below) and still is. (alway when warmed up). I had set valve clearance and new plugs last fall and had only a couple rides before winter and thought it was gone, but it was not, just hiding in the cold weather! Over the winter all sensors including TPS replaced, pulse sensor replaced and gap correct, full decent tune up (and verified several times), several tried times, always the same, does it with tank cap open, no spark leak at wires or plug caps, they are like new, plugs are new, valve clearanes set loose end of range, tried several brands of fuel, etc. I now have Cam Case open, Gears (Cam/Crank/Oil Pump) removed, original cam chain tensioner removed. The tensioner is worn but not badly, the spring is very weak and takes very little force to hold it off the chain, it actually barly touches the chain with no pressure on it. Tried fitting the new Millepercento/Stucchi type tensioner, and there is a problem. The case pad that the pin of the original sensor sits against is about 4.5 mm to high so cannot install new tensioner base which is flat and sits against (over) that pad. Even if I machine (grind out ) the case pad the 4.5 mm, will also need to relieve another 2mm for the end of the pin that protrudes through the base to clear the pad. The pad height relative to the height of the surface where the new tensioner lies on is 4.5 mm different as measured from the cam case joining face surface. My question is have others installing these tensioners had to machine out the pad to install them, or am I missing something here? I will attach pictures for reference. old tensioner prior to removal, case with removed (see pad on right side), old tensioner base and new tensioner. I appreciate any help or advice on how to proceed to install this. Is this possibly not the correct tensioner? Is it normal to need to machine out the pad?


-
ANSWERED Head oil feed leaks on head side.
PhillipLarsen replied to Grim's topic in Technical Topics
On mine the nuts on the oil line were a hard to turn initially but used a little wd40 and loosen/ tighten and they loosen up. If only one is giving trouble you might consider disconnect all three ends of oil line and take the fitting with the oil line off on the difficult one and then work on it on the bench -
ANSWERED Head oil feed leaks on head side.
PhillipLarsen replied to Grim's topic in Technical Topics
I had the oil leak at both heads ( 2004 Ballabio) where the fitting attaches to the head. It was not the oil line to fitting. If you check out other reports I think that is where the leak is most often There was an aluminum crush washer between the fitting and the head. In my case that was where the leak was. It was all original 20 years old. Looked like some kind of thread sealer or Locktite on the threads. I removed the fitting and glad I did not just tighten them up as the aluminum crush washers were quite distorted from wiggling around. I replaced the aluminum washers with copper washers and used some locktite to ensure threads sealed as well. No more leak so far. -
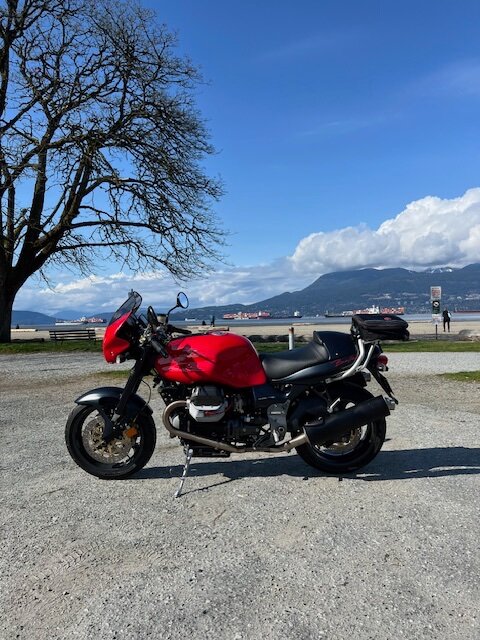
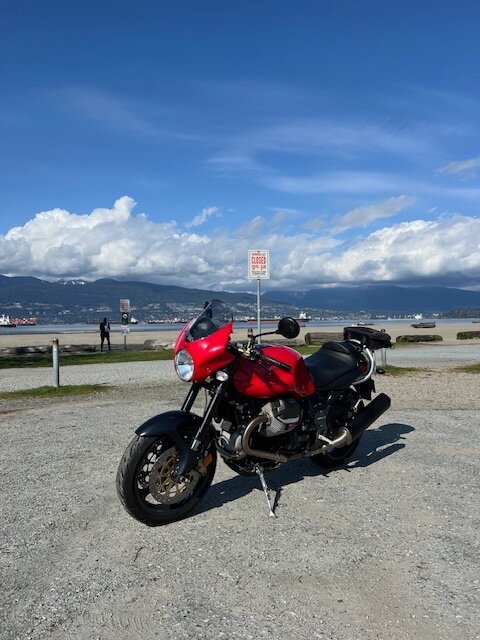
Had my first ride of year on 2004 Ballabio after completing my 20 year (approx 25,000 km ) maintenance visit. With all the work done, new tires, all callipers & master cylinders rebuilt, new brake pads, all new engine sensors, complete “Decent Tune Up”, including plugs, air filter, etc., Roper Plate installed, drive shaft removed and greased, etc. it is just like it came out of the showroom in 2004. Good for another 20 yrs/ 25,000 km. Not sure I am! What a pleasure to ride.
-
Or Forever in Blue Jeans
-
Note my spare in the picture is my clutch master on the shelf!
-
My mistake, looking back through my orders from my 20-year overhaul of the 2004 Ballabio, Powerhouse UK is where I got the caliper kits for front and rear calipers. Gotham Cycles (Ducati/Brembo parts) is where I got the master cylinder kits for clutch (12mm), front brake (16mm same as used on Ducati) and rear brake. (some are the same parts as used on early Ducati 916 I think or at least use the same internal parts). You will see all the Brembo parts (with Ducati references parts on line). If rebuilding the rear brake master be sure to order the 90-degree fitting with O-ring (comes separate) as you will want to remove it from the master cylinder to make sure no bit or residue in there. That is where mine had plugged up, leaving back brake rubbing without me knowing, destroying pads, plastic pad cover, etc. On the clutch and front brake master cylinder I add a bleed banjo fitting where the brake line attaches to master cylinder. Makes it easier to ensure no trapped air. Gotham sells these as well. The parts are not too expensive, especially the rear master. I had also bought an original Moto Guzzi supplied Brembo complete front master cylinder with all the attachment, including lever, adjuster, etc., prior to finding the rebuild kits were available through Gotham. . On the shelf for a spare now. Hope this helps.

-
I bought rebuild kits for all master cylinders and callipers for my 2004 Ballabio last year from Powerhouse Automotive in UK. You can find them on ebay and their own website. If you don’t see what you need just ask them. They had it all for me and service was fast to Canada.
-
This always makes me think about changing the lady partners daily in the summer as I move through the week (Ballabio, Stelvio, 916, CBX, Norton, 500 Turbo, 40 Indian Chief)