cowtownchemist
-
Posts
49 -
Joined
-
Last visited
-
Days Won
1
Content Type
Profiles
Forums
Events
Gallery
Community Map
Everything posted by cowtownchemist
-
Hey Mike, do you mind putting up links to the end weights and mirrors you ended up going with? I am also in the market for a similar set up.
-
Thanks all for the replies. Today I learned something!
-
The failure of this hose caused a lot of muck and grime to leak out and get all over everything under my tank. It was so bad that I couldn't even see the red of the frame. Everything looked black. My question is, when the hose is functioning properly, where does all the oil go? Is it just getting spit into the frame? Sorry if this is a dumb question...
-
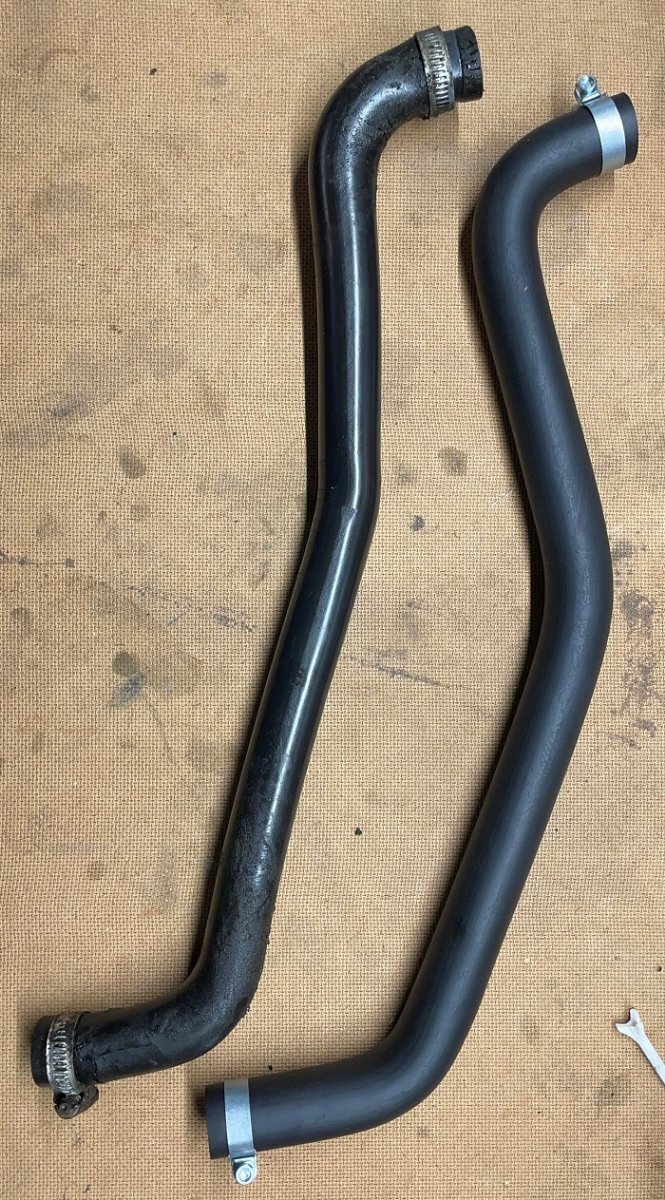
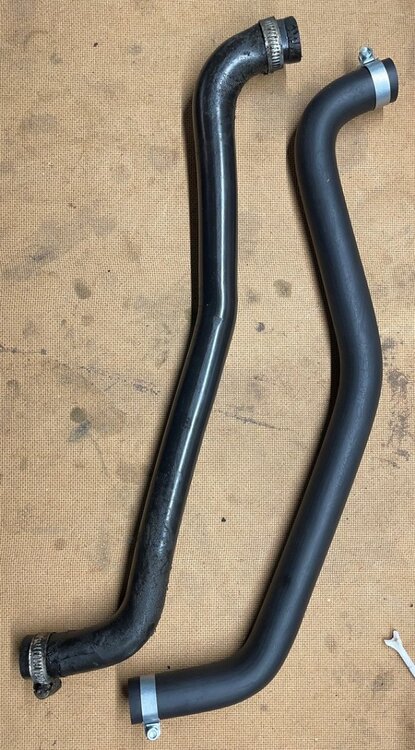
I replaced my breather hose over the weekend. Getting the old one out was pretty easy with the tank off. Getting the new one in was a struggle. There is just not much room to get your hands in there and get the right leverage to force the hose onto the openings. But after a few choice words and a little determination I got it on securely. One thing I learned is that the MG Cycle breather hose clamp is too small for the upper attachment to the frame. It worked for the lower side to the engine but I had to use the original clamp for the upper end. https://www.mgcycle.com/index.php?main_page=product_info&cPath=71&products_id=1186 https://www.mgcycle.com/index.php?main_page=product_info&cPath=71&products_id=2785 Old vs. New
-
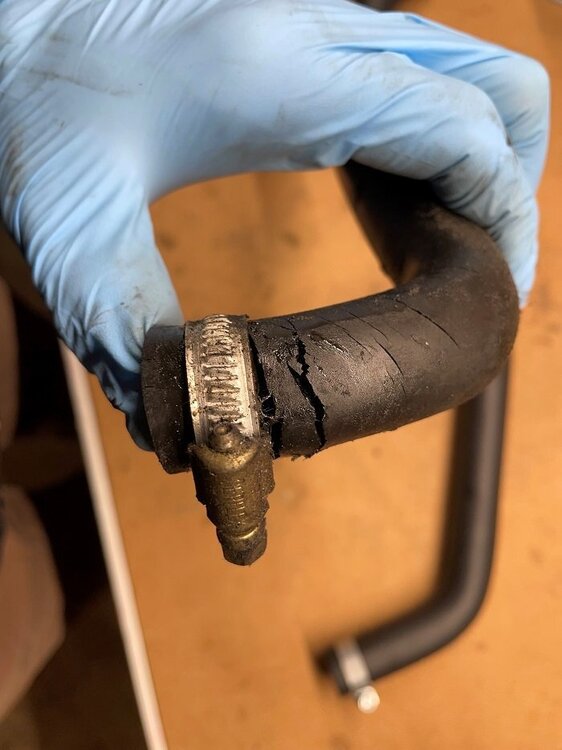
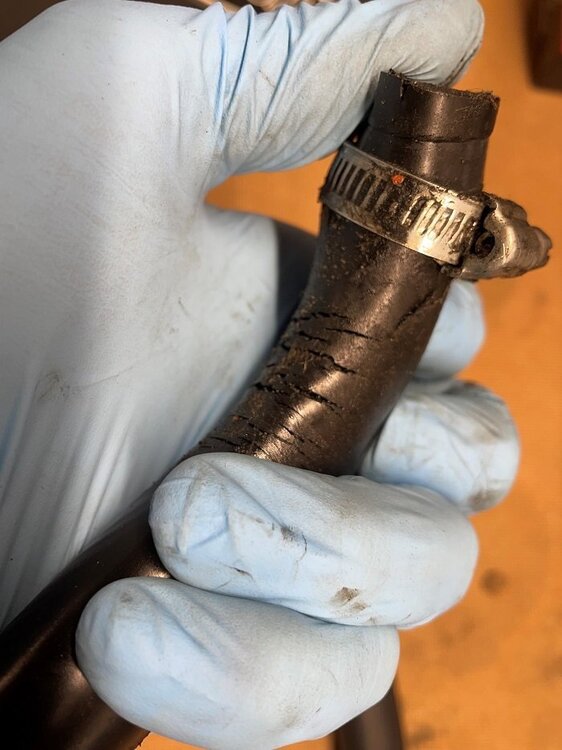
Welp, I pulled the tank off of my 2000 V11 this weekend to do my Tank-Off maintenance. Old dried caked oil everywhere under there. Traced it back to a split in the breather hose near the top clamp by the frame. That makes 4 of us recently I think. I put in my order for the parts from MG cycle today. I read that it is a bugger to reach and can tell the same just by cleaning around it. Does anyone have any tips for me that may make my task a little easier as I go at it?
-
Are you referencing the bracket for the tail tidy or the exhaust? If you are talking about the tail tidy I am most definitely interested!
-
I pay Geico $163 per year for coverage of two motorcycles. I do not have any collision coverage, only the minimum liability required by the state of Ohio. For only my 2014 V7 alone it was about $75 per year. When I added the older 2000 V11 Sport the premium increased by $100. The lady on the phone said that the older V11 cost more since it had "Sport" in the name. They must assume you will drive it faster
-
I also have an asymmetrical zip jacket! I chose this one: https://www.fc-moto.de/epages/fcm.sf/en_US/?ObjectPath=/Shops/10207048/Products/Merlin-Chester-D3O-Cafe-Moto-Lth-Jacket/SubProducts/Merlin-Chester-D3O-Cafe-Moto-Lth-Jacket-0001 This is my second Merlin Jacket. I also have a textile one which breathes for summer riding. Couldn't be happier with them.
-
I have a V7. I haven't found a specific forum for it. But I've gotten all the information I've needed from both WildGuzzi and GuzziTech forums. Mainly WildGuzzi
-
I think both. I'm not entirely sure as I haven't looked inside yet. I didn't catch that Scud had the springs and Chuck had the extenders. I messaged Velofish the other day since I bought the bike from him. He said he has already replaced the spring. So that may not be my issue. I'll dive into it this next week or two and find our what's going on in there.
-
Well, I think I may also be in need of a full V11 shift improvement including the superspring and a Lucky Phil Shifter Extender. I've noticed that occasionally when shifting up from 2nd to 3rd, I could "feel" through the shifter toe piece what may be the detents of the cog beating against the shift selector. Sometimes it takes me multiple tries to get into third, and once it wouldn't shift back down to 2nd without a lot of trying. @Chuck, do you still have some available that I can buy from you?
-
I did my valves a month or so ago. Mine did have both the S and D visible. I used the tire rocking method as one of the bolts on my alternator cover appears to be stripped and I haven't had a chance to deal with that yet. It took me a few tries with the tire to figure it out, but once you get the hang the rocking a little back, then forward it is pretty rhythmic to turn to where you want it.
-
Are you a low or high rpm driver?
cowtownchemist replied to p6x's topic in Special place for banter and conversation
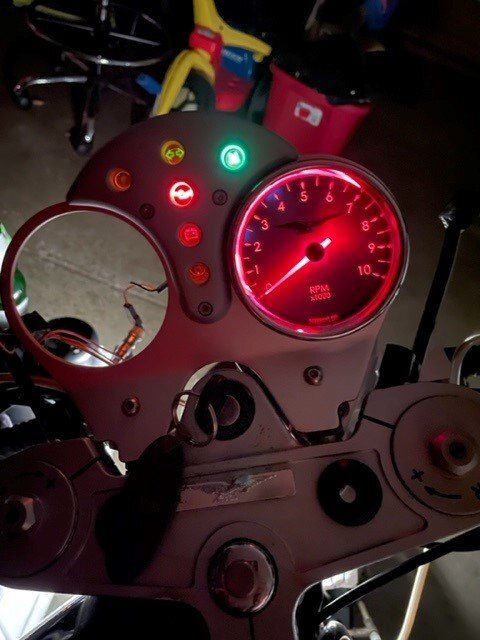
Now that I have a working tach I have confirmed that I am a high RPM rider on the V11. I typically cruise around 5000 rpm, shift around 6000 when accelerating. I seem to ride my V7 similarly. I find both bikes respond best in the 5000 - 6000 RPM range. -
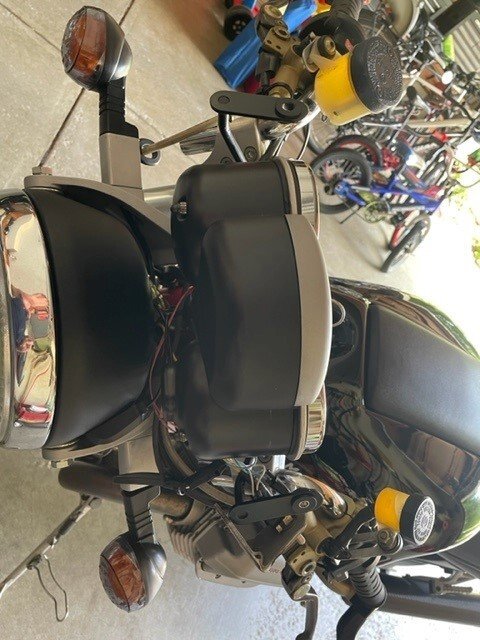
I made some touch ups to my gloss black fairing for a 2000 V11. I just used one of the Duplicolor "Universal Gloss Black" units from the car parts store. After a little light sanding and the clear coat, it looks pretty good to me.
-
I found the instructions in the FAQ section of their website. From what I read, the GPS odometers can be programmed by the user. The mechanically driven ones need Speedhut to do it.
-
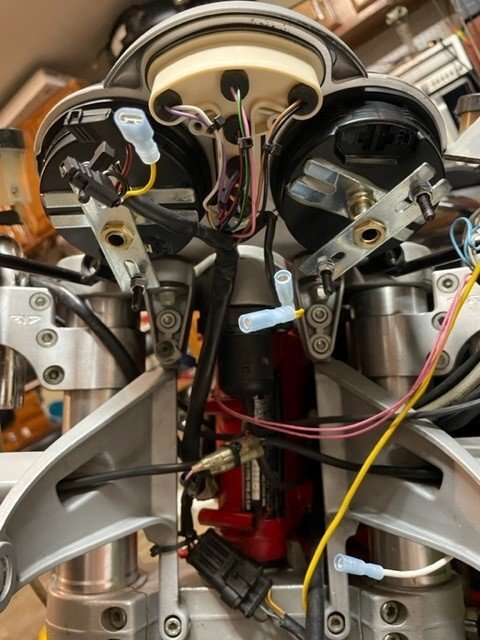
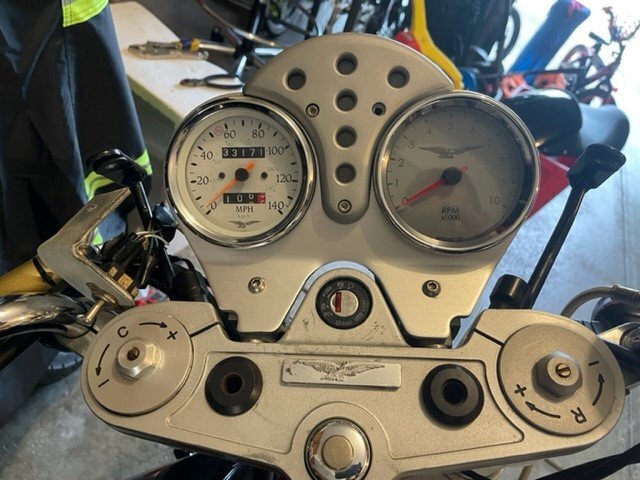
Success! I now have two fully functional and great looking gauges! After utilizing the work bench and the housing I was able to get the bolts aligned and the lock nuts tightened with some locktite. After which I was able to get the back housing on and fasten it with the original four nuts. It definitely took a lot of trial and error to get the appropriate depth of the bolts and alignment. One tip is once I was close to where bolts needed to be, I marked the back of the gauge so that I could line them back up if I accidentally moved it while adjusting, which happened quite a bit. I set the tach to 2 PPR and confirmed it was very accurate with Guzzidiag. I programmed the odometer to the same mileage as on the stock gauge. I went for a short test ride and all functioned extremely well. I still need to take out the old speedometer cable and plug it up. I received the bolt from Zoro this afternoon. Thanks everyone for the help on this task! Here are a couple final pictures. I will update with some night pics later on.

-
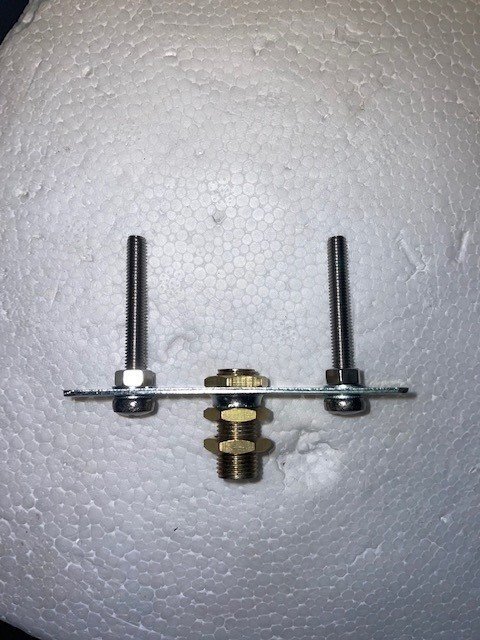
I made the decision to go with the lamp parts method in order to leave the back housing un-molested. $50, a few sparks, and some JB weld later I have the setup in the pictures below. However, I became very frustrated as I am having a really difficult time getting the screws to line up with the holes in the back housing. Also, the added brackets has reduced the amount of space to stash the extra wiring, I may now have to cut back some of the excess and redo the spade connections. Last night I got to the point where I almost decided to just go ahead and take all the lamp parts off and just go back to using the lock nuts and cutting the housing. Does anyone have any tips on a way to easily align those four mounting screws with the holes on the back? I would hope I don't have to go through this struggle any time I would need to remove the housing in the future to change a light bulb. I may just go ahead and replace all the warning lights with LEDs right now to avoid having to do it later. Does anyone have a link to the appropriate LED replacement bulb for the warning lights?
-
I have not measured the amp draw. The heated grips were installed when I bought the bike. The instructions indicate a 0.2amp power draw for the gauge and instruct to use accessory power for the main gauge power and to use dash lighting power for the gauge lighting power. When I initially powered up the speedo, its internal clock was already running and displayed a time of 5:06, not the expected 12:00 like when power goes out on the microwave. This tells me there is some internal battery for it. Also, the 4 hour GPS "memory" also alludes to an internal battery and not a constant power draw. Otherwise the GPS "memory" should be permanent. However, this is all speculation. What is the best way to measure the amp draw when both the speedo and grips are on and also the best way to measure if there is a vampire power draw when the bike is off?
-
I wired up the speedo last night. On the test it powered up and acquired its GPS signal with no issue. I used the original light wire to power the speedo lights. I already had a power line tapped into the daytime running light for my heated grips so I pig-tailed off of that to provide the main power to the speedo so I shouldn't have any interruption in the power when starting. One thing I read in the instructions, and I don't know if the older models have this or not, is that the GPS location is saved for 4 hours. In some earlier posts I read that some people had an issue with the speed needing to re-acquire the signal every time the bike was turned off. Seems like this 4 hour location save should help that. GPS QUICK START - GPS location is saved internally for up to a 4 hour period. After 4 hours it will take 30-40 seconds to acquire signal again. The jury is still out on what I will do with the back cover. I plan to make the final decision tonight...
-
You are right, the OD of the lock nuts is too much for the un-modified cover to slip over them. Even trimming off the ribs would not get it thin enough for the cover to slip over. A back-up option I am noodling is having my friend 3D print me a new back cover which is slightly adjusted to accommodate the larger diameter of the lock nuts. But I think the cover would then protrude over the metal dash plate. In order to use the original cover, I need to either trim it back or find an alternate way of securing the gauges such as the lamp parts method demonstrated on some of the earlier pages of this thread.
-
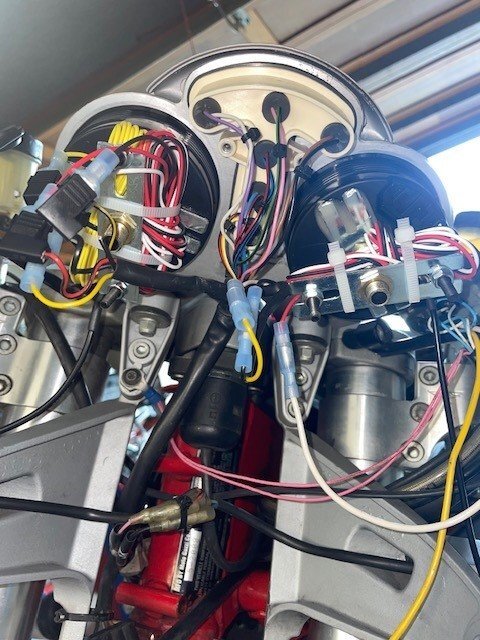
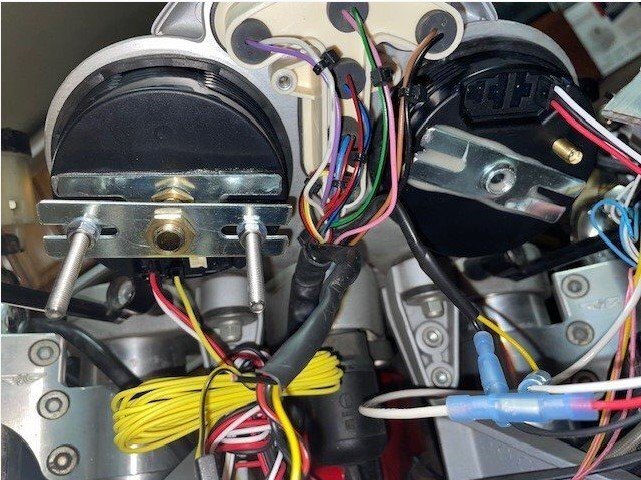
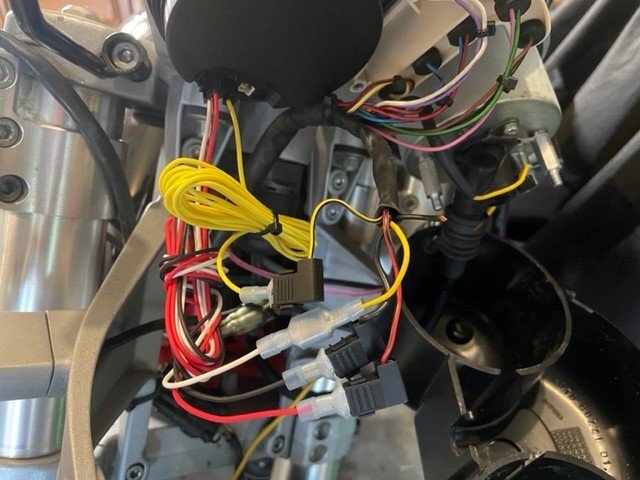
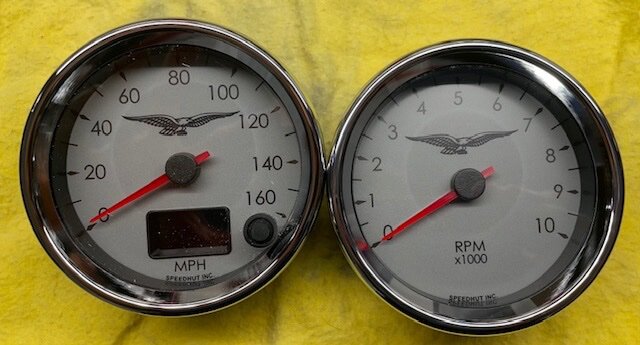
I made some progress on the installation this weekend. The wiring was a breeze utilizing spade connectors on the Speedhut wires to connect to the existing wiring on the bike. All of the Speedhut wiring fits easily into the space in the back cover. I didn't even unravel it. For the o-ring, I just cut the original o-ring/gasket and removed some of the material to leave two square o-rings of the right size. Here are pics of the new tach next to the old speedometer. The new one is a little bigger. Here is a pic of the tach all lit up! I still need to decide what to do about the back cover of the gauges. I am now leaning towards doing what previous user amstaf did and trim the "cups" to fit around the Speedhut lock nuts and then secure it using three M4 screws from behind threaded into the existing screw mounts on back of the warning light cluster. The Speedhut lock nuts secure the gauge really well. I am just worried about water potentially getting into the cups around the seal. I will probably remove the o-ring that I currently have between the lock nut and the dash and then move it to behind the lock nut so that it presses against the "cups"
-
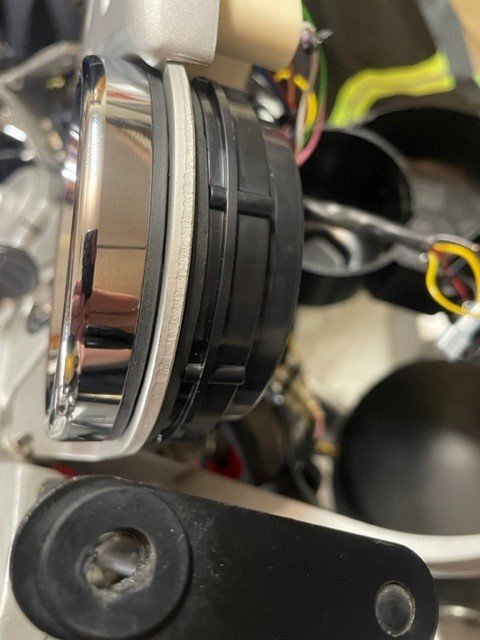
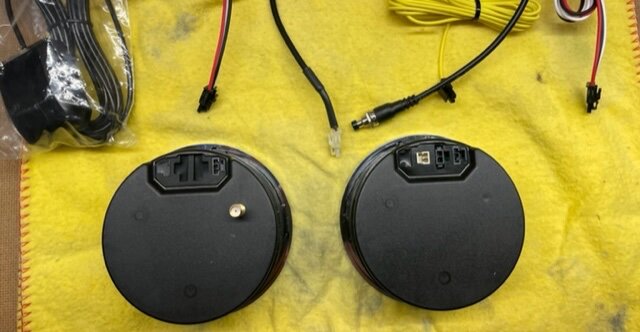
They finally arrived! Here are my speedhut gauges. The new design has removable clips for the cables so they can be disconnected during installation. Both came with the inner o-ring to help weather proof the glass seal. The bezels now have two little lock tabs which need depressed in order to unscrew them. Now I need to decide how I want to secure the back housing in the gauge cluster. I think I am going to attempt something similar to doc’s method by using the three screw holes on the back of the warning light cluster.
-
I also wear full face helmets. I have not had any issues removing the ear plugs, they have a little tab that sticks out to grab them by. Can't do it with gloves on though. One note specific to my situation is that the bigger JBL speakers on the Cardo though don't fit completely into the pre-made speaker indentations in my helmet (HJC i10) which causes them to protrude a bit and rub on my ears when putting the helmet on. When this happens, the earplugs sometimes get dislodged while putting the helmet on and I need to get my fingers in there and re-secure them. This caused me to one time push the ear plug in too far and sideways which was not a good situation. I did have a little difficulty that one time getting it back out. But I blame this on user error and my specific helmet set up. When I use my other helmet (Sena Outrush R), without the big speakers I have no issues at all with the earplugs when putting the helmet on and off. There is a huge improvement of the Cardo Freecom 4x vs the built in Sena on the Outrush R helmet. Volume, sound quality, voice communication with Siri, voice communication with the Cardo system are all far better features that the Sena does not have.
-
Has anyone tried an inline resistors with the LED turn signals to regulate the flashing? I am contemplating this upgrade and have a few of these laying around. https://www.af1racing.com/OXOF374-Resistor-Pair
-
I wear these earplugs which are great for reducing wind noise and other high pitched sounds. Its nice with the little keychain case so I always have a place to put them when I take them out. https://www.amazon.com/Motorcycle-Protection-Motorsports-Parachuting-Open-Topped/dp/B08FDH1XKL/ref=sr_1_3?keywords=motorcycle+ear+plugs&qid=1689253641&sr=8-3 I have a Cardo Freedom 4x with the upgraded JBL speakers in my helmet. I really like it. The sound for music is much better than the Sena one I have for my second helmet. The Cardo also integrates with Siri on my iphone. So I leave the phone in my jacket pocket and have complete voice control over music, phone calls, text messages, and GPS directions. Also the Cardo has a build in FM radio which is nice sometimes, but the antenna is so small that I only pick up the strongest radio stations.