Lucky Phil
-
Posts
5,449 -
Joined
-
Last visited
-
Days Won
276
Content Type
Profiles
Forums
Events
Gallery
Community Map
Everything posted by Lucky Phil
-
Maybe he's got a wooden right leg? It looks like the wear pattern that some guys have at track days. The guys that are WOT down the straight and get in your way in the corners. So they coast through the corners and when its about 10 deg off fully upright they go wide open throttle and blast past you on their R1 or whatever just in time to get on the brakes so early for the next corner you have to be careful you don't run into the back of them. Thats how their tyres wear, just off the crown and next to no wear on the edges. Ciao
-
Doesn't appear to be the case docc:) Interestingly most of the worlds race tracks are clockwise. Years ago Rob Mcelnea Gp and WSB rider came here for the Swan series in our summer. He went to Oran Park in Sydney where the first round was on an open practice day during the week. Nobody was around so he started doing some laps to familiarise himseld with the track. He was doing OK until someone arrived and pointed out to him that the track was actually run anti clockwise not the usual clockwise he just assumed. He said he thought it seemed a little dangerous,lol. BTW it was pretty dangerous by modern standards even racing in the correct direction. Ciao
-
I suspect it's psychologically determined. Most of the worlds population is right handed, often described as the dominant side. During a left had turn in a aircraft, or bike that puts the right side higher than the left, Right in the dominant position. In a car being right handed I feel more comfortable in right hand corners than left but on the bike or aeroplane its the opposite. Once again in a car in a r/h corner the left side squats and the right side rises to the dominant position. Just a theory. Ciao
-
Have you done a track day on this bike? Ciao
-
On a V11? Ciao
-
The WW2 bomber engine look? Ciao
-
Yes but the outer sections are very thin and to get enough torque to stretch a steel 6mm screw so it doesn't loosen will probably be too much for them after a while esp if the faces aren't dead square. Aluminium screws are also good for this stuff as they are a bit elastic for their dia but strong enough for unloaded covers. Ciao
-
As mentioned a while back it's wise to be careful with the mount screws. I suggest a dab of Loctite Nut lock and a "just snug" tightening. The mounts don't have aluminium inserts like high quality stuff but it should be ok as it's only a simple unstressed cover. I'd also put it on a glass plate or surface plate and make sure its flat and use some wet and try to flatten it if its not. If it's too far out then glue some shimming washers on the low mounts so it doesn't distort when you bolt it up. Ciao
-
Yes probably or shrink fit. Same interference fit by a different process. Ciao
-
My suggestion upon reflection is to have the shaft hard chromed to a build up of probably around .004" ( I'd need to research that) Ping Chuck! and then shrink fit it back on again. Plenty of engine stuff these days use shrink or interference fit for things such as engine driven balance shafts and cam sensor wheels etc. Ciao
-
No thats just a reflection of the gear teeth. The whole unit is an assembly. Ciao
-
Funny you mention "Tuning for speed" Pete. About 35 years ago at a classic meeting, may have even been the old Amaroo park a guy had set up a display of his head porting expertise he was touting to passers by. I stopped for a look and enquired as to why he was polishing inlet ports to a mirror finish which was a 20 years out of date concept even back then. "Tuning for speed" he said, you need to read it. Knowledge builds, techniques and practices move forward but some get stuck in history. I'm more amazed people bother to make video's about this stuff like it's some sort of revelation and now I'm old I can reveal all my secrets, lol. I'd rather hear about his life experiences in motorcycling and tuning. Ciao
-
Indeed the original cross plane crank (the second crank iteration, the first being a flat plane crank) was made in Mandello in 1956 as a pressed up unit and subsequent cranks were made in Germany by Hirth using Hirth couplings. Ciao
-
At 7:30 it turned into bench racing session with this guy said his bike would beat this other bike. Why do people seem impressed when someone applies 50 year old tuning technology to a 50 year old engine. They have been using D shaped ports forever on big 2 valve engines for years with large included valve angles (pretty much all of them) nothing amazing there. As for 0.002" way ahead of their time big end clearances well. There hasn't been any changes to engine bearing or piston clearances in 50 years I can think of. I can put any engine in the last 50 years together with .0015 to .002" big end clearance and .002 on the main bearings and it will work fine. What has changed is the ability of manufacturers to more consistently produce those tolerances and avoid selective assembly. Rod length, dwell times at TDC piston acceleration rates over rod length and stroke, it's all well known engineering stuff, no magic, nothing amazing or new. Ciao
-

How About Some Pics from The Roads Down Under
Lucky Phil replied to Kane's topic in Travel & dealers
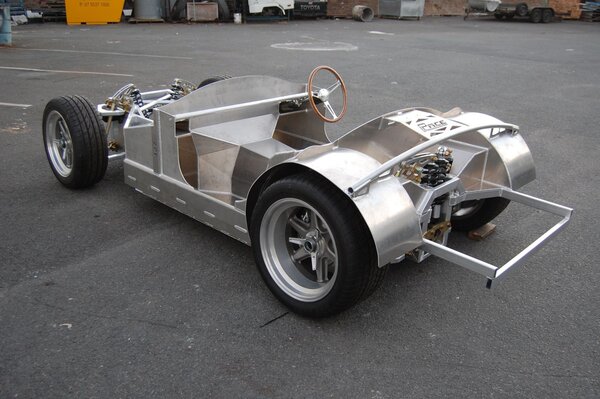
Was thinking more along this line. Made here in Australia. Monocoque aluminium chassis, Chev LS or Ford twin cam V8 engine. Fully independent bespoke suspension, billet A arms carbon fibre body thats so good many order with polished gelcoat coloured finish and don't bother with paint. No donor stuff apart from the engine transmission and the diff centre. Ciao -

From the album: lucky phils V11
-
From the album: lucky phils V11
-
How About Some Pics from The Roads Down Under
Lucky Phil replied to Kane's topic in Travel & dealers
I thought I might build a Daytona Coupe one day, then I sat in that one and changed my mind. 6'2" people need not apply. Ciao -
I would say that the gear and shoulder is a shrink fit on the shaft and its moved then eventually released. Ciao
-

From the album: lucky phils V11
-
How About Some Pics from The Roads Down Under
Lucky Phil replied to Kane's topic in Travel & dealers
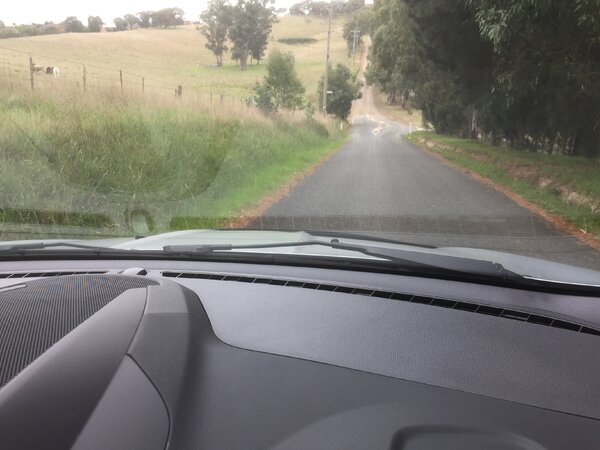
So little action here re Aussie roads. I have so few electronic images of riding, most are old printed stuff. Here's a few from more recent times although a bit boring. This is a fairly large water reservoir near home that I visit often as it's on one of my usual country rides. I like to keep an eye on it's condition as its one of the main water supplies for Melbourne. I've seen it looking dismal and beautiful over the years depending on its level. There is a sailing club and a couple of picnic areas around it and a very nice 18 klm long open bushland walk around its perimeter which the wife and I have done quite a few time. Out there is total quiet except for the birds most of the times. Here's the Guzzi parked there a few years ago. My old ST2 parked at one of the picnic areas. Here's a shot I got there on a very still day. Very reflective mood. A trip into the city a few years ago to have lunch with my wife. A Sunday at my local hill climb about 10 min from home. The end of my street. 30 min drive from the heart of Melbourne. Ciao -

From the album: lucky phils V11
-
From the album: lucky phils V11
-
From the album: lucky phils V11
-

From the album: lucky phils V11