Leaderboard


Popular Content
Showing content with the highest reputation on 06/27/2025 in Posts
-
I ran my battery tender cable under the tank to terminate near the steering head. That way, it's easier access for charging and can be used with a USB adapter to charge something in a tank bag as needed.4 points
-
Where was spell check when I kneaded it?4 points
-
This is another weak point, my VII sport failed there as well. don't try to re-attach the copper will be corroded, just replace both wires back to the regulator. Note, the bullet connectors at the regulator are not a standard size you would be better off crimping the wires there with a suitable size of crimp link. Roy3 points
-
This forum has good knowledge and helpful members. The only problem : no psychics .3 points
-
Good for you, enjoy it!3 points
-
2004 engine. Purchase new in 2012. Never installed. $1200 Georgia MP
 3 points
 -
You misspelled aluminum again! Not much steel in the engine other than the valve covers maybe? I'm guessing of course...have never run a magnet around the engine to find what's steel or knot (hee hee).2 points
-
Thanks. Much appreciated.2 points
-
Molly, Many owners have gone before you, the wiring is a weak point on Guzzis, I went through a failed regulator and broken wires inside the alternator also Roy2 points
-
I see here you are testing the diodes (meter switch to the diode position that's about the only testing you can do. If by chance you find that one of the diodes is open circuit its possible to add a new diode outside the case the circuit just goes Yellow wire through the diode to the regulator case. You still need the yellow to go to the internal circuit it's part of a bridge rectifier a pair of diodes and a pair of Silicon controlled rectifiers. I used to have a circuit diagram I drew of the regulator but I have misplaced it. If you reverse the leads the meter shows Open circuit right? When it failed I think the battery was flat (no fuel, No spark) When you put the regulator back on the case has a good connection to chassis? looking at the male/female connection to the loom where the regulator plugs inwith the key On you see +12V on the female to chassis? it is the power supply and voltage reference tapped off the headlight supply wire under the tank the male plug of the M/F connector gets the voltage it needs to work from there. Clean the ignition switch, look up from underneath you will see two phillips screws holding the switch block to the lock, take those out and the block will come away in your hand prise it apart and clean out the old grease, replace with new soft Vaseline. Good Luck Roy2 points
-
Thanks it’s up front under tank I thought it may have been important but battery tender makes sense I’ll pull tank off and check. everything appears to work now job today was front brake micro switch again you guys helped with a thread it appears Brembo has gone to a little plastic bar that fits it there instead of steel ball. Repaint timing cover touch up engine black crinkle coated and fix or change exhaust cans and and recover seat we are done for now Thanks guys been a big job bits missing etc still chasing a grey rev counter but I don’t think that’ll happen, leaning to speed Hutt custom if I can’t find one Regards Kapiti Kiwi2 points
-
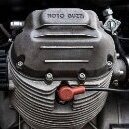
That first image looks a bit like a battery tender connector, which is a common add-on. But as others have noted, clarity, context, and connection locations would be useful.2 points
-
...measure them, and throw them away. Get some decent replacements with a hex-head or a torx or something. A phillips head in that position is just a pain in the arse. Too hard to get at to be able to put enough pressure on the head with a screw-driver to get it out without stripping out the head.1 point
-
That is extremely slick !1 point
-
You spelled a word correctly .1 point
-
I'd like offer a clarification of this point . . . The factory regulator ground is a small gauge wire that does go back to the battery through the factory wiring loom. The regulator (case) benefits from a robust ground directly to the engine/timing chest. What is critical to prevent that tiny wire from (unsuccessfully) carrying the full grounding current, is to regularly service the battery negative/ main ground to the back of the gearbox behind the seat latch: Otherwise: PHOOF!!1 point
-
The issue is long gone as long as V11 owners realize that running a true, properly rated and constructed, high current micro-ISO relay is the biggest part of the solution. (Issues like tight relay connections can be contributors.) Presently, this Picker Components relay meets or exceeds what we learned to expect from the (nla) OMRON G8HE: https://www.digikey.com/en/products/detail/picker-components/PC782-1C-12S-R-X/12352866 DATA SHEET1 point
-
Sherly you guys are not still having relay trouble???? I thought that issue was long gone Roy Moto Guzzi - making Electricians out of riders since 19211 point
-
Like new , as in brand new , never cranked ? A steel for some , a steal for others .1 point
-
@cory464, There’s a recent classified ad with bar end weights for sale if you’re still looking!1 point
-
Wow! What a steel that will be for someone.1 point
-
I uhh, might have quickly snagged it on ebay...1 point
-
yeah, my first impression of the first blurry image was a battery tender connector. which should trace easy back to battery - even if battery is not present.1 point
-
He's only posted 9 times on here so I will cut him some slack. I have to take pics all the time . I want to be sure if/when I send them I want to be sure the recipient knows what they are looking at and where it is located on the machine. Up to 3 pics are good to me. I do this a lot if it is disassembly / reassembly on something. maybe we will get better pics and help this guy out. On the one pic , it won't hurt to follow the wiring back to see where it originates will help figuring it out. It really looks "add-on" .1 point
-
1 point
-
Whatever you do , make sure you voltage regulator ground does NOT go directly to battery - terminal. Kiwi_Roy warned about this on the possibility of this becoming the main battery ground and frying the wiring harness.1 point
-
1 point