
Chuck
-
Posts
3,757 -
Joined
-
Last visited
-
Days Won
150
Content Type
Profiles
Forums
Events
Gallery
Community Map
Everything posted by Chuck
-
Thanks for the description, knumbnutz. Sounds pretty straight forward.
-
Continued with corrosion control on the Mighty Scura. Liberally sprayed aerokroil all over and let it sit over night. Tapped on all the fasteners with my copper hammer and sprayed it again. Everything just about fell apart. 2017-03-08_12-12-31 by Charles Stottlemyer, on Flickr Looks as if I caught this just in time. 2017-03-08_03-18-16 by Charles Stottlemyer, on Flickr Made up a hard aluminum shoe and stuck it on with Metal set A4. We'll see how that turns out after curing overnight.
-
Hopefully it will be nice when finished. Nothing much to look at at the moment Sent from my D6503 using Tapatalk I would have liked to look at the inside of the transmission. Are there any gotchas?
-
I'll be interested to see what you learn. The Kid put (I think) that clutch in his Spot along with new springs. The clutch pull was so heavy, we took it apart again thinking maybe a spring had come out of the spring well. Nope. It takes a gorilla hand right back to the lever to release it.
-
No,as far as I know, the greenie never came with red wheels. Naturally, I could have forgotten. I was still in my "honeymoon" stage with the Centauro when I rode to Mid Ohio and Guzzi had a brand new greenie there. I was instantly in lust, but not enough to do anything about it. My Kid eventually bought a pristine example as his first Guzzi, and molested it himself. Lowryter has it now. I still say it's one of the prettiest Guzzis ever.
-
Rod to crank. (easy) Crank to case. (not so easy) To me, without actually looking/measuring, maybe the oil pump is toast, and has been for a while. I *think* you are looking at a complete overhaul, though.
-
Uhh, on particularly onerous tires, I wrap a piece of leather on the rim and a 1 inch C clamp. That Dunlop probably qualifies. I doubt that you'll need air in it.
-
That was the easiest tire to mount I've ever done. Now, I see what those guys at the bike shows that are hawking tire changers are using. They make it look so easy because it is.
-
Pay my expenses, and I'll bring my bear rattle out..
-
I'm guessing carbon. Not unusual. It helps to rotate them each time you adjust the valves. Have you miked it to see how much wear there is? Hard to see in a picture. Again, you need to measure how much it is worn. Shirley, there are tolerances in the shop manual? I haven't looked.. Cam bearing looks rough to me. You need to measure it. I've never seen that, so I'd say no. Yes. There is a fair amount, and I've never seen a spec for it. No, there shouldn't be any radial play at all. It's supported by two caged needle bearings. Have you looked at the rod and main bearings?
-
From my Scura records.. For future reference on brake howl, rear brake side bearing problems, the rear spacer is 113.2mm. Some were short by 1mm.
-
Thanks for the pix, Scud.. like I said, I'd *never* get anything done. In all the years I've been going out there, I've never seen it so green. That rain dance I did in December was a little more effective than I had planned. Must have had something to do with the bear and California. 2017-03-05_07-29-14 by Charles Stottlemyer, on Flickr I *assume* you've been on 33? It's fairly nice.
-
I said that about my Centauro many years ago.
-
Woke up this morning and ... 2017-03-04_08-10-47 by Charles Stottlemyer, on Flickr Good. I can get something done on the Scura today. I don't know how Scud does it. I'd never get anything done if it was sunny and 70 every day. Back to work. Moved the vise on the HF lift. It was too far forward. Repaired the RF turnsignal. Installed a new front tire. I'll install the real Lucky Phil shifter extender (instead of the original prototype) yet this afternoon, and that'll do it for the day.
-
So, you've given it the sniff test and know for sure that it is gear oil?
-
If you touched the "sacred screw," may the goddess have mercy on your soul..
-
But..but..they were ON SALE, with FREE SHIPPING.. (Guzzi Content) and a better than expected color match. Grumble grumble.. great artists are never understood. I Shirley don't need to tell you that it's a slippery slope, man..?
-
Must...resist...temptation...to...open....wallet...
-
I decided "what's the point of that?" the first time I used it.
-
Ah yup..
-
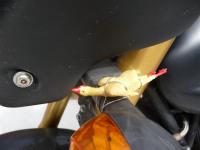
Got a good start on damage control from the Mighty Scura falling off the jackstand. Installed Scud's brake reservoir and lever. Thanks, Scud.. you rock.. 2017-03-02_04-48-56 by Charles Stottlemyer, on Flickr I should buy a lottery ticket. When I took the old lever off, I said to myself, "Chuckie.. there's going to be ball bearing in there that will want to run away and hide.. watch it." Caught it, thought, meh. I'm bad.. Cleaned everything up, had the little ball between my fingers, thought if I put a dab of grease on it.. it would stay in it's little cubby hole while I installed the lever. Reached for the grease, and dropped it. Heard it hit the stand, then the floor. I thought, no need to look for it, it'll have rolled into another dimension, never to be seen again. Round stuff just does that. Looked down, and it was sitting right beside my foot. (!) Put a little grease on it and installed the lever. The horns were totally brown with rust. Bead blasted and painted them, along with the alternator cover that had been sand blasted by the front wheel. Painted it with Aero engine grey, and don't like it. I'll probably pull it and paint it flat black like the horns. Took a stainless toothbrush to the regulator, and made the corrosion fly. 2017-03-02_04-49-47 by Charles Stottlemyer, on Flickr Spent a fair amount of time cleaning the drywall stuff off the tail piece. I was sick, it looked horrible. Had a big gob of drywall stuck on it with white scratches through the Scura decal. Thought.."It's water soluble. I'll apply lots of soap, water, and elbow grease." It came off. All of it. Took some rubbing compound and rubbed out the paint on the entire bike. Looks lots better. 2017-03-02_04-49-22 by Charles Stottlemyer, on Flickr Used my manly pink HF tire machine to install a new rear tire. 2017-03-02_04-50-13 by Charles Stottlemyer, on Flickr Whew! A good day for an old fart. Well, I did paint the stuff yesterday.. I'll change out the front tire tomorrow, and do little nickle and dime stuff.
-
And Lucky Phil bad mouthed me for the gaudy RED gaiters on the Aero Lario..
-
I *think* it would be possible, but it's been years since I've been in one. You'd still have to get the bezel off to freshen up the needles, though.
-
The trick with removing the bevel is to capture it so it can't deform while working up the crimp. I've *read of* somebody doing it with a hose clamp. (Guzzi content.) I machined a flat bottom pocket the right depth that the gauge just fits with a push. Used a tack puller to slowly go around the crimp. No problemo.
-

HOW CAN I DETERMINE HOW MANY MILES ARE ON MY BIKE?
Chuck replied to barnett468's topic in Technical Topics
It's pretty easy to tell the difference between an 8000 mile bike and a 108000 miler. Just look for general wear from use.

