
Chuck
-
Posts
3,757 -
Joined
-
Last visited
-
Days Won
150
Content Type
Profiles
Forums
Events
Gallery
Community Map
Everything posted by Chuck
-
Me either, that fairing looks a little "added on" to me.. not that I would consider changing it if I had one. I'd say bottom dollar would be around 7500. Whatever someone is willing to pay is what it is worth.
-
True enough. He came with a chip on his shoulder thinking his "no damage at 4500 miles, so they all don't fail" would be verified on another forum. When it wasn't, he left in a huff with many FUs. Hey, everybody's different. He's welcome to his ideas.
-
That's a really good idea.
-
Hmm, I thought I'd replied to this and another thread. Don't see either. At any rate, I've quit using the UFIs on the big blocks because of what *I think* are gasket problems, not to mention a few cases of leaking at the seams reported by guys with Outsiders. I've been using the Bosch 3330 for years. MGCycle also sells the HiFlow HF551, which I've heard good things about.
-
Thanks, Phil.. that makes much more sense.
-
Haha... you are a total nut case. Takes one to know one. There were a couple clean, low-mile greenies for sale a few months ago. Just keep watching craigslist - do you know the search all of craigslist site: http://www.searchcraigslist.org/ If you don't care about originality, you could repaint a black or silver red-frame model. Just to give you guys an idea of what a nut case I am... I'm planning on riding the bike to Barber next year. So something like 5k miles. What could go wrong? Time to find a bike and sort it out. Then again I should probably sit on one first to see if it actually fit. Anyone in the Portland area mind if I sit on your bike? Let me count the things.. There's a reason that aircraft mechanics generally aren't pilots. No, seriously I'd ride the Mighty Scura anywhere. Any sorted V11S could do a 10K round trip.
-
He said the oil filter hadn't filled.
-
Ok, pull the pump off and pack it with grease. That is recommended for startup on a fresh overhauled aircooled VW. I've never heard of a Guzzi pump not priming, though. This may be a first. I'd try Phil's method before going through that.
-
I like that one..
-
Oh, man.. that sucks. Same place as the one in South America?
-
When I did the first startup of the Aero engine, it took 15 seconds of sweating bullets before oil pressure came up, but it had to fill the oil filter cavity, galleries, etc.
-
Tell you what. I'll give you 50 dollars for it, and I'll even come pick it up.
-
Uhhh, do you have the correct gaskets? If so, there's not much that can go wrong. FWIW, I have found that prefilling the oil filter actually takes longer for oil pressure to come up, but only by a second or two. If you have the correct gaskets, pull the plugs and crank it in 5 second bursts to keep from overheating the starter motor. If pressure doesn't come up then, in the words of the Chinese aviator.. Sum Ting Wong.. you have a problem.
-
The Mighty Scura's oil line was pretty darn stiff. I just didn't like the way it "loaded" that no doubt unobtainium carbon fiber cover. I zip tied the line down to the starter.
-
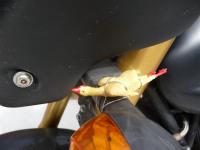
I don't do that, either. I have to guess it was the original owner. BTW, he disabled the sidestand safety. What's up with that? All it does is stop the engine if you drop it in gear with the engine running and the sidestand down. I re enabled it. That vent hose is putting a pretty good load on the starter cover when tucked in behind. I'll see if I can tie it down somehow.
-
I thought you said you didn't have the crankshaft out of the engine?
-
Springs too heavy?
-
Uhh, this isn't "cornering grind" it's not being careful and sliding the extended sidestand on the pavement while pushing the bike backwards. No, it's not me. I know how vulnerable to damage those suckers are. I'll reroute the hoses tomorrow. Thanks..
-
Yes.
-
I'll bet your mains are as bad as the rod bearings. As I mentioned at the start, "something" has gone through the engine. The crank "may" polish out, but without standing there, measuring tools in hand..it's hard to say. You're there. Pull the crank and start measuring. If you can't, take it to a machine shop. If you aren't fairly well versed in engine building, you won't know what is bad and what is not. Sorry, but that's the best advice I can give you, and certainly no offense intended.
-
Ok, ok.. don't hit me again. I'll see if they'll tuck under that super light cover. Guzzis are all about lightness, you know.
-
I thought about making the sidestand mount black, too.. but I felt one foot sliding on the slippery slope. I'll see if they'll go behind the cover.. no doubt will. It was cold out in the hanger when I put it together after going through the preselector, and I did it in a hurry, not even thinking about those hoses. They *are* unsightly, now that you mention it. I did a bunch of shop tips in the Lario Rehab thread on WG. I *am* trying to pass some of it along when I think of it. There aren't too many of us old farts left..
-
Ok, here's the repaired sidestand. The file is called a Vixen file..they are used for aluminum to keep from loading up (pinning) the teeth. 2017-03-09_12-50-40 by Charles Stottlemyer, on Flickr This is a file card. It's used to keep files from pinning. If you keep your files clean, they'll last a lifetime. 2017-03-09_12-50-30 by Charles Stottlemyer, on Flickr That pretty much does it. Everything back together, 6years of rust and corrosion at bay. 2017-03-09_12-50-15 by Charles Stottlemyer, on Flickr Nice day today, 55f, and not blowing 50 like it was yesterday. Kicked the tires and lit the fires. Hoo wee! New tires, serviced forks and steering head bearings transformed it from "Hmmm, wonder what is wrong.. it feels a little strange to Yowzaa!
-
Weather man in Sandy Eggo.. "Look out the window. Sunny and 70? It'll be that tomorrow." That job's about as close to stealin as it gets.
-
To me, it seems as if there is abnormal wear for a low mileage engine. I was only guessing oil pump, especially when you said it had a lot of radial play. 5 bar should be *plenty* of oil pressure. *something* has gone through the bearings, though.. I'd look and measure pretty carefully before just putting it together.

