Scud
-
Posts
4,123 -
Joined
-
Last visited
-
Days Won
253
Content Type
Profiles
Forums
Events
Gallery
Community Map
Everything posted by Scud
-
What does "index the piston ring end gap" mean? Is that where I make sure the gaps are not aligned? I noticed that the gaps were at the 6 o'clock, 9 and 3 positions when I removed it. I assume I should keep the rings in the same positions.
-
Good idea. It's soaking in diesel fuel while I have dinner. The diesel cleaned the combustion chambers (along with a toothbrush) in about 1/2 hour. I hope we don't need the rectangle dishes tonight...

-
Yes - that's what Craigsinclair described in the earlier posts on this page. It seems that the push-cups (or whatever they're actually called) are different between 5 and 6 speed clutches. The receiver on the 5-speed is smaller diameter, so he had a step machined into the flat end.
-
Try Pete directly first. I can ship from the US if needed, but that seems inefficient. He posted his e-mail in this thread: http://www.v11lemans.com/forums/index.php?showtopic=19849
-
And the twin plate 6speeder already has the correct hub? No - you would need an input hub that was removed from a Scura, Tenni, or RM when somebody did a single-to-dual conversion. The shallower 6-speed hub is no longer available from Moto Guzzi, so that's why RAM stopped making the kits for the 6-speeds.
-
OK - new clips are "cheap insurance." I'll get those. I assumed I should remove the rings so I could clean the piston. How would you clean the carbon deposits off the piston crown - without making a mess inside the ring grooves?
-
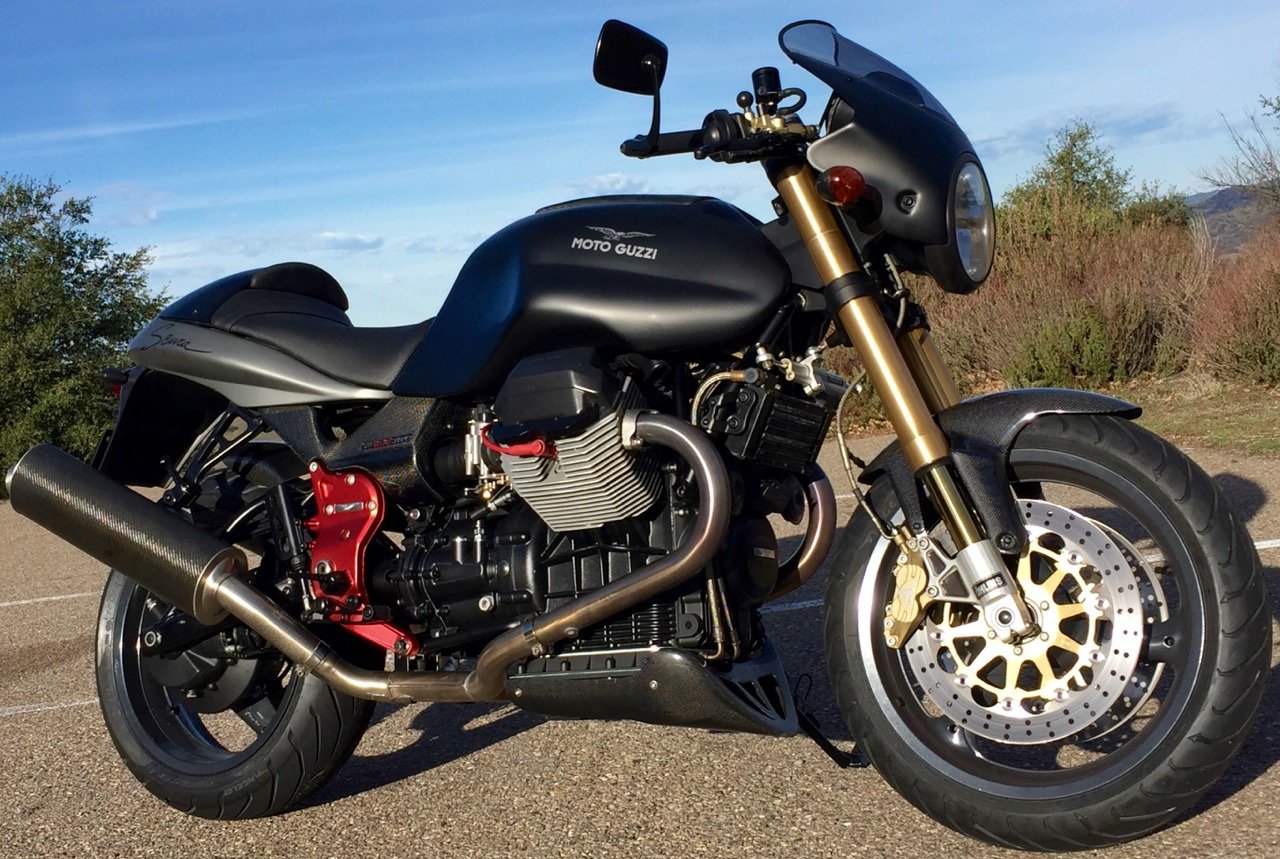
So... looks like a low (or no) speed drop on the left and some normal wear. That thing on the tank looks like the paint came off and was poorly re-painted - maybe from removing a knee-pad. I think the trip-meter can be repaired for about $100. That still looks like a good value to me - but it would have been a "steal" without the little cosmetic issues. You've bought several bikes. Sometimes the buying decision is as much about the previous owner as the bike. If the PO is pointing out all the flaws, that's a good sign. All the V11 tanks are made of the same material and potentially vulnerable to swelling due to ethanol in fuel. Several people have sealed the tanks on the inside. I keep thinking I should do that on mine.
-
Thanks for the update. This means that anyone could install the RAM 5-speed unit in a V11 if they have the correct transmission input hub. Good to hear your bike is sorted.
-
The manual referenced a "special tool" to remove the pin - but I was able to push it out with my finger after removing the clips. I watched some videos about removing piston rings by hand - but when I tried it, it seemed like a bad idea. So I'll get a ring removal/installation tool. Clean pistons on the horizon... On the clips... they came out easily and seem in good condition. So it's "recommended" to replace, but what really happens? Those of you who've done this - do you re-use the clips?
-
All the problems with various models seem pretty infrequent. The most notorious is the exploding flywheel from the Scura - while low-probability, the damage is catastrophic. A cracked tranny case can be dealt with - as can electrical stuff. What electrical stuff are you worried about? 18K miles is barely broken in. Pretty darn low miles for a 16 year-old bike. If you had a modicum of sense, you would get a Honda ST1100. Sense is over-rated.
-
Well... the 2003 and 2004 bikes are probably the best sorted - but then you get the longer frame and the wider rear wheel along with it. From what I can see, the red-frame bikes are every bit as reliable. The Tenni is beautiful, but suffers from the same clutch/flywheel as the Scura - and the same bubbling engine paint as other 2002 models. It seems that the red-frame bikes are more prone to cracked transmission cases (like Low Ryter's recent problem) - and the later frames hold everything together a little more securely. If you want Ohlins and a fairing, you'll be looking for a Rosso Corsa or Nero Corsa. Up to you... but you said "help me find a green bike."
-
Go get the Greenie. If you want to spend a little more, you could upgrade the suspension and put a nice carbon-fiber fly-screen on it. Maybe a few farkles, like bar-end mirrors... silver rizoma fluid tanks... maybe a carbon fiber belly pan... or a smaller inner fender... How much more help do you want spending your money? I suppose you could put a new exhaust on... or an LED headlight... My Scura is all-day comfortable with the fly-screen. You don't really need the bigger fairing for long-distance.
-
I'm glad it was not closer to me... such a good deal. It won't last long. Best wishes. I hope she goes home to you in Portland.
-
Top end paint... Painting the heads and cylinders was not as bad as I feared. Not sure I got total coverage all the way back between the fins, but it was silver already, so it'll be fine. Now I could use a little more advice: I'm leaning toward removing the pistons, partly because I can see that, despite by best efforts, little bits of carbon have flaked off the piston and travelled down among the rings. Plus, I've never removed a piston before, so I am curious (and I will be better able to clean the crowns). Some questions: 1- Installing the stud (which came out with the cap-nut): I figure I'll tighten it with two nuts locked against each other - but should I use loc-tite - and what strength? 2 - Removing piston from connecting rod: I read the manual and I think I can do it, but on page M-46 it says "Remove the piston pin "C" using the special tool, commercially available." So... what is the special tool?
-
I sold it to another member. At the time, I was planning to put the other motor in without taking it apart. But now that it's apart and painted, this is the time to put another plate in. And you know what's funny? Your Indiana title did not list the engine number. California needs to record the engine number when they register it (which is only after I get it running). At that time, they will record the number of whatever engine is in the bike - and that spare engine came from my parts bike, which was crashed.... in Indiana...
-
I hope you cannot respond right now because you are at the airport. That would be an EPIC fly and ride. I would love to spend 3 days crisscrossing the mountains - or hugging the coast - between San Francisco and Portland.
-
My Scura and LeMans both have plates. I'm going to put one in the Champagne project. I'm keeping a little spreadsheet - and I just put your name on it. Will advise final price and give PayPal details when I have the plates. You need two upper sump gaskets (to sandwich the plate) and one lower sump gasket (although you might be able to re-use the lower gasket that's already on there). When I did the group buy before, I got all the gaskets from MG Cycle - if you call them, they will know exactly what you need. May as well buy a groovy black-face oil thermometer/dipstick at the same time. Why? Because it's cool. Potentially 6 of the 10 now spoken for - 8 if you count two in Europe, but I think those will ship direct from Pete.
-
Swoosh - run, don't walk, to Palo Alto and put $3,600 in this guy's hand as fast as you can. https://sfbay.craigslist.org/pen/mcy/6063812500.html
-
It might be better to pay Pete directly and have him ship from Australia. If I ship it to you, I need to charge you for shipping US to Europe, plus 1/10th of the shipping from AU to US for the 10 plates I'm going to get. But I can ship it to you if needed. I'll check back with you when I have plates in hand to see whether you still need one.
-
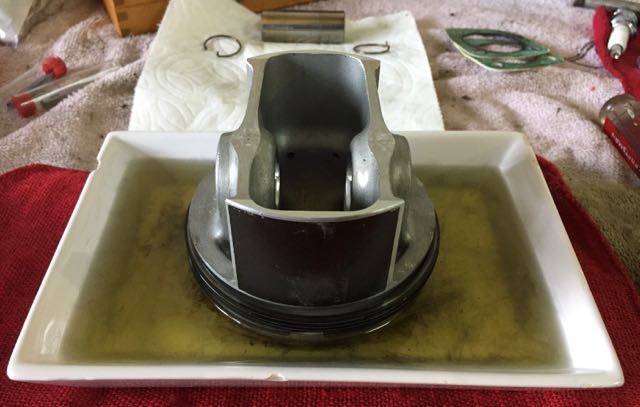
Got the block in. Now waiting for paint on the top-end and a Roper Plate for the bottom end. Based on Chuck's idea to pour kerosene in the combustion chamber to check for leaks, I used diesel fuel instead (cuz that's what I had). No leaks. But it did give me a nice opportunity to clean out the carbon deposits. And here's how the "cast aluminum" color of VHT Engine Paint looks next to original parts. It's a bit brighter than the original paint. Question - should I also clean the carbon deposits off the pistons? If so - should the rings be removed first - or is it OK to mask them?
-
mmmm... that's a much darker shade of green.
-
If the pin still fits snugly (doesn't wobble in the cover) and if it was shifting well, you could try re-installing it with some sealant, such as ThreeBond 1211 - or whatever you're going to use to seal the case when you reinstall it on the transmission. If the pin wobbles, maybe take it to a machine shop. They can smooth out both surfaces - and they can install a sleeve in either the case or the pin so that it can be pressed in again for a perfect fit. (maybe Docc could move these two transmission posts to the shift improvement thread?) [moderator edit: Next best thing, I'll link the Shift Improvement thread here]: http://www.v11lemans.com/forums/index.php?showtopic=19547
-
I've decided to open a V11 dealership. I think I'm gonna make about $1.00 per hour. That or I will sell a bike for $5,000 and charge another $5,000 in "dealer prep and assembly" - like the dealers do on new bikes. Seriously - just one is for my use. I think three others are spoken for now, leaving six. I'll hold onto (no hoard) the rest and re-sell them as needed. Should save shipping from Australia. By the time I sell the last one I should have a bit left over for and a board donation.
-
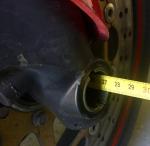
The hollow front axle on my 2003 LeMans length is 273mm. I didn't measure the thread pitch, but for reference, the nut on the left side requires a 30mm socket or wrench (same size as the swingarm pivot pin nuts).
-
The Öhlins on my 2002 Scura have a solid axle that screws into the LH fork. I'm pretty sure this is the same axle as the 2002 Marzocchis. The Marzocchis on my 2003 LeMans have a hollow axle that passes through the fork and requires a nut. This would be longer than the solid axle, because the threads have to stick out to accept the nut.