

Lucky Phil
-
Posts
4,552 -
Joined
-
Last visited
-
Days Won
235
Content Type
Profiles
Forums
Events
Gallery
Community Map
Everything posted by Lucky Phil
-
At that mileage the whole clutch will almost certainly need to be replaced, basket, hub and plates. Pretty easy job Ciao
-
Interesting video's. I'm always amazed that people will go to the trouble and expense of investing in something like a K-line kit and then not spend the $25 on a cheap air driven impact gun to drive the liners and the sizing arbours. Hammering them in and the arbours through with a lump hammer is silly. All that stuff bouncing around on the bench etc and the fact that one of the reasons you use a 4000 bpm driver is so the sizing process is fast and fluid and produces a uniform ID not a stop start irregular interior. Its way easier with the impact driver believe me. Also why dont people spend a little time making a simple jig or cradle from wood to hold the component, head in this case to the bench so when you're doing this sort of work you're not chasing it all over the place and watching it wobble around while finish reaming. I made up my own simple cutter to trim the liner which worked fine. I'm not actually convinced that the K-line reamer is compatible with the guide material Guzzi use as I see he has the same trouble with the process as I did. Surprisingly hard to ream the guides. I have since found out that Kibblewhite have 2 types of reams for the different types of guide material they sell and the reamers shouldnt be used on the wrong type. Ciao
-
I was thinking of this system for the swingarm bearings. As I said slide hammer pullers aren't usually much good unless the item has a lot of mass. Of course the disassemble the bearing and use the stick welder on the outer race always works just takes a while to do. Ciao
-
Ok thanks Scud. Looks like a decent investment then. I have a theory on getting out the s/arm bearings. Use an internal puller but instead of using a slide hammer directly on the puller use a metal tube and bolt arrangement to apply constant pulling force on the bearing then impact the arm around the bearing with a copper hammer and or use the slide hammer in conjunction with the static pulling force. The piece you are using the slide hammer on has to be very heavy or very well anchored for them to be effective. Pit bull make a harley wheel bearing puller with the thinking I'm thinking somewhat Ciao
-
I'm with you docc,I thought the tight clearances were .004/.006 and the loose were .006/.008. Oh well, I do know that it makes a difference to the starting and idle running though, which surprised me.Such sensitivity to valve clearances. Dont know about running them wider than that though,you would get to the point where the opening/closing ramps became ineffective and valve seat wear became an issue. It would be interesting to see what effect valve clearance had on actual dyno numbers though so we could see the differences between starting,idling,valve noise and outright running performance then choose the compromise we wanted to make. I'd chip in for the extra hour of dyno time after someone does a dyno tune to find that out. Ciao
-
I watched a youtube video and it looked to good to be true. Reminded me of those manufacturers instructional videos where the component literally just about falls apart in your hand but the reality is a whole lot different. Any more details on this tool scud. I mean did you give it a real testing bearing to pull? say like on the difficulty scale of a Guzzi v11 swingarm pivot bearing. Ciao
-
Sometimes a large flat blade driver with the shaft through the handle can work as you lever the spacer aside as much as possible and drift it. Heat doesnt hurt but its not super effective as the heat transfers just as fast to the outer bearing race and it expands as well and the heat you're putting into the hub with a heat gun and not burning the wheel paint etc is not so large to make the differential expansion that big. A 15mm steel drift with a sharp end edge and levered hard across usually works but its no walk in the park sometimes. Of course when you get it out the other end is easy and then you grind/file a notch in one end of the spacer for next time. Even if you can get the bearing to move 1mm it opens up the ease of removal. The next step is to break apart the bearing cage and load all the balls to one side and see if the inner will come out and then pull the spacer and drift out the other side. Then you run a single bead of stick weld around the inner dia of the outer race and when it cools the outer race will fall out. The other method is to spot weld a bolt to the inner race with a stick welder then drift it out from the other side using the bolt to hit against Ciao
-
Drift them out. One end of the bearing spacer usually has a relief/notch in it so you can get the edge of a drift onto the inner race edge on one side. Once you get the bearing to move a little then the spacer loosens up a little and you can get more purchase on the inner race with the drift and keep it going. Support the wheel on the hub not the rim or tyre to get maximum impact force into the bearing. Sometimes the spacer is a little short and you can lever it sideways to gain purchase on the inner race. These are generally the wheels that have short bearing life. Ciao
-
Glad you chimed in Pete, I was out of my depth here. Ciao
-

How many Ghezzi Brian Folgore were imported to USA?
Lucky Phil replied to Moto Americano's topic in 24/7 V11
Yes they were so good everyone's using them now, like swinging fork front suspension. Ciao -
No idea, Guzziology doesn't mention year models. They probably only built the T5 for a few years. Is your bike possibly one of the effected wrong speedo bikes? because if it is Guzziology says once you change it to the correct speedo ration it doesn't feel overgeared at all. Ciao
-
I'm not that familiar with the EV model just what I can see in internet images,but Guzziology recommends to use a T5 7/33 ring and pinion set for 5 speed 1100's with the 8/33 ratio. It also says that that early California 1100's had the wrong speedo gearing fitted from the factory and they overed so the bike wasn't going near as fast as riders thought when they were waiting to shift into 5th. Ciao
-
Your'e exactly right, its the working stuff out that takes the time plus I'm slow at that. I can come up with solutions but i'm not fast at it. I have a good mate that arrives at the same solutions as me usually but he figures out in 5 min what it takes me a week to work out. He has a really strong ability to visualise things and it's a fantastic gift. Interestingly after he had a course of chemotherapy he lost the ability but after a year or two he gradually regained it. I often need to see stuff in the flesh and then modify and refine it. Ciao
-
No those stats are always without the rider. Too many variations in riders. If you are too far outside the box these days with regard to your physique then you can pretty much forget getting a proper cutting edge sports bike to handle to its full potential. The bike and suspension and the tires are all designed these days for a rider between 5'4" and 5'8" 125 to 145 lbs. As you move outside that box your ability to be competitive diminishes exponentially. You may think that that's only for road racers but if your 6'2" and 190 lbs nothing on a a modern hyper sports bike is designed for that kind of creature. Not suspension, ergonomics or tires. Doesnt mean its unridable on the road but your on a hiding to nothing getting it set up to be really good. Modern sports bikes are designed around modern racers,ie Jockey sized people. Ciao
-
So I managed to make a mount for the regulator from 4 mm aluminium plate just need to pretty it up a little. I also found a new place for the stupid horn. I totally dont need a horn fitted to a bike but its a legal requirement here so its fitted. Getting rid of the 2nd one though. There's plenty of space under the tank now but real estate between the V is tight. I had to re think the swapping of the reg and feed tap as there's no real room on the rhs of the frame to mount the pump as the main wiring loom runs there. The only issue is the reg body is close to the TPS connector but it should be ok. The benefit is it simplifies the fuel hose routing. The fuel will come from the pump on the rhs to the filter then over to the throttle body on the lhs then cross over to the rhs tb then from there to the reg and back into the tank. Found out I need a Centy throttle cable as well. Ciao
-
This looks very nice. I have one of these single seat units in red brand new ( the original dual seat is still used)and a CF front cowl unpainted new as well plus a spare tank and second hand fairings in various colours. The plan was to have a spare set of bodywork in red as that was my favourite colour for them when I bought it in 2012 but as time has passes I actually like my yellow better. Too may red ones around I guess. Ciao
-

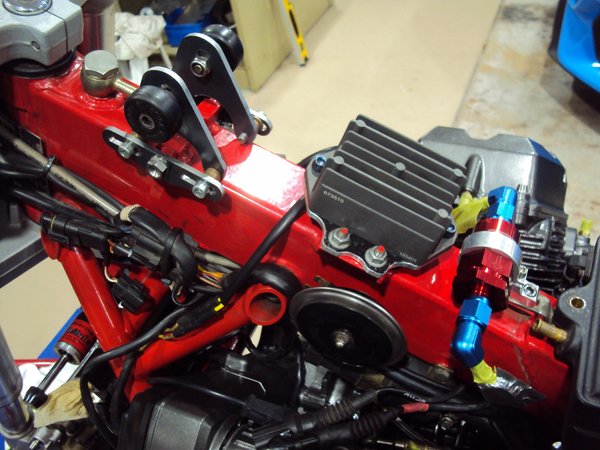
From the album: V10 Engine
-
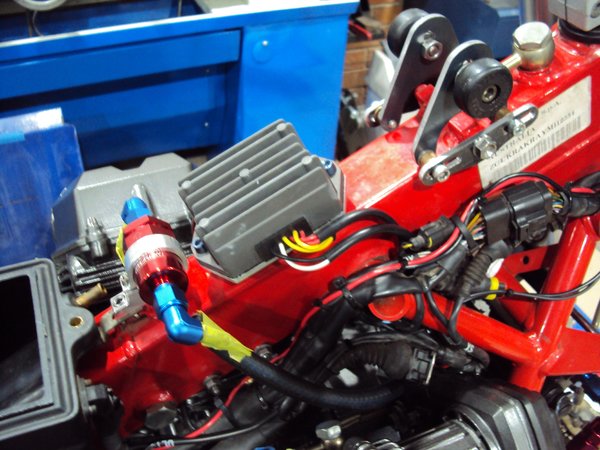
From the album: V10 Engine
-
From the album: V10 Engine
-
Rear brake Caliper carrier bolt rounded out
Lucky Phil replied to LangleyMalc's topic in Technical Topics
Sorry about that mine doesn't have the pin so I ignored that bit:) Ciao -
Rear brake Caliper carrier bolt rounded out
Lucky Phil replied to LangleyMalc's topic in Technical Topics
Carefully drill the head off the cap screw,loosen and remove the other caliper mount bolt. Remove the rear wheel, pull the caliper off and use multi grips to extract the bolt with the head drilled off. Apply some heat and or penetrating oil if necessary. Ciao -
Young and smart I'd say, 860 GT's weren't very impressive even in their day. Ciao
-
Nice, I went straight to the aviation section and looked up PW 1830 and Wright R-3350 gaskets. R-3350, now there's and engine for you. Ciao
-
Agreed on everything here. My 1000 used to live in my lounge room. I never tired of looking at it,it was just the most beautifully designed and executed motorcycle I've ever seen. Fairings off was even better. Every part was perfectly designed and a thing of beauty no exceptions. I only sold my last one because I missed riding a twin. No matter how beautiful the MV was I couldn't deny the pleasure of a big high output twin, hence the purchase of the 1198. The 1198 isnt half the looker of the MV but it has the feel and sound over it. You cant have it all. One of my most vivid memories was as a mechanic at the WSB round years ago at Phillip Island working for a friend running a 996 Corse. Starting that thing was a sensory overload. I'd be at the back with our starter, a Honda stationary engine with a go cart wheel and tire mounted on the crank fitted to a wheeled frame with handles and a twist grip throttle. The 996 was on its stand and my mate stood next the the bike chest on the tank and holding the bars. My job was to hold the Honda engine flat out with the go cart tire hard against the back wheel of the 996 spinning the wheel up to god knows what speed but fast. You could hear the wizz of the chain over the Protesting little Honda engine. My mate would be looking at me and I'd give him the nod when I thought we were at maximum wheel speed and he'd pop the clutch on that big angry racing twin and it would start instantly. Both Termi outlets pointing straight at my chest 1/2 meter away. The sound was overwhelming as was the experience. We'd then hand it over to our rider and he would take that frightening, brutal thing out and do battle with it. There's not many things in this world as visceral and emotive as a big racing twin at full noise. An inline 4 doesn't even come close. Not even the beautiful and magnificent MV. Ciao
-
Or a scale at one end and a levelling block at the other end and then repeat the other way around and add together. Ciao


