

Lucky Phil
-
Posts
5,449 -
Joined
-
Last visited
-
Days Won
276
Content Type
Profiles
Forums
Events
Gallery
Community Map
Everything posted by Lucky Phil
-
From the album: V10 Engine
-

From the album: V10 Engine
-
From the album: V10 Engine
-
I think you can modify a 5 speed input hub fairly easily to 6 speed dimensions and they still make those probaby more economical way to go ciao
-
Hey Tinus89 can you re post here the images of your gearbox crack. The ones in the historical thread wont open anymore. I've seen LowRyter's l/h mount crack images so it looks like I've got some more reworking to do. Ciao
-
We'll find out once I can figure a way to actually get it off the bench:) Might need to enlist the help of a few 20 year olds I know. Ciao
-
Perish the thought Ciao
-
Yes docc, I'm running the extra plate. Ciao
-

Timing Gear Set - Replacing timing chain
Lucky Phil replied to FalcoLion's topic in Technical Topics
A Dayton/Centauro and I would then assume an MGS-01 all run higher oil pressure than the V11 engine by virtue of its higher relief pressure setting. The Caruso oil pump has the potential to support pressure by virtue of its greater pumping volume. It also means that it can cover system losses better if things get to a dire stated internally for whatever reasons. A friend of mine had a relatively new MK4 Le mans years ago that would put the oil pressure light on in the summer at idle once warm running one particular grade of oil which I cant remember now. It was ok with 20W-50 under the same conditions though. I have always though that maybe the Guzzi engine is a little marginal with oil pressure at low rpm and high temps, Maybe. Ciao -
Ok good to know. I didnt realize they cracked there as well. May need to do some blending there also or remove the whole corner as luhbo mentioned. Ciao
-
Ok didnt know that. I think I'd still go with a tube insert between the lugs and leave the metal in the holes. Seems the cracking is a bit hit and miss but better to address it if possible. I would go all out if I had the equipment of my machinist friend was still local to me but hopefully the extra gearbox support and radius will be enough to mitigate the risk. Ciao
-
Replacing all fasteners, is there a list?
Lucky Phil replied to JBBenson's topic in Technical Topics
Really? Proof? Ciao -
Replacing all fasteners, is there a list?
Lucky Phil replied to JBBenson's topic in Technical Topics
Stainless Steel is a poor choice for fasteners on a motorcycle esp one that vibrates a bit. The material is too hard and so has minimal stretch which leads to loosening fasteners. they were made for the marine and building industries not for automotive use. I hate the way passive cad plated steel fasteners dull after a while but I wouldnt go SS. The Daytona engine I have just completed and the gearbox I have apart on the bench have been converted to all Titanium external fasteners including the washers. I guess the engine cost around $230AU or so to do and the gearbox around $140AU. Ti fasteners dont weather, stay tight and look great for the life of the bike or car. All my bikes have gradually morphed over to Titanium fasteners including the chassis bolts and nuts. The cost is up there I know but I think its worth the money in the long term. Ciao -
On balance I think I'll leave it the way it is with just the radius done. The above is interesting and I understand the concept but its not quite applicable to the V11 gearbox mount in that no matter what the loads will go through the radiused area. No ability to create a modified load path. To give a lateral steel bush any meaningful wall thickness you would need to open up the mount holes 4mm which I think would be too much but the idea is sound. What you could do is use a tube between the inner faces of the mount lugs that the bolt passes through which would achieve the same results with regards to the crushing/squeezing loads from the bolt. However that would require machining the inner faces of the bosses to square them up and I dont have access to a mill at the moment.The lateral ribs between the mount lugs are also at bolt hole center line as well which will take the mount bolt crush well enough I think on balance. Considering the occurrence of gearbox cracking, the mileage at which it generally occurs, the fact I now have the supplemental gearbox mount and have done the radiusing and the low mileages I actually do I think as I said I'll leave it there. All good suggestions though and worthy of consideration for those with the box out and access to the machining equipment and the prospect of lots of miles. Ciao
-
You mean take that corner off? Ciao
-
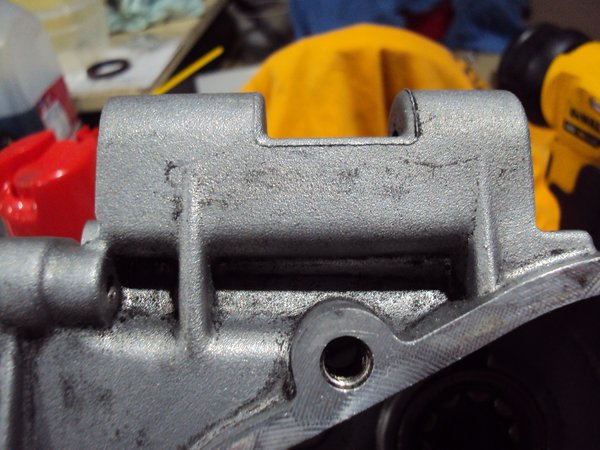
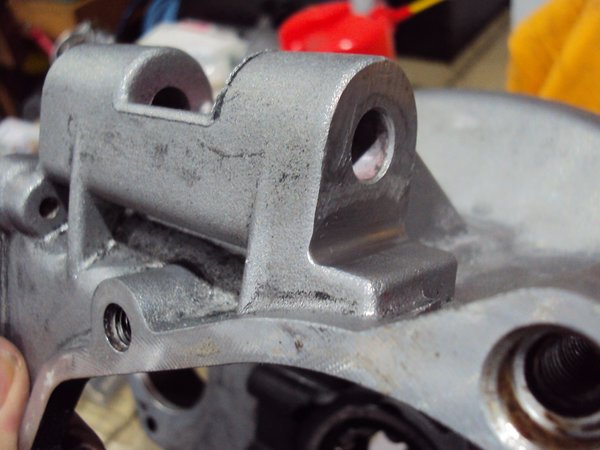
So here's the gearbox mount rework. 4mm round file and take it carefully. Finish off with some 800 wet and dry on the file followed by green Scotchbrite. Important to make sure the finish of the fillet is smooth and free from surface defects that may cause stress risers. Ciao
-

From the album: V10 Engine
-
From the album: V10 Engine
-

From the album: V10 Engine
-
Timing Gear Set - Replacing timing chain
Lucky Phil replied to FalcoLion's topic in Technical Topics
I take all the points made but as the old saying goes, long after you've forgotten the cost the quality remains. I btw didn't replace my V11 pump when I did the gear upgrade. I didn't realize Joes pumps were available and there was some fitment issues due to patchy quality of some aftermarket pumps around that time so I stuck with the std pump. I did however use a DHS pump I'd had for years in the Daytona rebuild. Ciao -
Timing Gear Set - Replacing timing chain
Lucky Phil replied to FalcoLion's topic in Technical Topics
I think I covered the benefits of Joes pump adequately. Ciao -
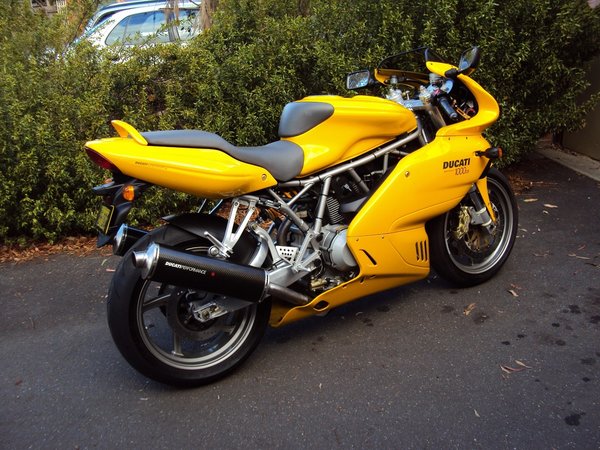
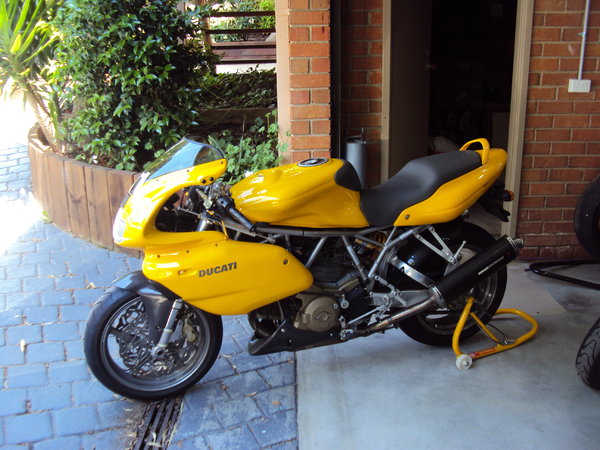
How about one of these. Year model 2003 1000ss Dual Spark Or in this guise. Ciao
-
From the album: lucky phils V11
-
From the album: lucky phils V11
-
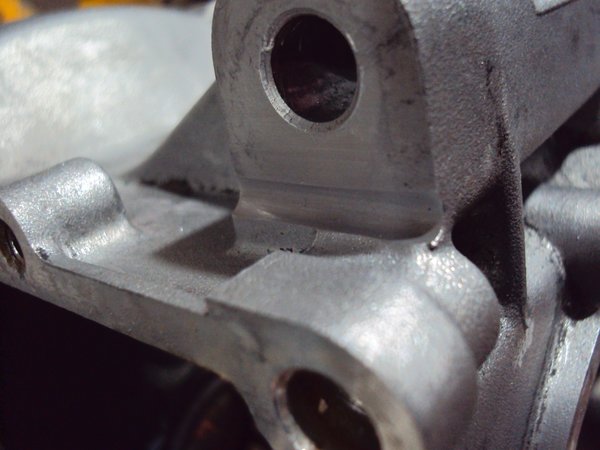
I thought before I get too far into this gearbox stripping and painting I'd better check that the mounts weren't cracked. First step break out the dye check kit. Clean down the mount area and apply the dye. Wait for 15 minutes. Clean it off again with solvent and apply the developer. All good thankfully. Its not hard to see why they can crack here. There is not genuine radius from the vertical machined face to the horizontal area. its just the edge created by the face cutter. I'll create a radius here by hand as there's a decent amount of material and what you lose will be more than compensated for by the removal of the stress raiser from the machining. Ciao


