

Lucky Phil
-
Posts
5,449 -
Joined
-
Last visited
-
Days Won
276
Content Type
Profiles
Forums
Events
Gallery
Community Map
Everything posted by Lucky Phil
-
Do the horn or any of the lights work with the ignition off chuck? Ciao
-
Now he tells us. Pilots, same everywhere:) Sounds like high resistance in the switch to me. Where's Kiwi Roy when you need him. Ciao
-
Chuck, try replacing the lights relay. If its stuck closed you will have power to the LOP light, the low fuel level switch and the tacho with the ignition switch off. You wont notice the power to the low fuel level light unless its low and not the tacho either. Ciao
-
After starting the bike on the charger you might. Always thought this was a big no,no Ciao
-
^ +1. Ciao
-
So here's my attempt to minimise any chance of cracking on the L/H mount. I've Radiused the sharp edge on the casting without reducing the thin section of the casing. This should help. I think the other side is the primary problem area. I need to get my friend who is highly experienced in these sort of repairs to weld the other side. The process is to chase out the crack entirely which I've done, pre-heat the case so its nice and hot and then make several small welds to fill the area and add some extra material. The welds will be peened in between each weld run while the material is still soft to reduce/correct any distortion of the end plate face. If necessary he'll re machine the end plate face. Ciao
-

From the album: V10 Engine
-
Well the cracked gearbox case has been a factor. I need to visit a mate of mine to get it welded and i also need to get the side flow injectors cleaned and flow tested. Plus there's this little fellow (Merlin) thats arrived. I havent had a dog in a very very long time. Forgotten how much time goes into a puppy. More work than a toddler. Std Schnauzer btw. Ciao
-
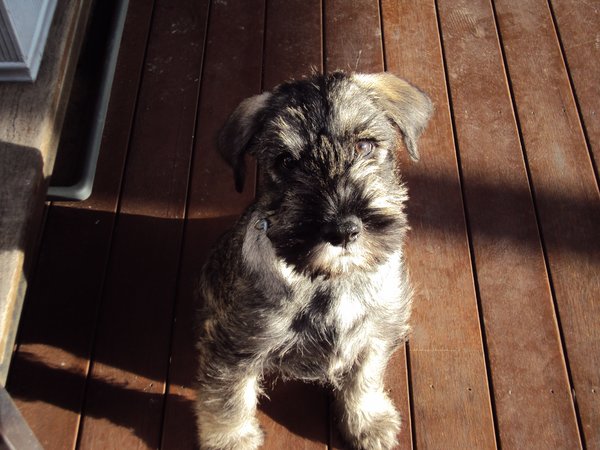
From the album: lucky phils V11
-
Green top feed Bosch, cant remember off hand the flow rate but greater than the top feed red Bosch. The green side feed are also of greater flow rate than the green top feed. The side flow injectors are not only greater flow but also give cleaner and simplified plumbing and dont have the highly delicate feed hose connectors for which parts arent readily available any more. Ciao
-
The std V11 doesnt have "side feed" injectors those are on the Centauro and Daytonas. Ciao
-
So I guess the attitude is "please help me sort my issue but I couldn't be #@$&@#@ sitting down and having a think about what things/mods I've done to my bike over the years that might impact the process of finding a resolution". With 50 years of troubleshooting everything from commercial jets to racing motorcycles and cars YES you do need to enumerate ALL the variations, and it's NOT a DISCUSSION its a troubleshooting exercise. I find this type of shit totally disrespectful to those that are willing to help,really I do. Ciao
-
So you didnt think it was sort of important that you would mention the bike is fitted with a power commander????????? It takes you half the thread to mention you recently replaced the fuel filter!!!!! Seriously, people come on here for troubleshooting advice and help and leave out the basic but highly relevant information. This is why I'm reluctant to get involved too much in these troubleshooting issues and waste my valuable time. Ciao
-
Just make sure they incorporate aluminium inserts into mount points esp ones like the valve and alternator covers where the tabs are smaller. I'm sure there would be a market fora carbon V11 tank with all the Ethanol tank swelling issues about. Talking about tanks they should also be treated with a liquid liner before use to make doubly sure they arent affected over the long term. Ciao
-
The Ohlins stuff is covered in the V11 workshop manual update. I can email it to you if you want. Ciao
-
If you are running Unleaded fuel you can forget about looking at the exhaust tips for mixture information. That grey colour you used to see was lead deposits and the black you see now is the carbon thats a byproduct of low speed running and the warm up rich fuel map even if the mixture is correct. Ciao
-
Very true docc. My set of sideflow throttle bodies for the Daytona engine were like this. Stripped one of the screw heads off. Was very fortunate the others came out(on the bench) My advice is plenty of heat with a small propane torch and all should be ok. I did manage to get out the broken one without damage by an easy out and the heat but it was a nervous task Ciao
-
Because one comes standard in the Guzzi tool kit with every new bike along with a grease gun for the drive shaft fittings, a multimetre for the electrics and a tether to stop the bike floating away if you ever remove the flywheel. Ciao
-
You replace wheel bearings every year!!!! no wonder the bearing bores are shot. How many miles do you do annually? Ciao
-
Not a bad price on that wheel docc with a disk and drive assy even for 2015. Ciao
-
Probably cheaper to buy a good second hand wheel. If you resleeve you would sleeve it to take the std bearing or bore the wheel hub to take a bearing with the same width and ID but larger OD if there's one available. Ciao
-
But who says its lean, images can be misleading but it looks fine to me. The r/h may well be too rich. The only way to tell with any accuracy is to lambda probe each cylinder. Unless you're prepared to do that then its just going to be a drawn out proposition. Are we willing to wait for a few thousand miles to see the color of the ports to ascertain whether or not its corrected every time you make an adjustment or try something, because thats what it will take? I'll watch the rabbit get chased down the hole with interest. Ciao
-
Unplugging the TPS and trying to rev the engine is a pointless test. Of course it will not rev and cough etc the same as not getting enough fuel because that's exactly whats happening. To test the TPS you need to use an Ohmmeter on it and look at the resistance shift verses the positional rotation. Ciao
-
Its far more complicated than fuel in temp out. There are a lot of variables some of which are compression differences, squish clearance differences, varying shapes of inlet ports that give different amounts of turbulence. All of these and much more affect burning efficiency and therefore what you see in the exhaust port and it all varies depending on what speed and load is on the engine. For a road bike particularly there is an acceptable window of operation and as long as the engine performs well, carburates well and doesn't use too much fuel then delving into exhaust port colors is a little pointless from a practical point of view. Race engines are different of course but they are operating in a much narrower window right up against the limits. The chances of burning an exhaust valve on a road bike due to tuning issues are pretty remote. If the map is that bad it'll be horrible to ride. Of course reading plugs and ports on a road bike is fairly useless anyway unless there is an extreme issue. thats why racers always used to do a plug chop at the end of practice and the straight as low speed running everywhere else just gave useless readings. Ciao
-
I wish I had the time to chase this kind of detail on a perfectly running bike. I'd take the spare time and forget the exhaust colour. Ciao


