

Lucky Phil
-
Posts
5,449 -
Joined
-
Last visited
-
Days Won
276
Content Type
Profiles
Forums
Events
Gallery
Community Map
Everything posted by Lucky Phil
-
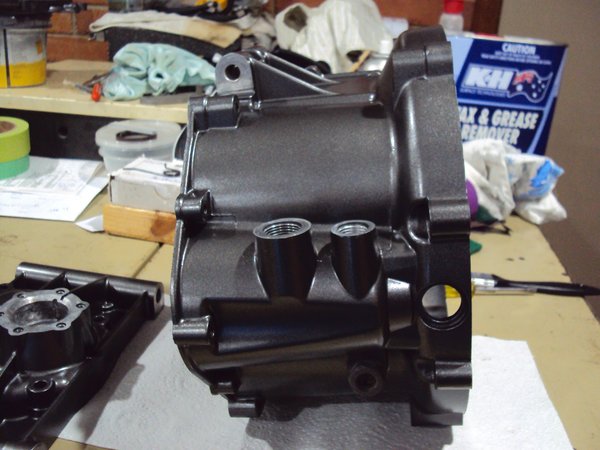
From the album: V10 Engine
-
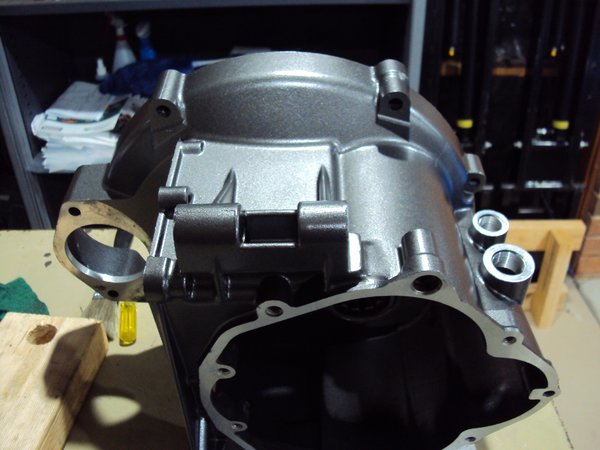
From the album: V10 Engine
-
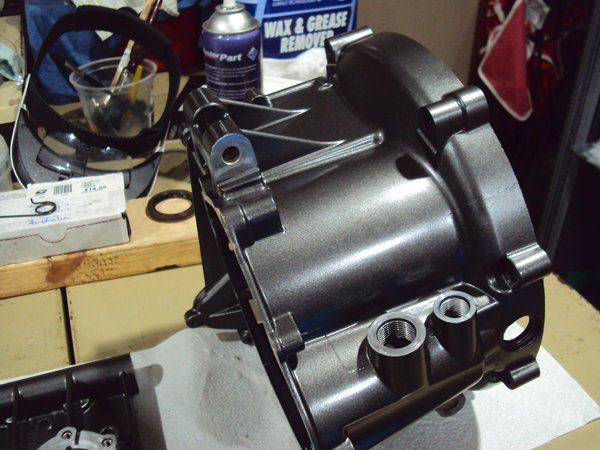
From the album: V10 Engine
-
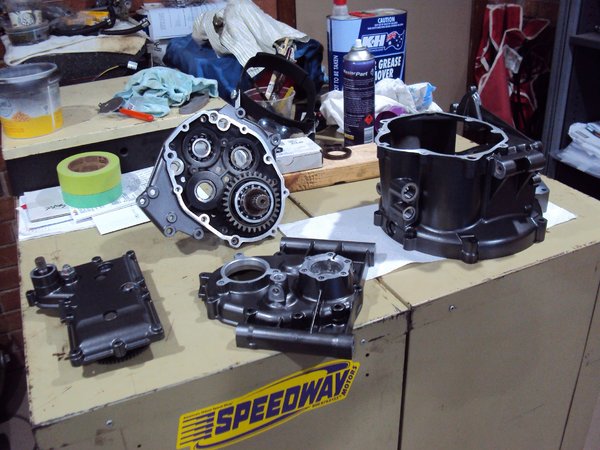
From the album: V10 Engine
-
Sounds like how my body feel every morning. Ciao
-
All it does is introduce another variable you dont need. Ducati did it for a while in the 851 days along with a vacuum connection to the fuel pressure reg then wisely deleted it. Ciao
-
Pointless, get rid of it and plug the holes. Its just a convenient way of isolating the holes without plugging. Ciao
-
I'm currently repainting a wrinkle finish gearbox and I can tell you if an engine was painted with this level of adhesion you would never have an issue. Looks like you either got a rock solid wrinkle paint job or a flaky one. Ciao
-
Oh ok my mistake. Ciao
-
Most likely cable tied to the front engine subframe. Two bullet connectors on yellow wires from the alternator. Ciao
-
A fix as old as time. Those connectors have always been an issue. Ciao
-

Greetings! Glad to have found you! And I have a question.....
Lucky Phil replied to Kane's topic in 24/7 V11
At the very least we've saved you from a Norton Commando,lol Ciao -
Would require a whole new rear gearbox housing with an internal bevel drive. Better in there than dangling off the back wheel. Ciao
-
I'm thinking something like the Magni chain drive conversion for 70's MV Agustas Ciao
-
If you want to really improve the bike and save a massive amount of weight and dont mind spending money commission an elegant chain drive conversion and rid the bike of the heavy leaky inefficient POS shaft drive system altogether. Ciao
-
Greetings! Glad to have found you! And I have a question.....
Lucky Phil replied to Kane's topic in 24/7 V11
You need to make a commitment to owning a Guzzi. As long as the bike is fundamentally sound and the price is as good as others here have indicated then you cant afford to sweat the small stuff. The valve cover may have a porosity spot in it which would be the first I have heard of and would be an easy fix internally. More likely its been damaged at some point and repaired without sealing 100%. Also forget about a test ride to see if you "like" the bike because chances you wont be in love with it on a test ride. The joy of Guzzi ownership grows on you as you commit yourself to adapting to what the bike requires from the rider/owner.The test ride is just to make sure everything works. Ciao -
Greetings! Glad to have found you! And I have a question.....
Lucky Phil replied to Kane's topic in 24/7 V11
Welcome to the board. Both my brother in laws had 850T's back in the 1980's while I was riding Japanese bikes. One had an 850T and the other a T3. A friend I rode with in the early 90's had a T5. As for the highlighted point,well dismiss it from your mind. My 2000 model is stable as a locomotive on our Aussie roads and I know what a full blooded tank slapper is like on a GSXR1000 on the straight at Phillip Island at 200kph with the triple clamp hitting the stops in both directions. There are plenty of people here on this forum with many.many miles on red framed bikes that will tell you they have never experienced an issue. Why Guzzi did what the did with the later bikes is a mystery. I suspect they moved the flywheel guy to the frame department around that time. Buy the 2001 bike and have some fun. Ciao -
Sorry not seeing this. Ones an adventure bike and ones a pseudo flat tracker for the suburbs. Ciao
-
I've just had my bar end weights out and it was a matter of removing the rubber plugs that covered the allen head socket in the end of the weight and loosening the screw and the weight unscrewed from the bar. The weight itself is threaded into the ID of the bar itself. Ciao
-
good tip Ciao
-
Might just borrow from Pete Rolf. Thanks for the offer but my use will just be a one off hopefully so no need to have tooling sitting around doing nothing. Ciao
-
Stein dinse have them https://www.stein-dinse.biz/product_info.php?products_id=9011 https://www.stein-dinse.biz/advanced_search_result.php?inc_subcat=1&keywords=29711960&x=9&y=2&categories_id= Ciao
-
HMB Guzzi or MG Cycles Pete off the top. https://hmb-guzzi.de/Clutch-Internals_1 http://www.mgcycle.com/index.php?main_page=index&cPath=193 Ciao
-
No sorry I didnt look at the sizes just the Big Block ref. I dont believe it matters a whole lot as they will make whatever you want. Email them and ask for a price for a price for the V11 valve sizes. You may need to send them a std valve but all the BB's are probably the same with the exception of the major dia. Ciao
-
If you're in desperate need Pete I have a spare new smaller lock washer (p/n 04055000) which you can have. I also have a single new larger ( 95028020) which I'll need replaced to put my box back together. Ciao


