

Lucky Phil
-
Posts
5,449 -
Joined
-
Last visited
-
Days Won
276
Content Type
Profiles
Forums
Events
Gallery
Community Map
Everything posted by Lucky Phil
-
Radial play on the outer input shaft bearing is normal Docc, you can't eliminate it unless it's originating from the small inner "nose bearing" on the pinion. Ciao
-
Or it has the Ethanol swollen tank issue? Ciao
-
Yep the red frames are the ones to have. Anything else is a fat horrid lazy barge who's owners should be shunned........ Ciao
-

*Polished wrenches for polished things*
Lucky Phil replied to docc's topic in Special place for banter and conversation
Like this docc. You compress the ends and lock them via a knurled section on the end of the handle then insert them down the bore or hole and unlock them. You then feel them around until they are at the largest dia point and lock again. Remove and measure with your Mike or vernia calipers. Very cheap, this set is $36.95AU on ebay. Ciao -
*Polished wrenches for polished things*
Lucky Phil replied to docc's topic in Special place for banter and conversation
Brake rotor ridge is no problem docc, just use the calipers in enough of a radial position to avoid the ridges. The other thing you need is a set of telescoping gauges for measuring hole ID's. Use in concert with your calipers. They are as cheap as chips, maybe $30US. Ciao -
Rear Ohlins shock bump stop replacement, how?
Lucky Phil replied to al_roethlisberger's topic in Technical Topics
Not an easy job I'm afraid. I recently replaced the rear eye end on the Ohlins shock ( TTX race shock) on my 1198 as I fitted a flat rear link which required a shorter eye end. To replace the bump stop you will need to remove the spring then the eye end or completely disassemble the rear shock and remove the piston from the shaft and fit it that way. I can tell you that to remove the eye end you will need a shock shaft clamp which isnt that hard to make. Biggest issue is though that sometimes you need to actually put this in an hydraulic press to hold the shaft while you apply a lot of heat to the eye end to break the thread locker. You will probably need to remove the eye end bearing so its not heat damaged to do this. So best case scenario is make a shaft clamp, remove the spring with a spring compressor, remove the eye end bearing ( pressed in) clamp up the shaft in a vice with the shaft clamp fitted and use a propane torch to heat the eye end while you try to unscrew it. Re fitting is easy. New bump stop, fit the eye end with a new bearing ( you may as well) refit the eye end, with thread locker and refit the spring. The easy way.......take it to an Ohlins specialist and he should have it done in 30 min max. Cost me $60 to get done and he did it while I went and had a coffee. This specialist was a national superbike race team that ran Ohlins suspension and the mechanic told me about the eye end removal difficulty and the sometime requirement for the shaft clamp to need to be in the press. Not common knowledge even for shock specialists. Dan Kyle the US Ohlins dealer I bought the shock off also recommended using plenty of heat for the eye end removal. If you take it to the suspension specialist it may be worth mentioning this technique just in case they run into issues. Ciao -
Gratuitous Pics of Girls + Guzzi
Lucky Phil replied to sign216's topic in Special place for banter and conversation
Amazing balancing skills......no stand. Ciao -
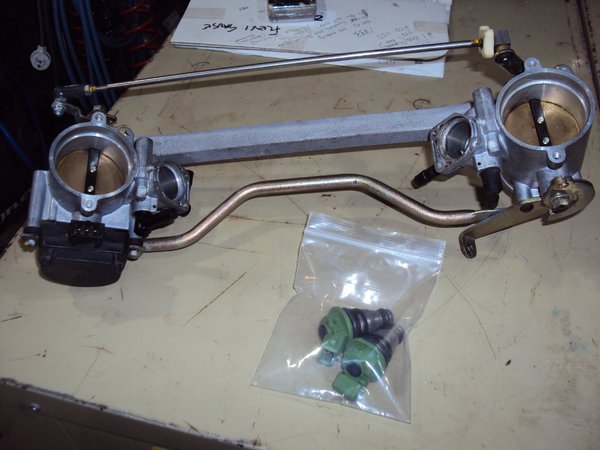
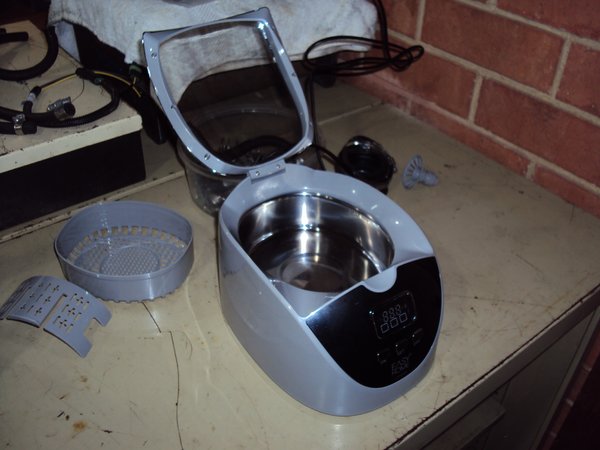
So I moved onto the side flow injector throttle bodies. I wanted to remove the injectors and run them in the ultrasonic cleaner as I had no idea of their history and they had been sitting around for years. I envisaged a painful time of it and I was correct. In their infinite wisdom the 2 4mm screws holding in the injector retaining plates are installed with red loctite!!!!!! What the hell. Naturally the first one sheared off flush with the TB and the rest came out with difficulty. I managed to get the sheared one out eventually but I was lucky for sure. Snap on easy out kit and a scary amount of heat and it was out without damaging anything. The injectors were also difficult to removed which I expected as the o rings dont like to release after years in place and the injectors are hard to get a grab on without damaging them. I devised a process and eventually got them out without damage. Next on the list is to strip down my spare gearbox so I can paint strip and paint the cases. Everyone needs one of these in the workshop. Cheap as chips and work remarkably well. I also have a 20 liter commercial one for the big stuff like cylinder heads etc. Next job. Break down strip and paint the cases to match the engine. Ciao
-
From the album: V10 Engine
-
From the album: V10 Engine
-
From the album: V10 Engine
-
looks like you're overthinking this a a little. Ciao
-
I agree, I just purchased 2 Chinese made right angle ignition sensors ( I bought 2 because they were cheap, I mean $10US each and it made no difference to the postage) During my research I found many,many options from many different European business sources that were in a range of 15 to 30 US dollars. Now considering that the cheapest OEM genuine one I could find was around 125 US dollars then these cheaper (visually identical to mine) versions were obviously Chinese made as well. My conclusion is 2 part. 1... The cheap 20-30 US dollar versions sold by European outlets are in fact the same as mine and probably from the same manufacturer with a profit margin applied. 2... There was such a proliferation of them available from reputable outlets that its unlikely they were terrible quality. I mean what reputable company would want the risk to reputation and the hassle of selling a relatively small amount of sensors in the grand scheme of things for a profit of 5 to 10 dollars a piece if they are going to leave customers stranded on the side of the road all over Europe. I guess time will tell if my logic holds up. Ciao
-
How anybody allows a clutch to degenerate into that condition I dont know. I'm not surprised the flywheel failed trying to cope with the results of that magnitude of wear and the mechanical stress it would have caused. Ciao
-
My recollection is that Guzzi used RAM components for the single plate clutch with the exception of the flywheel which was a non RAM unit. I've not heard of a RAM aluminium flywheel failing and I doubt that RAM would still have been selling them 12 years after they started to fail on the std bikes if they were an issue. It sounds to me like the brew ha ha from the 80's with regards to Magnesium wheels on road Ducati's. Speedline Magnesium wheels were problematical for a time and Campagnolo mag wheels which were fine got caught up in the whole "Magnesium motorcycle wheels are fragile and dangerous" debate and legislation. I experience a bad crash with a Ducati fitted with Campags and can tell you they bend and not shatter. Same here with regards to RAM flywheels I think and they probably just went to steel as the weight saving with alloy is negligible. Steels probably cheaper as well. Ciao
-
How the hell does that happen? I mean 2mm!!!! Ciao
-
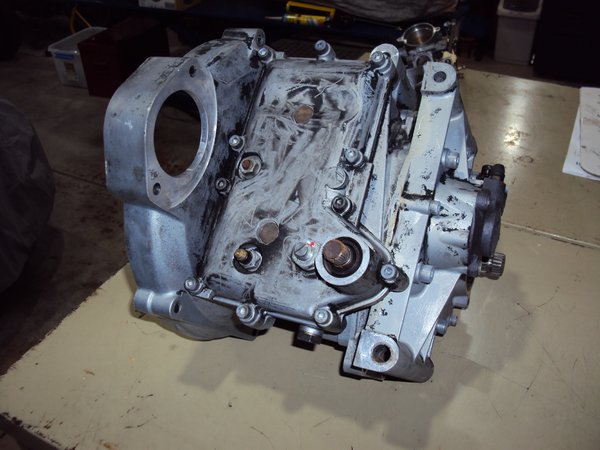
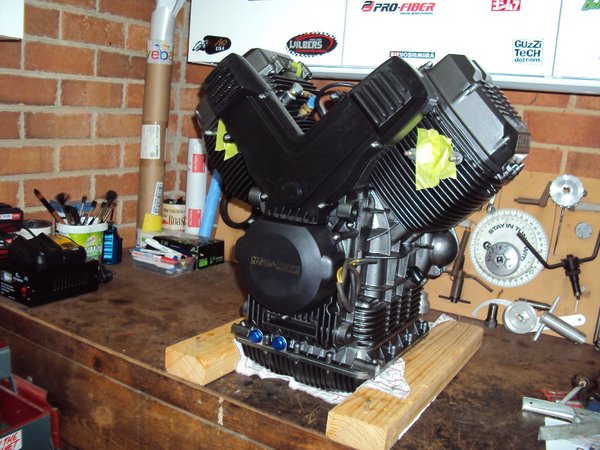
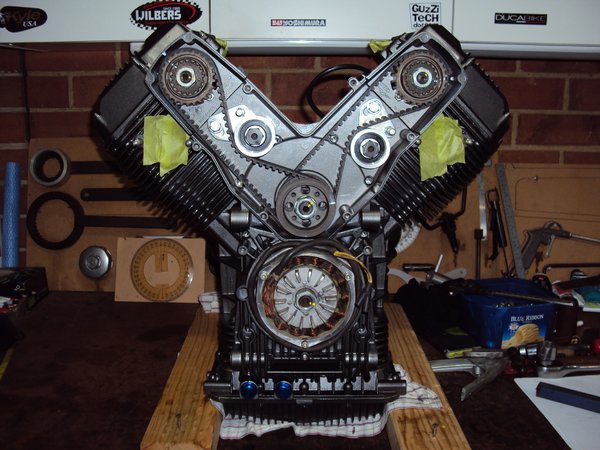
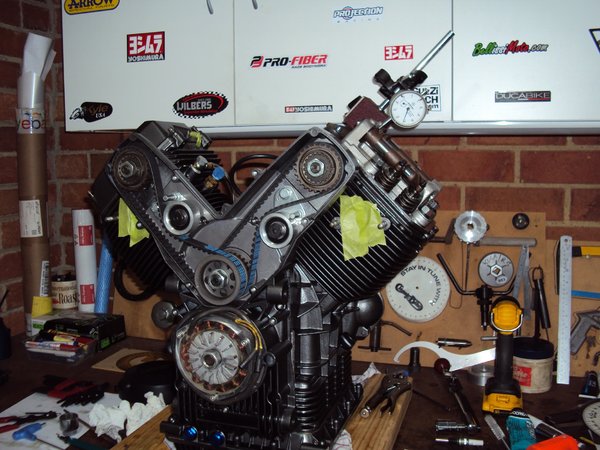
So here we are and I'm calling this finished. Did the final job today in making a camshaft pulley holding tool so I could torque up the cam retaining nuts. I finished off the cam timing a few days ago which on this engine is really easy. Briefly you find TDC on the L/H cylinder ( with the full stop method in this case) and rotate the engine in its DOR until the its 49.5 deg BBDC and then with the rockers removed from the engine and a dial indicator on the exhaust lifter you turn the cam anticlockwise from the base circle until you get .040 (1mm) of lift. All this is done with the belts and pulleys fitted and the cam micrometer adjusting drives removed. You then just move the cam drive adjuster around until the splines on the camshaft and pulley line up and install. Turn the engine 270 deg to TDC on the R/H cylinder fit another TDC indicator and re set the degree wheel and repeat. Home made TDC stop tool Home made cam pulley holding tool. Cam pulley and micrometric adjusting drive Here's how I had the dial indicator set up. Just a piece of steel ( in this case a Ducati bevel drive exhaust nut tool) bolted to the rocker cover flange and a magnetic stand with dial indicator operating directly onto the exhaust lifter. I forgot to take a photo during the timing task but this is the setup with the rocker installed. Both rockers are removed during the cam timing operation. Finished engine And dressed. Ciao
-
From the album: V10 Engine
-

From the album: V10 Engine
-
From the album: V10 Engine
-

From the album: V10 Engine
-
From the album: V10 Engine
-
From the album: V10 Engine
-
From the album: V10 Engine
-
Yes docc when I change the fluid in my wifes car 6 or so months ago I was struggling to get uncontaminated fluid indication on my tester until I actually checked the fluid out of the new bottle and found it to be 1% already!!! I had some old fluid in a sealed bottle I had had for years and checked it and it was zero. I'll be opening any new stuff I buy at the store in future and testing it before I lay down my money thats for sure. Ciao


