
Scud
-
Posts
4,123 -
Joined
-
Last visited
-
Days Won
253
Content Type
Profiles
Forums
Events
Gallery
Community Map
Everything posted by Scud
-
I tried this LED. http://www.amazon.com/gp/product/B00HJEGQQ2?psc=1&redirect=true&ref_=oh_aui_detailpage_o06_s00 It fit, but I could not get it to maintain contact, so sometimes it worked and sometimes not. Obviously, it's out now and I'm back to the standard bulb.
-
Not everything that CAN be done SHOULD be done... but now that it WAS done, it's very hard to look away. He's fortunate to be alive. Teahupoo (the massive wave he rode at the end) breaks into shallow water over a reef.
-
When an Irishman asks for luck, you know it's troubled times. Good luck, sir.
-
Q3s are black and round. L7 = square Who would name a motorcycle tire with the abbreviation for "square"? Think about the potential ridicule... "How are your L7s wearing? Are they "squaring off?" Seems like a marketing error to me...... Like the unfortunate double-meaning of the resurrected SWM motorcycle company I am a (MWM) Married White Male... how do I justify falling in love with, and bringing home a SWM? Who has time for this silliness?
-
Great tennis metaphor. Here's what I was thinking: Then he gave the hammer to Thor, and said that Thor might smite as hard as he desired, whatsoever might be before him, and the hammer would not fail; and if he threw it at anything, it would never miss, and never fly so far as not to return to his hand. ...ummm... "air filter"... there, I'm on topic.
-
Yes, but are the rotation arrows both pointing the same direction? Is it time to turn one around?
-
I saw that "cool shit" too. Someday... I was in Ljubljana once... so close... but that was before I caught the Guzzi virus.
-
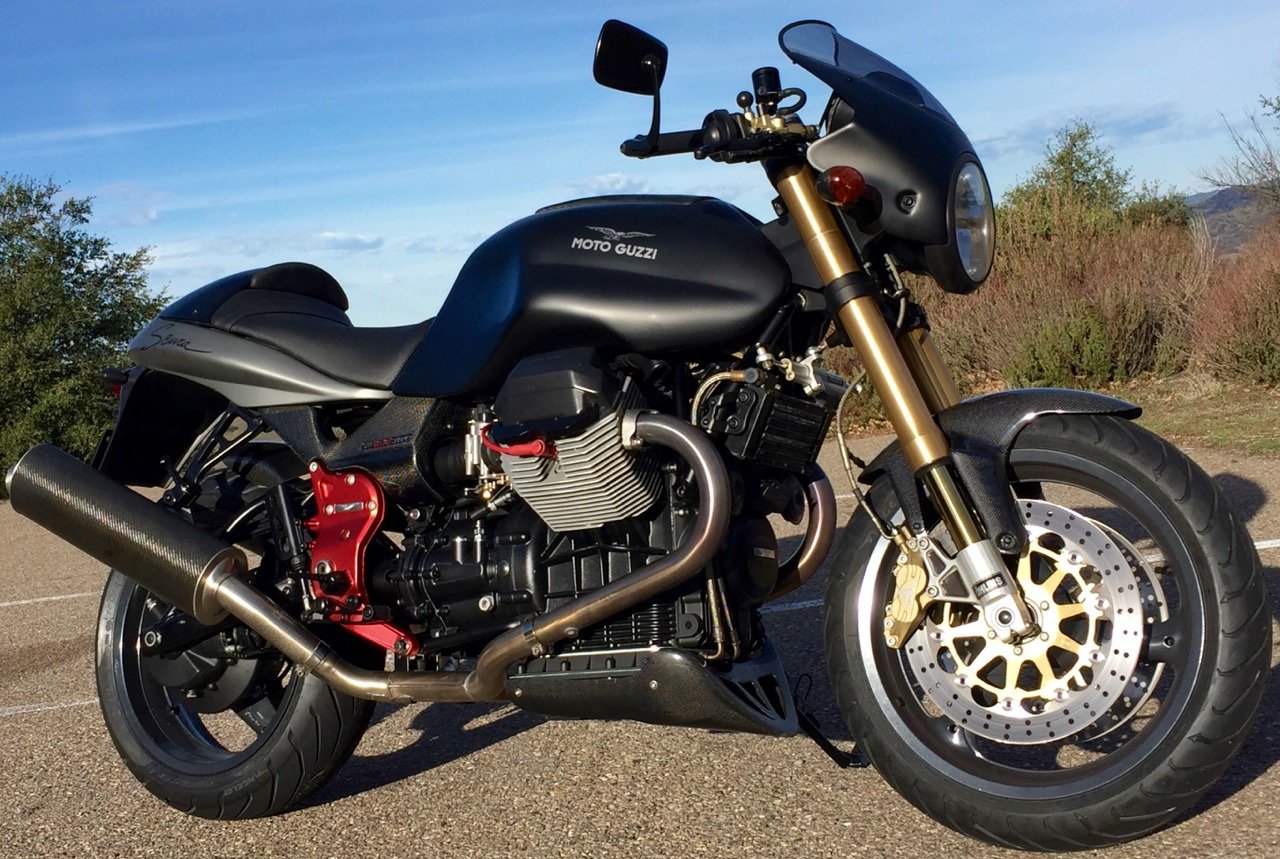
+1 on fun factor - all aspects exactly as you describe it. That 440 2-stroke must like riding Thor's Hammer. Your other remarks make me think I should swap air filters - I've got mismatched high vs low flow things on the bikes. LeMans has sawed-off titanium exhaust with a paper filter in the stock air-box; Scura has stock exhaust with a K&N filter in the stock air-box. Would be a good experiment (but not today). BTW - I'm probably faster on the quiet and stealthy Scura, but the LeMans sounds faster. They're both fun.
-
Check this out. This is actually a dirt bike surfing. Two things I love... but not so sure they go together well. Back story:
-
Bummer you missed that. The fly and ride would have been a true adventure. Cross-continent? You'd need some roo-busters. At risk of continue to drift off topic... a set of Marzocchi Shivers off an early 2000's Husqvarna would give you a lovely long pair of golden Italian legs... and be easy to live with. Here is a random V11 link from Craigslist to get us back on topic: http://orangecounty.craigslist.org/mcy/5140610638.html ...and I rather like this silver/grey naked 2002 sold as a 2003 with the super low miles and the perfect titanium kit racing setup.
-

Dead BMW for fun and profit?
Scud replied to Scud's topic in Special place for banter and conversation
Thanks guys for sharing your experience and advice. I just joined http://bmwsporttouring.com/under the same name as I use here. -
The V65TTs must have been selling at the same time as the R80GS BMWs. Look what's happened to that segment of the market since those bikes - now we have "Adventure" bikes. Similar story as SUVs in the car/truck world - and only a small percentage of owners actually take them off-road. I had never seen a V65TT before; it's groovy... and I suppose part the story of which the Stelvio is the current chapter. I would seriously consider a diesel Stelvio - if one were to be featured in the next chapter - like a 100 year anniversary edition. http://www.v11lemans.com/forums/index.php?showtopic=18931&hl=%2B100+%2Byear+%2Banniversary
-
Just go back one page on this thread, click the images in Chamberlain's post. When they open in a new pop-up window, you can then click the "save" button and you will have the files.
-
Here's a lovely greenie with very tasteful aftermarket fairing. http://sfbay.craigslist.org/nby/mcy/5153107661.html ...and for entertainment value, a 1986 V65TT - let's call it a "Super Enduro" since it has an orange frame - waaaay ahead of KTM. http://sfbay.craigslist.org/nby/mcy/5148665016.html
-
Dead BMW for fun and profit?
Scud replied to Scud's topic in Special place for banter and conversation
Yeah - that's one of the factors that favors the parting-out approach. Uncharacteristically for BMW, the first generation oilheads (the 1100s) don't often get to use all 6 digits in their odometers, because of total driveline failure - tranny, driveshaft, AND final drive. And I believe the improved 1150RT drivelines are not compatible. I'll probably join a BMW forum for a little while. I'm still speculating at this point, because I haven't assessed the damage yet. Either way, I think I'll do alright with this and end up with some extra money for more Guzzi goodies. Anybody done a part-out? How did it go for you? -
Same thing as if you cross an elephant and a rhinoceros: 'ell-if-i-know. Seriously, I'm happy with the Pirelli Angel GTs and from what I can see everyone is happy with the genre: "sporting, high-mileage tire" - by all the usual manufacturers. Oil can last for millions of years... why bother changing it?
-
The Angelic GTs can take you to the Devils Postpile. Can the Demonic take you to the Angels Postpile? I think not... That should settle the matter. I think it's ironic that the Angel's tread has little devil-eyes in the center. This thread is about nothing - like a certain Shakespearian production or Seinfeld creation. I don't have time to read the whole thing, but isn't ironic that Time has become timeless?
-
Dead BMW for fun and profit?
Scud replied to Scud's topic in Special place for banter and conversation
I had a 1996 RT for a long time. The motor is a workhorse, but the driveline is the weak-point on the R1100 series. Plan A probably should be: repair, ride around, resell. It's been down on the left (the side pictured) and damage is purely cosmetic. PO says everything was working before the driveline disintegrated. I just ordered a battery - gonna see if the motor actually runs before doing anything irreversible (like selling a body panel). Just considering my options. One worry with dismantling is that the bike takes about 3 times as much garage space when it's apart - and it's sort of hard to move after you sell the wheels... Need to go to San Francisco again soon... -
Howdy boys - Yesterday I picked up (literally, as in by using my pickup truck) a too-good-to-refuse 2000 BMW R1100RT for $600. Why so cheap? transmission/driveshaft spline stripped - catastrophic failure after close to 100,000 miles. Cost for dealer repair is more than cost of buying a similar bike that works (about $3,000). I'm going to see just how bad the damage is first - depending on what I find, maybe try to repair and sell. But I think it might be easier, more fun, and more profitable to part it out. I think I can get my $600 back just by selling the 2 seats (leather Corbin and stocker), saddlebags and the brand new rear tire (installed right before failure). PO was thinking about parting it out - but only sold the windshield. Like our Guzzis (and probably like many bikes) they are worth more (financially) in parts than complete. But converting a BMW to cash to buy Guzzi parts and help fund daughters' college .......that's priceless. Something about my shady past: In my college days one of my jobs was to dismantle wrecked Datsun Zs for a Z-car specialty shop. That's where I learned "If it wasn't melted and poured into a mold, you CAN disassemble it." So... anybody done this and have advice? What do you do with the pile of crap at the end that nobody wants to buy? How do you get rid of the title if nobody buys the frame? Who wants four new BMW oil filters and a filter-wrench? I'm keeping the BMW tool-roll for my LeMans.
-
OK - 66 hours ride time is a BIT out of the way... Re stands, there was a recent discussion here, with some good pictures: http://www.v11lemans.com/forums/index.php?showtopic=18907
-
Time is what keeps everything from happening at once. Now it's time to have breakfast, then it will be time to suit up, then it will be time to ride the LeMans to work, then it will be time to park, then.... It takes 10 seconds for my new visor to go from clear to dark - or from dark to clear. https://www.bellhelmets.com/transitions-solfx-clickrelease-shield/ Some people claim the effect doesn't last longer than one year; It will probably take me a year to determine the validity of their claims. BFG - is your Scura operational? Last I recall, someone chided you for neglecting it - but time has passed since then.
-
Guzzidiag says: "Scud, you will never find a COM port and OBD cable to make me talk.... hahahahaha" (sinister super-villian laugh)
-
And therein lies the secret to whole thing.
-
calijackalbob - you DO have Guzzi fever. I love that classic green and silver top-half on a modern, CARC bottom-half. fotoguzzi - KTM Adventure is the ultimate go anywhere, do anything bike. It's 80% dirt bike, 80% sport bike, and 80% touring bike. That's 240%!!!! How can you go wrong with math like that? I still sometimes miss my KTM 950 Adventure, but she went to a worthy cause - trade-in on my Scura. I'd take the Adventure R version as I do enjoy pushing the big dirt bikes into tight places... http://www.ktm.com/travel/1190-adventure-r/ Money being no object, I will take a new Norton Commando 961sf as my short-hopper, please and thank-you. Saw one in person recently... http://www.nortonmotorcycles.com/bikes/commando-961-sf/ In black... obviously... not sure why they are making those other colors... I assume that for this game, we don't have to give up our current rides.
-
Thanks PD. According to those data (and from a Scura... ) removing the snorkels has a minuscule benefit in HP and torque - robbing a tiny amount of HP and torque between 2,000 and 2,500 RPMs - and giving it back between 5,000 and 6,500 (my favorite spot). A snorkelectomy also adds 4 mental horsepower (I made that up) by increasing intake noise. Surprisingly, if I am interpreting these data correctly, removing the snorkels takes away a 1/2-second of lag time from a 45 km/hr, 4th gear roll-on and somehow makes the bike quicker to begin accelerating.
