Leaderboard


Popular Content
Showing content with the highest reputation on 04/11/2021 in all areas
-
Evening All! So I had a little wiring issue with my wee Monza, and decided to draw out a coloured wiring diagram to gain some control over the problem. Went marvellously- all sorted now yay. I ended up enjoying it so much that I decided to draw out the V11 diagram in colour too. So, if any of you fine gentlemen would like a copy of this let me know. It’s been a tough year, that’s for sure, so no charge for this unless you’re feeling flush and want to punt a few quid my way. I’ve gained enough from this forum over the past few years not to feel greedy at all. Looking at a coloured diagram makes a tonne of difference. Anyway, let me know if you’d like a copy. 🙂 Stew6 points
-
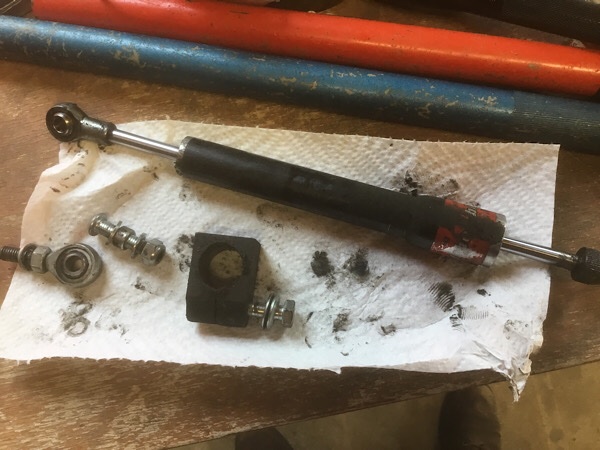
I replaced my leaky BiTubo at about 68,000 miles in August 2009 with a Japanese Shindy (SHIN-juh) standard length/oval body (17-001). It's nicely made and comes with fresh end joints (ball joints/Heim joints/Rose joints . . . ) that have tiny grease fittings on them. Only 58,000 miles on it these eleven years, but staying "flash." http://www.shindypro.com/ss.html5 points
-
Today (and yesterday): Proper cleaning Installed a pair of Angel GTs (with my new hitch-mount NoMar tire changer) Flushed clutch fluid and both brakes (I thanked myself for installing speed bleeders a while ago) Cleaned the brake calipers and pistons Changed transmission oil and rear drive Dropped the pan during oil change since it had been sitting idle so long. For entertainment, here is an easy way to bleed the rear caliper (while you have the wheel off).
 3 points
 -
I used the Shindy on a past V11 and was happy with it. I would not hesitate to use a Hyperpro. Ohlins dampers were stock on the "special" models that came with Ohlins forks and shocks - so you know the Ohlins will fit easily. The Shindy I installed took a little fussin and cussin - but only a little.3 points
-
G'day mate Yeah the standard Bitubo ( I think from memory ) isn't all that flash! I put a Hyperpro damper on when I had my Suspension done as my std unit was leaking too, it's been bloody good / no issues. Yep definitely worthwhile upgrading your suspension by the way!! Cheers Guzzler3 points
-
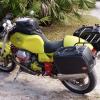
Meant to post a slideshow of pix of installation, etc., but forgot. Here they are. Moto Grappa & Moto Gomme Open the link to see in "collage;" hover cursor over pix for captions. All best viewed in slideshow mode. Peter Youngblood is a Guzzista saint. Bill3 points
-
I wouldn't be happy with just bleeding the system after a failure. Consider flushing it completely. If you have a little syringe, you can draw all the old fluid out of the reservoir and fill it with new - that will reduce the amount of flushing you need to do. FWIW, I just did this yesterday as I am getting mine back on the road. I used Motul DOT 5.1 fluid in place of DOT 4. (not DOT 5, which is not compatible). It's best to have a helper to squeeze the lever while you work the wrench and monitor the fluid. To keep the hose on the bleeder and avoid making a mess, use a zip tie.2 points
-
Thanks for the recommendations, gents!2 points
-
Address please?😁2 points
-
Sorry, my bad. I did a search.1 point
-
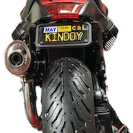
Here’s the nasty old thing — yuk! My bad for not noticing it sooner (dark when I leave and dark when I return, and making hay in between): So it’s out with the old and in with the new, sometime down the road. In the meantime, I’m just gonna shake my head!
 1 point
 -
I've been using the Harbor Freight tire changer, with the Mojo Blocks and Mojo Lever. It's mounted on a pallet. It's been pretty good, but there was a learning curve. Having recently bought 6 motorcycle tires (a pair each for the Scura, Stelvio, and 701 Enduro) I decided to get the No Mar tire changer with the hitch mount. I did the Scura tires yesterday and I really like the convenience of the hitch-mount, and I'll probably figure a way to mount it on the wall or hang it from the ceiling when not in use. The wheel mounts much more securely to the NoMar than it did to the Harbor Freight. The wheel did not spin at all while removing or installing either tire. On the Harbor Freight unit, I had to use strap to tie a spoke to one of the arms. The bead breaker was a puzzle at first, because it is not compatible with the hitch mount and I didn't mount it to the floor (can't drill into a post-tension slab). I managed to get the front bead broken with some effort. For the rear, I figured out how to position the bead-breaker under my hitch, then used an adjustable height hitch and some wood to sort of jack the truck up on the bead breaker to keep it in place. That worked great. As for the levers and lubes, I had plenty of RuGlide tire mount lube so I used that and didn't try the NoMar stuff yet. I did try their mount and demount bar, but I like the Mojo Level better. Maybe it's because I have so much experience with the MojoLever, but I really struggled with the NoMar lever. I can probably figure it out, but I think I'll just stick with the one I know. FYI - my Harbor Freight unit is for sale on Craigslist for $75. But if anybody here wants to come get it, I'll gladly take $40.1 point
-
They do look pretty good. How will they mount and work under the steering head mouthing points of the V11? What say you, guzzler? Did you go with the CSC or RSC version? How about a pic of it mounted on your bike?1 point
-
Are you sure it's not just the belt slipping? I would think that anything mechanical screeching wouldn't do it for long.1 point
-
There is no proper sequence for hydraulics . You just have to TRY what worked last time . Since there is no last time..... i have a (can't remember the name) hydraulic bleed kit and reverse bleed . Open the bleeder , connect hose and force fluid back through the slave up through the master and catch the fluid and air bubble(s) . You want the master to be as level as possible to get the air out . Also , you can push the fluid from the master through the slave to get the air out too . Keep the master as level as possible too . Good luck & use DOT 4 fluid1 point
-
It didn't take long to get the first victim ... erm ... I mean volunteer to use the new changer. Chris B is coming over (with his girlfriend) to swap some tires on the wheels of his Honda AT. Sure hope she's been watching the No-Mar videos! Pretty sure I am hopeful that we can R&R the tires, but way less sure that we seal the beads. My old and large Craftsman vertical compressor ... ... is hors de combat with something seriously amiss in the control valving. It screeches like [Kathi made me delete the first three analogies I used here! ] at relatively low pressures. I need to find someone who can see if that is fixable. Parts seem to be few to unobtanium, with pricing to match. My smaller B&D one doesn't have the volume to push the beads home. I did buy a Kobalt air tank last night to see if we can bridge the gap. If not, Chris (or his girlfriend ) can see if a gas-station can make that happen. At least the tires will have been mounted. Assuming I can get the air piece worked out, local and "furriner" Guzzisti and riders of selected Other Brands are welcome to use it, including folks on trips who plan better than I do and want to drop-ship tires for en route swaps. Finding shops to do this in the area is more difficult and ex$pensive than one would think. Off now to watch those No-Mar vids. Bill1 point
-
Nice. We should just have our new tires delivered to your house then?1 point
-
I did get the clutch partially working. I opened the bleeder valve and let out a little fluid, but couldn’t properly bleed it, as I didn’t have any hose. I squeezed the lever about 100 times to build up pressure, which seem to work (or it made my hand tired). I’ll do a proper bleed tomorrow. Thank you for all your help.1 point
-
And it's gone - first guy to see it, bought it on the spot. Been nice chatting with you all over the last few years. Look for me and the red car at the Vanilla Bean in Pomfret CT on Sunday mornings. I'll be at the Guzzi table...as an alumnus :-) VT4L1 point
-
I've got to relay my experiences. I have been changing tires for 50 years using a bead breaker mounted to my bench and concrete floor, tire irons, 4x4's on a concrete floor or car tire wheel with protector on my bench, and rim protectors. I've always been successful, even with a 240 section Harley tire but, with the exception of the skinny '75 Triump tires, it was always a struggle. And, anytime I thought I had learned a trick, either it didn't work next time or it was so long between tire changes that I forgot it. Then I bought a No Mar Classic HD along with their tire irons, Xtra hand clamp, Yellow thing and their lube and bolted it to the floor. The first tire (rear) for my 2004V11 Le mans tore while mounting. I was unable to get it on without finally using tire irons and rim protectors. So, before I mounted my same size Suzuki TL1000S rear tire, I bought a used wheel and tire assembly off Ebay for maybe $60-$80 and practiced on it. That's is when I learned some of the tricks. Removing a tire is relatively easy but mounting is much more tricky. I'll practice on my Ebay wheel/tire first when it time to change my next tire ( I have 7 bikes). If I don't practice, I'm sure I'll look like those guys on YouTube with their tires spinning on the mountings. Finally, the further you get from mounting a race tire towards a touring tire, the less chance of success you'll have mounting the tire with the mounting bar. For my 2014 Valkyrie rear tire, I used the demount bar just fine but used only tire irons to mount it. The a few of these tire irons: https://www.jpcycles.com/product/2170075/j-p-cycles-tire-iron-15-curved used with a rim protector or plastic from 2 liter cola bottle will help get the last part of tire over the rim when using tire levers. No Mar's levers are wide. Frank Good luck.1 point
-
nailed it1 point
-
Yeah, I even tried running with the fuse block lid off. No joy. That is a hard area to ventilate on the V11 without flowing in road-crap and weather-scuz. Honda VFR guys learned to use computer hard-drive fans to cool their regulators. Is that what we have come to? Turn the left side of the V11 into a Testarossa, of sorts? Or just go total Jim Hall/ Chapparal . . .1 point