

Lucky Phil
-
Posts
5,449 -
Joined
-
Last visited
-
Days Won
276
Content Type
Profiles
Forums
Events
Gallery
Community Map
Everything posted by Lucky Phil
-
Mille = 1000 in Italian Phil
-
What front forks are fitted to your bike? They don't appear to be std V11 Sport fork legs and or you have the axle in back to front. On V11 43mm forks the axle nut is always on the LHS and the axle is inserted from the RHS. Those look like the later 43mm forks with the 25mm hollow axle but in the wrong way around? Phil Edit......Yep just checked. Looks like you bike has Aprilia RSV1000 forks.
-

1992-1996 Daytona Seat Fairing Builders Review Request
Lucky Phil replied to HadaDaytona's topic in Older models
The RS Sport was a much better looking bike. Different wheels, much better looking seat unit, painted engine, usd forks, more power than the original Daytona and Carrillo rods. -
1992-1996 Daytona Seat Fairing Builders Review Request
Lucky Phil replied to HadaDaytona's topic in Older models
The only thing I can add is if I were going to use a Daytona seat assy I wouldn't be using this god awful bread box version but the Daytona RS version. Gundagai where this one is made isn't a million miles away from Pete Ropers place and about a 5 hour drive from mine. This one has been on the HMB site as a special for years. Take off 19% and add shipping. Michael may cut you a deal who knows. https://hmb-moto.de/Rear-Cover-Sport-Corsa-yellow-black -
Every single person I've known over the years that gets into home brewing doesn't stick at it for more than a year or two. Too fiddly and finicky esp when you are woken up in the middle of the night with bottled beer blowing the caps off on occasions. Phil
-
You know you can buy beer at the shops I actually drink zero alcohol beer these days in summer. You can drink as much as you like, it's available at the Supermarket and cheaper than soft drink. Coopers make a nice one but it's a bit high in sugar so these days I drink Great Northern. Phil
-
ANSWERED Time to get the V11 out, but wont start...
Lucky Phil replied to rich888's topic in Technical Topics
Cant understand why you still have one fitted. Phil -
On the subject of hose clamps these are the best. Re useable and the special tool isn't required. Neat, compact, simple and reliable. I hate screw clamps on small hoses. They look like shite. 5/16 EFI hose needs the "purple banded" Norma Cobra clamps. You can buy them at many places or on line. https://www.irrigationworks.com.au/hose-clamps
-
You could re arrange everything like my bike I guess. EFI Fuel hose often leaks after long term storage at the clamps and after a bit of running they swell and seal again. Phil
-
Std bush. Buy them anywhere for far less. https://www.sp-spareparts.com/en/p/egb-1615-e40-b-ina?srsltid=AfmBOopEQweX5noDan8IK06-n8jMwp2x23nsWgj79duzIrKvL2X86Efe Phil
-
If 12 keeps coming off 10 the lever arm it's not related to the missing shift lever bush. More likely an issue with the lever or the arm itself. Spline condition or clamping action etc. The spring shown in the image isn't std I don't believe and the only measurement for the bush worth having is from an unused bush. You might just have to measure the ID of the frame support for the shift lever and the OD of the shift lever shaft itself and make or source your own bush if you can't buy an oem one. Old bike engineering.
-
3 small wires that sit in the thread pitch dia, so in the thread valleys so to speak. Two on one side and one on the other and then use a std mike to measure the bolt dia. Useful when single point cutting on a lathe. This is better than my explanation.
-
Personally I prefer the much more compact, affordable and convenient set of thread gauges I have sitting on the Lathe. These and a set of 6" Vernia callipers tell me what I need to know about bolt size and thread pitch and profile. If it's really tricky I'll use my thread mike or the 3 wire and std Mike method. Phil https://www.ausee.com.au/products/thread-gauges-set?variant=45253772935332&country=AU¤cy=AUD&utm_medium=product_sync&utm_source=google&utm_content=sag_organic&utm_campaign=sag_organic&gad_source=1&gclid=Cj0KCQiA2oW-BhC2ARIsADSIAWqLnzdb2iEZdt8iF1pAa0ExarJb-NDhZ0TOE5jKY98gNN_JAZ0VmfwaAoSpEALw_wcB https://www.tester.co.uk/mitutoyo-series-125-screw-thread-micrometer-0-4-0-5-mm-5-5-7-mm-choice-of-model
-
You don't want to use the generic torque for a 21mm or 22mm thread depending on the model that's for sure. Phil
-
They are a decorative lock nut for the pins. You need to use your judgement based on that. Hold the pin with the allen key and tighten the lock nuts tight enough to stop the pin backing off. Is a very fine thread so a little more than "nipped up" Phil
-
Ok I'll join in. When I was but 16 years old and a first year apprentice my best mate bought a 122S that had been a rally car and been stuffed into a tree front on. His dad was the service manager at a local Volvo dealer and a classic car guy with "contacts". We pulled the front off the 122 and repaired and panel beet the hood (where I learned how to "heat shrink" panels by an award winning restorer of the day) and got it straight and true then re sprayed the whole car. He and I put quite a few miles on that car with it's 1800 pushrod engine over the next few years. We painted it a pale yellow colour almost a light mustard. My friends older brother also had the four door version the 124 as well and it was a light grey colour. Back then it wasn't exactly a "cool" car to be seen in as a young bloke but it was faster and handled better than many thought it would. Phil
-
Screwed on reverse thread. Phil
-
I like the ring nut with the integral lock screws. Phil
-
BMR Can motorcycles have soul?
Lucky Phil replied to activpop's topic in Special place for banter and conversation
The only guaranteed answer I can make on this topic is Electric motorcycles definitely do not have a soul. Phil -
ANSWERED Can a battery be recharged still connected on our older Guzzi?
Lucky Phil replied to p6x's topic in Technical Topics
That warning docc is you're manufacturers typical "get out of jail free" warning. Who in their right mind is going to disconnect the battery when on a charger or even more ludicrously when they need to jump start a vehicle. What, disconnect the reg then jump start and with the engine running reconnect the reg? Phil -
ANSWERED Can a battery be recharged still connected on our older Guzzi?
Lucky Phil replied to p6x's topic in Technical Topics
This makes zero sense at all as probably over 2 billion vehicles worldwide are at some point on battery tenders/chargers with the batteries still connected. When you come across stuff like this you look at the overwhelming evidence in front of you and see if it aligns with the "advice" you've been given. Phil -
On the topic of popularity it's strange how the V11 Sport/Le Mans series is in terms of what people are prepared to pay for them on the second hand market probably, well almost certainly the least popular BB V twin Guzzi. Here the SH market price for them is very poor. Even old T's and T3's are selling or asking for far more. Even 16 inch front wheel Le mans is worth more on the SH market. Very strange to me. Phil
-
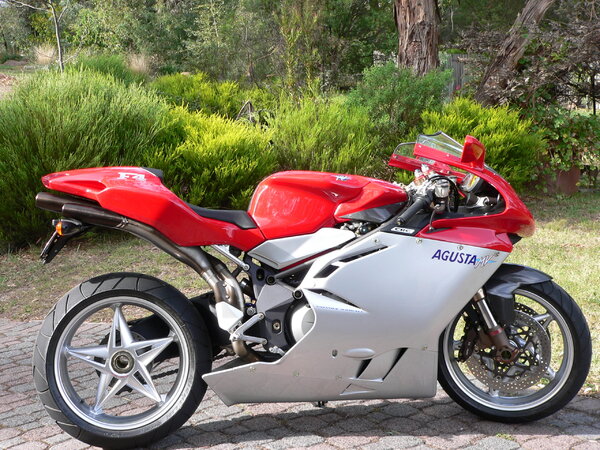
@Scud: It's brutal! or should I say brutale?
Lucky Phil replied to p6x's topic in Special place for banter and conversation
Here you go Tim the original and best. One of my 750's and my 1000 ( with the Aprilia RSV in the background) Beautiful bikes both of them. -
From the album: lucky phils V11
-

From the album: lucky phils V11


