

Lucky Phil
-
Posts
5,449 -
Joined
-
Last visited
-
Days Won
276
Content Type
Profiles
Forums
Events
Gallery
Community Map
Everything posted by Lucky Phil
-
This is getting traction here in the last 5 or so years. The artists generally use local people in the images. I like street art esp with a Guzzi parked in front. Must do a trip. http://siloarttrail.com/home/ Ciao
-
Haven't thought about the final assembly yet but that's an idea. My Aldi seals are a little small on the CS at 2.1 mm so I'm going to order some 2.4 and 2.5 Viton seals this week and test them out. Ciao
-
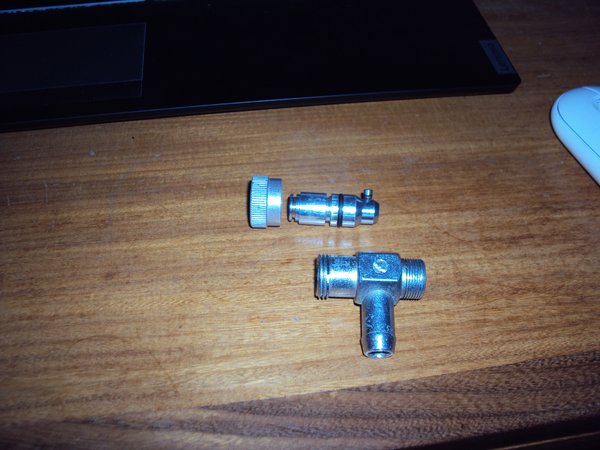
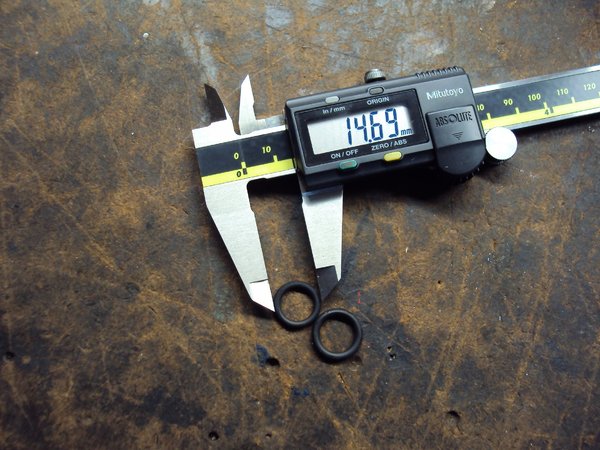
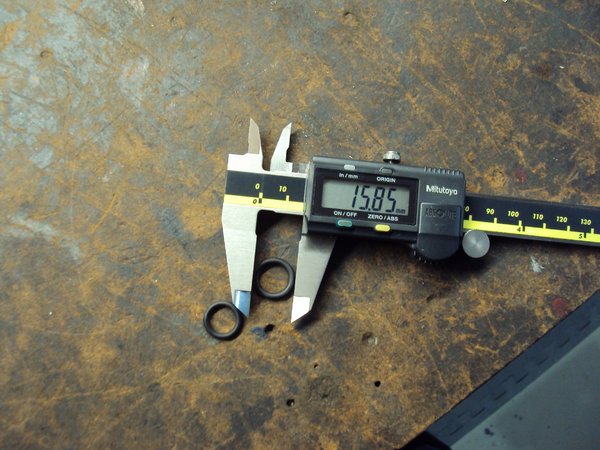
Some of you may be aware of my ongoing frustration with these things. Briefly I've had one that refused to close off and another that has leaked when in the open position. Time to investigate. I suspected that the issue was junk seals and it turned out I was correct. I carefully removed the crimped section of the aluminium operating knob so I could screw it off the body and remove the internal plunger. The seals were toast which was causing the leaking in the open position. Bearing in mind that this thing gets used once in a blue moon the seals shouldn't have an issue really. So seals removed measured up and left in fuel overnight. I also tested a seal from an elcheapo kit I bought at the local Aldi store for comparison. No idea what the Aldi seal is made of but it was almost an identical size to the original. The first image shows the two seals after 24 hours in fuel ( the originals hadn't seen fuel for a week or so) As you can see the original has swelled a lot, around 1 mm in dia. So if your manual tap is difficult to open and shut and needs pliers to do so here's your reason. Garbage non fuel compatible seals. My cheap control seal is fine and hasn't swelled at all. This sort of thing drives me nuts, to save pennies they use rubbish seals and to compound the issue they aren't replaceable.......until now,hopefully. The difference in the seal sizes is quite obvious after 24 hrs in fuel. So what we need is Viton or FKM seals which I suspect will need to be 10 mm ID X 2.4 mm CS. I'll confirm this soon. The problem is what to do now with the the tap and its lack of open stop since we have removed the crimped section from the knurled nut. The issue for me is the lack of equipment. I've got plenty of nice ideas but dont have a mill which would allow me to do it properly. What I came up with is in the following image. I drilled and tapped the plunger for a 4 mm grub screw that can be inserted into its hole through the tap outlet. This grub screw when installed now forms the down stop for the plunger internally by it striking the inner bottom edge of the outlet hole replacing the crimped section of the aluminium knurled nut. The only issue I had was that I drilled and tapped the plunger hole about 1 mm too high which caused issues when the tap was closed. I resolved this by opening up the throat of the outlet port up near the closed seal face. Downside? a reduction in outlet area but i doubt it would be an issue as the inlet and filter screen are smaller than the tap outlet spigot ID.Next time I'd drill and tap a 6mm access hole on the tap body opposite the outlet port and make the 4mm hole in the plunger all the way through. I'd then have a 4mm stainless grub screw with the stop end turned down to 2 mm and it would be accessed through the 6 mm body screw from the opposite side. This would be much neater and minimise the loss of outlet area. The 6 mm access screw hole would need to be sealed with some thread sealer but the tap could be easily pulled apart for seal replacement and servicing.Note here only 1 seal is fitted to the plunger. I give this idea to the greater Guzzi community and forego retiring in luxury on the Caribbean on the obvious fiscal benefits I could derive from patenting etc. Ciao
-
From the album: lucky phils V11
-
From the album: lucky phils V11
-
From the album: lucky phils V11
-
Hammertone? ( brand name) That's what its known as over here. Painted my first toolbox which I made as a first year apprentice at training college with it. Same colour as well. Ciao
-
Interesting, do you have a higher res shot so I can see the workings? Ciao
-
I had the same response when I swapped to gear driven cams after hearing that timing chain wear caused the hiccuping. Rode around a bit and it seemed cured with the gears but then the weather changed and warmed up a bit and it was back. I think its just mapping and a lot more prevalent under certain atmospheric conditions. The EFI experts may have a better handle on it than me though. Ciao
-
Dont bet on it yet. Ciao
-
Whats a cork:) Ciao
-
So Roy if you use a 3 wire flasher you wont need to do any wiring mods? Ciao
-
Not with such a low res shot I cant. Looks a little like a slide hammer but with a turning function. Ciao
-
There's a reason for that. Ciao
-
Quite, but the bike and Prince thinking he looks cool on it is the one and only thing that sticks in my mind, cant remember what the rest was about. I'd love to meet whoever was responsible for choosing that bike for the movie. Its interesting how fragile the "cool" image can be. I mean David Beckham is most girls dream until he opens his mouth. Of course some people can never be "cool". Even in a skin tight flight suit and acing the Top Gun school Chads never going to make it:) Ciao
-
Dont even think about adjusting this on the bike,its a bench job. Docc is correct of course about the simple stuff but it may be a shifter plate off for a look see for you. Ciao
-
Yes its a wrench to repaint perfectly good paint just for a colour change. Ciao
-
https://www.ebay.com.au/itm/Moto-Guzzi-FRONT-FAIRING-V11-CAFE-COPPA-ITALIA-01575388-GU01575388-GU01575388/143552827012?hash=item216c6a4e84:g:-5gAAOSwr9ReaRJN https://www.ebay.com.au/itm/Moto-Guzzi-FAIRING-RED-V11-CAFE-WITHOUT-SCREEN-01575488-GU01575488-GU01575488/133238608688?hash=item1f05a3d330:g:K4oAAOSw~aVd3~UO Not exactly cheap but if you really need one. Ciao
-
Even on a Vespa it would have been more epic:) Ciao
-
Some beautiful pieces there docc,esp the old style dividers and screw driver. I love the repair to the file handle,worth taking the time to repair skilfully. Ciao
-
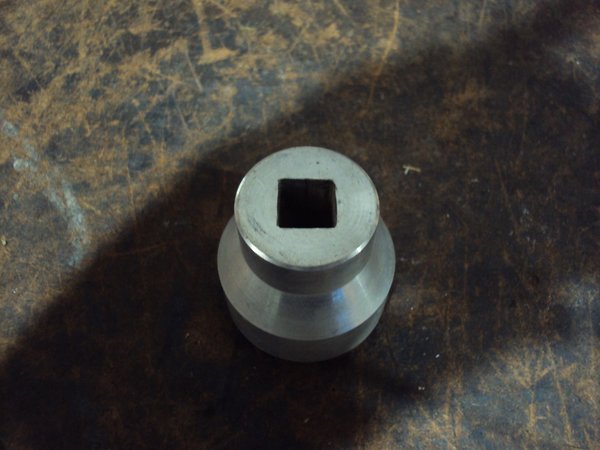
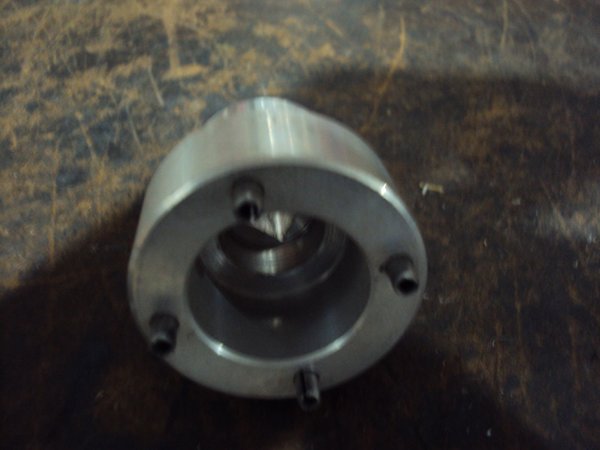
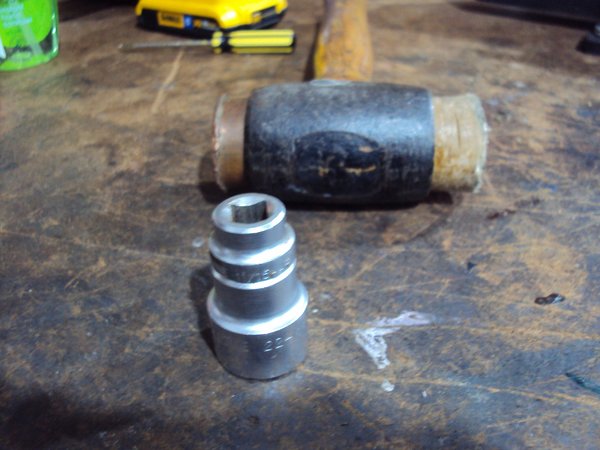
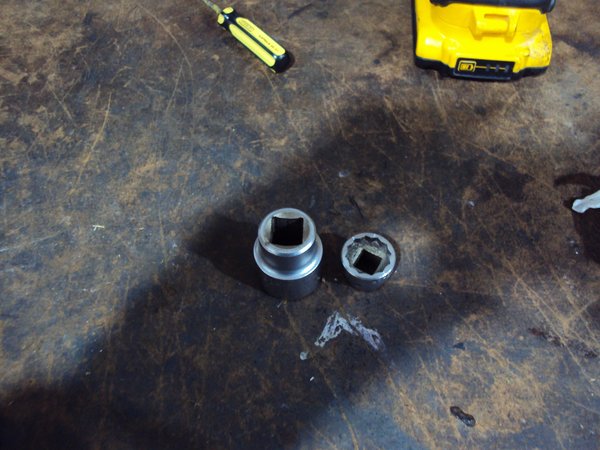
Now that the V11/Daytona assembly is all but finished I decided to take a break and re group my thoughts and have a good tidy up before I get onto running it and figuring out the EFI. The process unearthed some old friends that engendered some memories and reflection. Principle among these was my grandfathers mechanical tachometer, such a lovely piece in its velvet lined box replete with various drive adaptors. I guess he used it for setting engine idle RPM on cars, dont know but it makes me think of him and holding in my hand something he used and valued is a nice feeling. I also came across this I made about 30 years ago to remove Ohlins fork caps. I am slightly impressed with myself as I remember machining this piece up including filing the 1/2 inch drive section by hand at my friends workshop The actual memories of that day and the people present come back to me as a pleasant time indeed. More than just tools........old friends and valued memories. And here's my next project, a tool to remove the oil pressure switch on the Daytona engine. A long socket is too long and a short socket is too short so I'll make my own extended short tool. Just need to weld it together. Ciao
-
From the album: lucky phils V11
-
From the album: lucky phils V11
-
From the album: lucky phils V11
-
From the album: lucky phils V11


