
footgoose
-
Posts
3,049 -
Joined
-
Days Won
69
Content Type
Profiles
Forums
Events
Gallery
Community Map
Everything posted by footgoose
-
I got to mine ok with the bike up and rear wheel off, and with a needle fitting.
-
 I love me some Van. My favorite Van song by my favorite notVan artist, Glen Hansard, Swell Season. Thanks for the reminder
 -
if you do get rid of it, I would consider purchasing it. I've seen Tenni's equipped with both & I like the pad over painted.
-
If I didn't already own my dream LeMans, I'd have paid 7k for that one, but it appears pristine. I'd call it a fair deal for both parties. I HOPE a member here got it. So many variables in "values"
-
Some of the chin pad bikes have a black covered piece, and some have a painted one. I wonder if what's under the cover and pad is just the piece they painted for the alternative.
-
I use a nm to ft lb converter. http://www.metric-conversions.org/energy-and-power/newton-meters-to-foot-pounds.htm
-
nice job, and coverage. Thanks
-
How do I know if the pawl spring is broken?
footgoose replied to Frenchie's topic in Technical Topics
for the cover... others have described well. once the dots are aligned, look under one of the cogs (the one over the neutral switch) and you'll find a small indent (about 1/8" concave) and turn the cogs till the neutral switch plunger pops into the indent. thats neutral. for the gearbox, I just (as others have said) moved the selectors around (very scientific) until the rear wheel turns freely. The selector ends facing the cover form a sort of rectangle pattern as I recall.- 29 replies
-
- 1
-

-
- stuck in gear
- V11 Nero Corsa
- (and 1 more)
-
On a modern engine the primary role of the airbox is for resonant tuning, so the airbox works in concert with the engine and exhaust system as a whole. Its similar to tuned length exhaust but on the intake side. The volume of the airbox and its associated resonance has a significant benificial effect on the airflow into the engine. Its also used in conjunction with variable length untake trumpets and the shape of the lip on the intake trumpets. Its quite a scientific process these days, hence nobody removes airboxes anymore as it will lose you a lot of power. The ram effect has a negligeable benifit especially on a road bike and the ram ducts bigger contribution is in feeding cooler more laminar air into the airbox more than any small static pressure increase. On the V11 Guzzi though the airbox is there to hold the air filter and for noise emission reasons, its design pre dates resonant intake tuning on production bikes. Still dont see the point of removing it though. Ciao I'm curious for you to go a step further with the airbox analysis. What about the effect of removal of the top of the box, which has the snorkels, like when the BMC filter is installed? Looks like I only lose the cool air benefit, and laminar air flow.
-
I recall a quote from Spine Raid '17 ... "I don't know.... I drank from the jar"
-
Thanks BBz. Love that. What's in the "Bike Palace" next door?
-
My bike runs a PC3 and performs very well throughout the range. Stucci Xover, MG Ti cans, and BMC intake. (stock airbox with top/snorkels removed) I'm not "swearing by it" .. I'm jus sayin
-
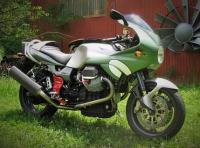
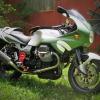
03 Sport Naked from Greg Bender site
-
It looks like a standard sport color, except for the red rear body section. And it's not a real cafe sport. I think he means cafe racer style.
-
apparently that will do you no good. (fubar) but welcome to the forum anyway.
-
welcome vt4l
-
Interesting Guzzi concepts
footgoose replied to brubache's topic in Special place for banter and conversation
thanks. the last one http://www.odd-bike.com/2015/01/millepercento-moto-guzzis-filling-void.htmlis a great read -
That goo in scuds tranny looks like it's mixed with something. Like water from condensation. A part of life in the mid west.
-
I'm far from disagreeing on RL heavy, but the jury is still out for my use of it. I've been in my tranny a couple of times since I started using it, and the strawberry shake always looks as one would expect. Yeah, it's thick and clingy, but nothing like scuds encounter. I'll continue with it till I see something I don't like.
-
+1
-
thanks Marty. Some really interesting bits on the red Magni bike. Someone should tell him about the Li battery. Was anyone tempted to call it Rattley Tappet?
-
Gratuitous Pics of Girls + Guzzi
footgoose replied to sign216's topic in Special place for banter and conversation
Bravo Docc!!! ! -
what's new from Guzzi, to Jim Dandy ...in 9 posts. Twisted
-
"No reason a Tennista to buy one - unless you plan to get an early sport to keep her company." well, they are all tarts, after all.
-
ok, that clears it up. I didn't realize it was a Guzzi part, since some bikes don't have them. Thought it was aftermarket. Thanks guys.