
Scud
-
Posts
4,123 -
Joined
-
Last visited
-
Days Won
253
Content Type
Profiles
Forums
Events
Gallery
Community Map
Everything posted by Scud
-
Czakky - I found the Ohlins manuals to be very helpful. The same principles apply to the Marzocchis, but I like the illustrations and explanations in the Ohlins. The manuals are in the downloads section here. I got a serious forum-provided education while I was setting up my Scura's suspension - it made such a difference that I swore it would be the first thing I do to any future motorcycle. I recall GuzziMoto said something like "setting sag correctly is the first, and most-often overlooked, step in suspension tuning." After the dramatic change in handling I experienced, just from turning some adjusters, I'm convinced. No spacers needed - it's all within reach provided you have some tools (a metric measuring tape is handy), a competent accomplice, and a way to get your wheels off the ground. It would be worth doing on your current setup just to either verify that it's in range, or to correct it and see what difference you notice.
-
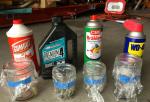
I'm rebuilding a pair of two-pistons calipers, so only four seals are available for this experiment. Apologies to blue Dawn. I expect no change to the one soaking in brake fluid, because the seal is what keeps the fluid from escaping the cylinder - it's soaking in brake fluid all the time. I chose petroleum oil because everyone seems to agree that petroleum products are bad for these seals. We'll see how bad it is. I'm most curious to see the affect of the brake cleaner and WD-40. Other than a visual and manual inspection after the soak, what sort of test should I apply? Perhaps hang weights off them till they break?
-
Several months ago, I used WD-40 to clean my brake calipers and we had some discussion about the risks involved in that. For reference, the discussion is interspersed with other stuff in pages of 2 through 4 of this thread: http://www.v11lemans.com/forums/index.php?showtopic=18967&page=4 GStallons suggested I do a test. Being curious myself, I said I would do so at the next opportunity, which has arrived. Here is the experiment: One brake piston seal in four different fluids: I'm going to let them soak while I am away next week. The used seals are Brembo, from a BMW K75s. They are from inside the cylinder, the ones that the pistons slide against. The fluids are: DOT 3 brake fluid (our control subject) 20w-50 petroleum oil Brake cleaner WD-40 What's going to happen? Step right up and place your bets....
-
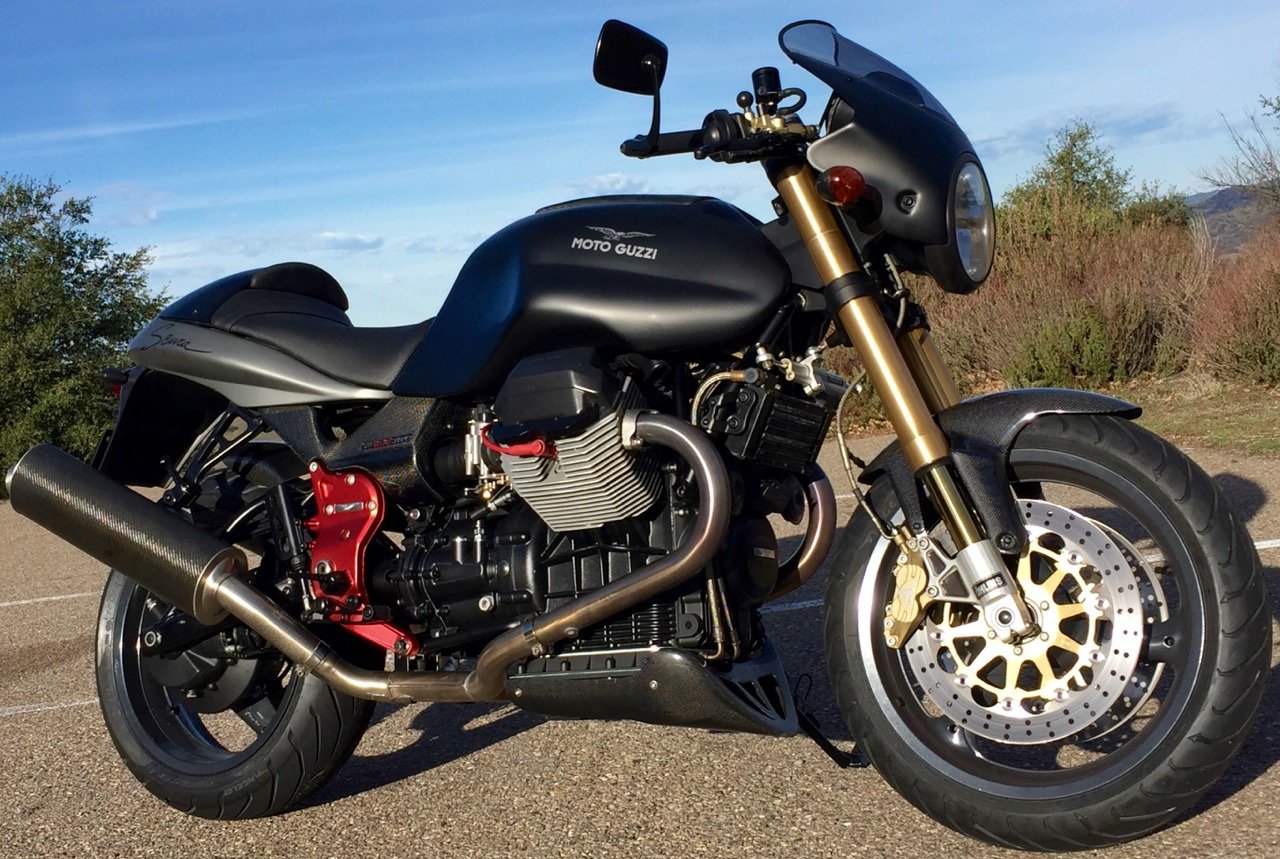
The original clip-ons go above the triple clamp. The triple clamp is different too. Mine has threaded holes to position the clip-ons, but no holes for the standard bar clamp studs. That's why I suggested you might be able to find someone to swap top triples and all hardware with you. Or you could figure a different path to accumulate the parts. You would not need to move your forks at all - you have plenty of room for the clip-ons now - and will still have room to move the forks a bit to suit your handling preferences. Here's mine, when it was still factory-fresh:
-
I just ordered BatteryMINDer #12248. It is supposed to work with AGM and other types of batteries. I think it will be useful for car and trailer batteries. I have a few old batteries in the garage and I will experiment to see if this charger can improve their condition.
-
Todd DOES sell Penske (but not Hyperpro). At the time I was shopping, he only a offered a Penske unit with a remote reservoir for about $1,000. That was more than I wanted to spend, so I went with the Hyperpro from another vendor - found a special offer that included a free rebuild in future, so I'm holding onto that coupon. Todd's Guzzitech website now lists a less expensive ($650) Penske shock (no reservoir) that Todd knows works on V11s. But Penske does not officially list this shock for the V11; they only list the direct replacement with the remote reservoir. http://www.guzzitech.com/store/product/penske-racing-monoshocks-8900e/ To restate/simplify: I am 100% happy with the Hyperpro shock. I would get the Penske if I was shopping today for two reasons: I think the Penske might be a little better. I would prefer to give my business to Todd. If you think you might have Todd do your forks, it makes sense to have him do front and rear at the same time.
-
Shock I went with the less-expensive Hyperpro 460 shock (461 has a reservoir, reservoir can be added to 460 later to make it a 461). It was a huge improvement over the Sachs unit (but I don't think mine was in good shape, so probably not a totally fair comparison). I would recommend the Hyperpro. However, if I had it to do over again, I would go with the Penske 8900E shock through Todd for about the same money as the Hyperpro. Todd confirmed that there is a Penske, non-reservoir unit works (but that was unclear at the time that I got my Hyperpro). Forks I'm with you on the front end - still thinking about trying to do them myself and plug an oil-passage hole as GuzziMoto did - or send them to Todd for his "magic." He doesn't sell a DIY kit, because whatever he does is his proprietary knowledge. I'm leaning toward sending them his way - mostly because my wrench-to-ride ratio has gotten out of balance lately (plus, having met him recently, I like doing business with people I know). I think straight rate springs chosen for you and your bike would be preferable to progressive springs.
-
1) I haven't done the conversion you've described, but I find the Cafe Sport (and other similar models) fairing to be a bit awkward-looking. It's like a half-step between the tight, bar-mounted fairing on the Scura and the large, frame-mounted fairing of the LeMans. Which way to go is a matter of preference. 2) I bet you could find somebody willing to swap the entire triple-clamp and handlebar assembly with you. Maybe post an ad here and on WildGuzzi.com. Some people with clip ons want to install bars - and everybody seems to have a hard time finding the parts. Raising the forks a bit will make it steer just a little quicker. If you have clearance under the bars, you could probably try that now.
-
Thanks for the update on this topic. I have a few Batter Tender chargers that I plug in occasionally, just to "top up." But this has all been intuitive - I haven't bothered to collect voltage data. So this AGM-dedicated unit is appealing. I looked around a bit for an EnerSys charger and came up empty. However, I found this BatteryMINDer unit that seems like what you are describing: http://www.amazon.com/BatteryMINDer-Charger-Desulfator-Batteries-Model-2012-AGM/dp/B005EKY20K/ref=sr_1_1?s=automotive&ie=UTF8&qid=1452312053&sr=1-1&keywords=agm+charger+odyssey Does that unit seem similar to one that is working for you? Note that BatteryMINDer offers two units that appear similar, but one has AGM as a suffix to the product number.
-
Good news. Future tuning should be easy - now that you have all that experience.
-
Thanks Stew. I don't actually need the bushings now, but it'll be easy to find your post later when/if I do. I was only thinking about replacing them since I had the rod off the bike and noticed a few little cracks.
-
-
I dropped off a pair of porkchops at the powdercoater - along with some more stuff that needed to be blacker.
-
Well stated GuzziMoto. I think I'll go ahead try the 5.1. For me, it's just seems like a good idea to have a little extra safety margin (higher boil point) on long, mountain descents where the brakes get a serious workout. Those sections probably see similar heats as some race applications.
-
I'm not having a problem with the rear brake - but recently saw Rox lose his on a long, steep downhill, and Todd said he loses his all the time. For me this is just a preventative thought, because I ride of a lot long, steep roads. My question is also partly prompted by the fact that I have an unopened bottle of Motul 5.1 and nothing to use it on (it was specified for the KTM 950 that I no longer have). Re Cost: I recently bought 365ml of Mopar DOT 4 at Pep Boys for about $9.00 (but same size other brands of fluid can be had for maybe $6.00) 500ml bottle of Motul DOT 5.1 is on Amazon for $11.00-$12.00 Cost/ml doesn't appear to be a significant factor.
-

BMW Flying Bricks (K-bikes)
Scud replied to Scud's topic in Special place for banter and conversation
I was not aware of the Chevy inline 5 - but that's longitudinally mounted for rear wheel drive. I thought Volvo was alone in a transverse-mounted engine (for front or all-wheel drive). I didn't know about the 3-popper in the Smarty either - that must be less common than either of the inline 5s. But I do think the K75 BMW may be a category unto itself. I like the weirdness of that motor. The little brick is growing on me - although my wife bought a Triumph T-shirt for herself yesterday. She thinks a green Triumph Bonnie would be cute and says maybe she'd learn to ride it. -
Based on some recent threads about rear brake fade, I got wondering about brake fluid. I've understood that DOT 3 and 4 are similar, but that DOT 4 has a higher boiling point, and I knew not to mix the DOT 5 (silicone) with it. But I never understood what the DOT 5.1 fluid was for. According to this Wikipedia page, 5.1 can be used to replace DOT 4 and it has a 30-degree Celsius (45F) higher boiling point. https://en.wikipedia.org/wiki/Brake_fluid Obviously, water-saturated brake fluid boils more easily (and the data in the table at the above link are compelling). "Wet" DOT 4 fluid boiling point is about 80-degrees Celsius lower than non-saturated fluid. Also obviously, brake fluid should be flushed periodically. But not so obvious to me: Is there any reason why we should not run DOT 5.1 in our bikes? Has anybody used DOT 5.1 in a V11?
-
True. I already posted that info in great detail in another thread (pressure vs flow). I apologize for bifurcating my problem. It's going to be about a week till I can work on it again - will post results then. Fingers-crossed that I can close-out both threads with a "problem-solved" message.
-
BMW Flying Bricks (K-bikes)
Scud replied to Scud's topic in Special place for banter and conversation
A nice looking BMW K series? Sorry, not possible! Wait, but the motor is shaped almost exactly like your Volvo! Touche. Least common mass-produced engine configurations: Motorcycle - BMW horizontal inline 3 cylinder Car - Volvo transverse inline 5 cylinder -
Not good. That's a sign of loose bearings. Does sound like the PRV is ok, though.. I'm hoping it is a sign that an important part of the gasket was missing - and that the bearings still have some life in them. Stay tuned for parts delivery, reassembly, and testing.
-
Neither MG Cycle nor Harpers carry the rod or the bushings. However, I happened to talk with Curtis Harper when I called. He said they are currently working with their machinist to create a new rod that will will use replaceable bushings. I'm going to wait for that.
-
A customer goes into the shop and complains that his car doesn't run well. The mechanic opens the hood, looks around a bit and goes to get a screwdriver. He then turns one screw, which takes him about 20 seconds. After that, the car runs perfectly. The mechanic says to the customer: "That'll be $100." The customer says: "A hundred bucks? That's ridiculous, all you did was turn one little screw." The mechanic says: "It's only $2 to turn the screw. It's $98 to know which screw to turn."
-
I'm done with cars. I've had a truck for a long time. Currently driving a 2005 Toyota Tundra Double Cab that I've had since new. It's basically only for road trips, bad weather, and hauling motorcycles (the best is when all three conditions are met at the same time). I'm just about to give it to my middle daughter and get myself a diesel truck - which will also only be for road trips, bad weather, and hauling motorcycles. Some cars I've had that I liked: 1955 Cadillac Fleetwood 7-passenger Imperial Sedan (aka limousine) - had it for about 20 years - drove almost all my friends for their weddings. A massive 20-foot, 6,000 pound car: white with grey crushed velvet interior. When I sold it, I had only one motorcycle (BMW RT) and I made a deal with my wife: "Someday this same amount of space will be filled with motorcycles." I should've said "the same amount of weight..." 1964 Ford Mustang - 289 c.i.d. 4 speed manual. Daily driver for many years: restored it twice before I sold it. 2001 Volvo V70 2.5T - probably the best mix of performance and practicality of any car I've had. I realize that's not much of a statement when compared to the mustang and caddy - I've had some other cars too, but I didn't like any of them.
-
Mmmmmmmmmh ... beeeeer!
Scud replied to helicopterjim R.I.P.'s topic in Special place for banter and conversation
Not only does this thread make me thirsty... it makes me think about taking up smoking cigars. Y'all are bad influences. -
Thanks Chamberlin. I appreciate the candid disclosures in those links. I don't feel any play in mine (as you also noted about yours). So if there is no direct replacement bushing, I think I will benefit from your experience and leave it alone. Maybe I'll call MG and/or Harper's tomorrow and ask about it.

