docc
-
Posts
20,491 -
Joined
-
Last visited
-
Days Won
1,188
Content Type
Profiles
Forums
Events
Gallery
Community Map
Everything posted by docc
-
Looks like Dr. John went with the Equal Length Header Theory. And if you're gong to post big, bold rear views of sexy, curvaceous Italians - it could beg the limits of technical discussion. Seriously, I don't understand why the typical Guzzi V-twin 2-crossover-2 doesn't qualify as 2-1-2 ?
-
This isn't becoming one of those things like Lotus' Colin Chapman was accused of: taking out parts (to "add lightness") until something collapsed and putting the last part back in?
-
No need to send my assistant by after all, then?
-
The price of a good running Guzzi is constant vigilance! Perhaps the occasional intense interlude. Be well fettled!
-
I was so reluctant to take the Sport apart to repair the subframe and address the oil leaks. It got worse as I went since the fuel injection/ignition harness was threaded through the rear subframe and I had to take it all loose as well (all the sensors, fuel pump, coils, injectors). Between waiting for paint to dry and some parts to show up, I spent five or six days grooming and fettling and cleaning and tightening. Cleaned all the connectors and especially the grounds. Had the coils, and the battery, and the ECU completely off and back on again. "De-stressed" the exhaust system. I don't know what did it, but the Sport runs better than ever! Sure, I adjusted the valves and new plugs, but this is fabulous! Maybe every 89,00 miles/ 144.000 km the whole wiring harness ought to be unplugged and plugged back up? In a fit of, "If it ain't broke, don't fix it!" , I didn't even reset the TPS, balance the throttle bodies, or crimp the relay bases. I'm wishing this totally good juju on all of your Guzzis!
-
Hang in there, man - there are couple posters here with Magni experience! Gio, what do you think?
-
The early Bosch units are easy to look at the lens and see if it is modified to the right or left. For driving on the right side of the road, my lens is modified on the left. Perhaps your lamp lens is fitted for yanks? (No wonder the MOT wouldn't like it!) EDIT: headlight (1999-2001 Sport) 037 40 540 AUS-J-NZ-SGP-UK 037 40 545 2002 LeMans parts also show a different part number for left hand drive.
-
Bike vertical. Fluid centered or above. Using a volume refill, mine covers the glass completely. What are you using for fluid? EDIT: pawl spring failures appear most common in 2002 (that could mean 2001-2003 worldwide), but later years have reported it as well. This looks like something else - (pawl spring failures, the lever goes limp). Interesting that this is an aftermarket lever?
-
I've been secretly trying to bottle Italian smoke in the hopes of getting AY's LeMans fully charged once and for all. I have just about enough to do up an ignition switch if we can figure a proper catalyst. Folks in these-here parts tell me smoke and moonshine work together . .
-
Wow, man - nice weld! And, finally, a Bjorn thread without a hammer in sight!
- 93 replies
-
- 1
-

-
- exhaust
- fabrication
- (and 2 more)
-

Former Members
docc replied to helicopterjim R.I.P.'s topic in Special place for banter and conversation
I see so many changes that are not small things! Where is the boat going? -
In California they call those "custom upswept pipes." In Tennessee, we would call that a rain gauge . . .
-
Intense! I don't think I've ever seen header wrap on forks before . . .
-
You guys keep shaming me into replacing perfectly good (but ugly) parts on my Sport.
-
After a hundred miles, no weep hole leak. The top of the motor is dry. I had never noticed that the distributor block off plate is right next to the opening for the crankcase breather allowing oil to flow out of the plate and through the bell housing. It appears that sealing this plate has stopped the bell housing leak! (That said, I also replaced the breather hose, the dipstick O-ring, and the O-ring on the timing sensor.)
-
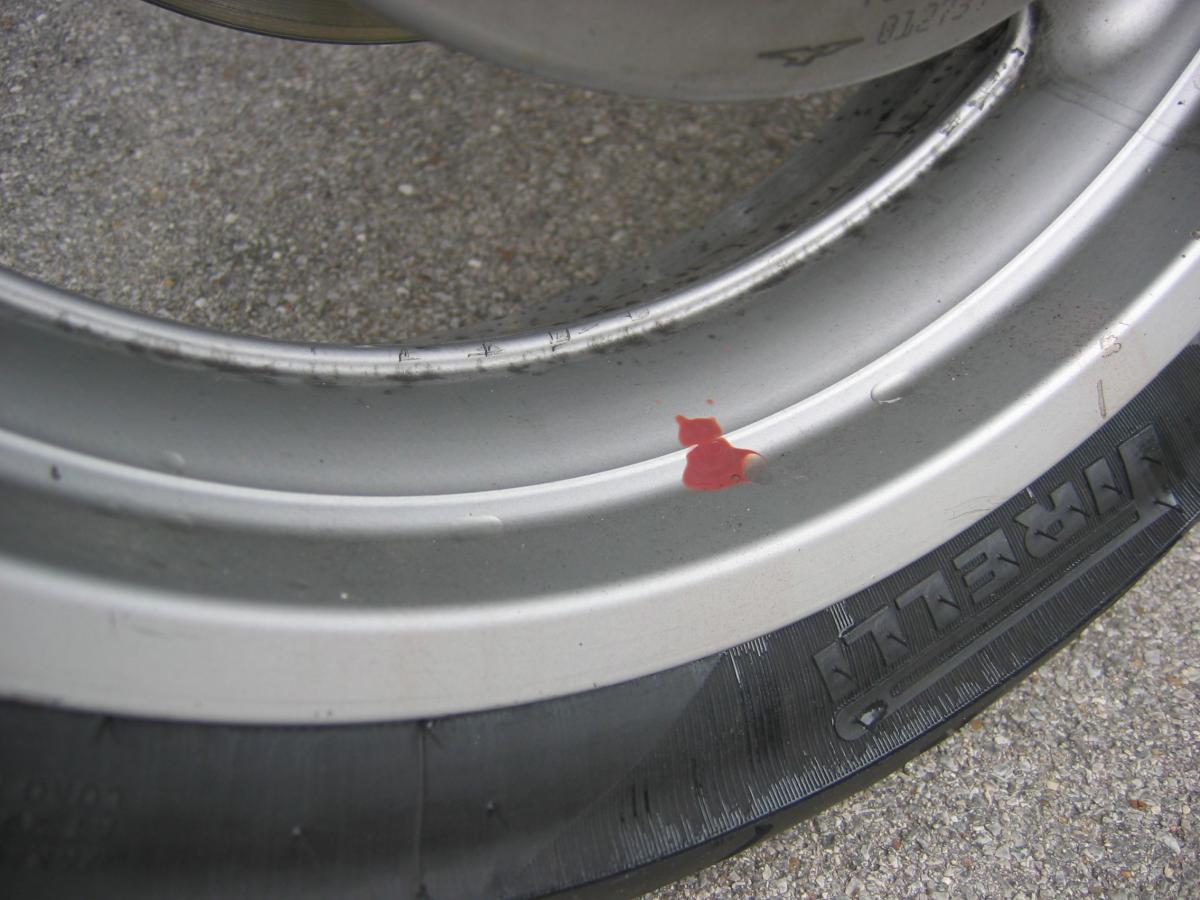
Typical gearbox leaks put gearoil on the exhaust collector, not clear back on the wheel. I can't tell from the picture it's not grease slinging off the shaft or the hub splines. Do you pull the rear wheel for look?
-
On the rim like this?
-
We're already all so trim and fit!
-
So, I freshened the O-ring with a #112 from the kit at the auto parts store labeled "oil seals." The fit looks excellent (better than my last attempt). Looking forward to some miles. So much more now that spring begins next week!
-
It's just that the South'n Bier and Grappa Raid could give the wrong impression. - and it's awkward to type. Seriously, it is best to bring "an appreciation" of the Guzzi spine frame; and a deep and abiding tolerance for those souls engaged in those bikes' nuances and needs. Do not be dismayed by late night sessions fashioning exhaust crossover shims out of Dos Equis bottle caps. Jus let 'em boys run wit it! They can't hep themselves. There is plenty of room for trailer parking. What with SRL's experience last year, count on others of us to help you off-load your fine Guzzi. Gravity is not necessarily our friend!
-
Not sure which part you're looking for. The saddle itself, or the small bum stop pad that attaches to the pillion cover?
-
As in, you thumb the starter button and there is no sound whatsoever? When you turn on the ignition and the run switch do you hear the fuel pump prime?
-
Looks like it. Not that anyone has made reservations as far I know. Hope to see you then!
-
There is an excellent discussion of exhaust dynamics in Keven Cameron's book, Sportbike Performance Handbook. The idea that exhaust pulses from the "crossover" and then from the canister will affect cylinder filing and, therefor, "flat spots" is heady stuff, but worth considering with any exhaust changes. The placement (length) of the junctions and volume of the silencer(s) will do more to influence performance than whether there are simply one or two canisters.
-
Still watching for dribbles and drips all about the Sport. After a really thorough degreasing and addressing several other (wet) concerns, it appears the sensor is drizzling a bit. Ugh. I must admit that I sourced the O-ring (16,000 miles ago) from the plumbing department at Ace Hardware. Would an automotive O-ring be a different composition, or am I just in for a replacement every 25.000 km?