Leaderboard


Popular Content
Showing content with the highest reputation on 05/26/2024 in all areas
-
I used to date this girl in college that liked heater hose over her footpegs . . . " and that was the only thing I will confess to" . . .6 points
-
Though this trip is on my '04 BMW GSA, I thought I'd post any updates here, and if anyone's along the way- particularly in the US- I have a pretty lazy schedule until Bozeman, MT. I'll be meeting friends in Bozeman July 4th, and leaving EP something like 5 days before. I plan to go through Taos, NM to the https://cumbrestoltec.com/ steam excursion, wander up to Moab- where I'll spend at least a whole day, or 2 if it suits. Then to West Yellowstone, and into Yellowstone NP with friends for day before heading to Vancouver. We'll up the coast-ish, then return through the Mountain route. After the return to Bozeman, I have to decide whether to ride East to Michigan and Ohio before breaking off (they're coming from Maine) and then whether back to EP or home to Florida. Decisions, decisions... Camping at all opportunities minus bear exposure. I may post up some of the prep, gear etc. since I have to leave EP in +100*F and Alaska may be near freezing.5 points
-
I’m endeavoring to get Greenie and Goldie out for a full-speed spin every few weeks, just “riding around” to keep them exercised, and avoid the issues of letting them sit too long. (Red is a regular rider) though they are obviously all roughly the same machines (1 short frame, 2 longs), remarkable to me how different they ride. Red has the slightly different foot peg position, and cushier suspension, and Goldie’s clutch is getting toward the end before needing plates, all which make for a fairly dramatic difference when riding back to back. And of course greenies short frame and no windscreen means what that means. Sort of obvious i suppose, but riding them all back to back accentuated things. That little Lemans windscreen I’d always thought didn’t do much, but it makes a real obvious difference in reality… really smooths the airflow a lot more than i would have thought. Similarly, I’d have said “the short frame isn’t that much shorter”, but its a whole different feeling. I feel like I’m on a mini-bike on Greenie after i get off the Lemans. Must be something else to it…. Maybe I should look more closely at stock foot peg position, or maybe that frame length delta just does more than i would have thought. Greenie, with the pods, purrs like a kitten, and pulls nicely through the whole rpm range, but is “lumpier” as you run up through the rpm range. I assume thats a pod issue to some extent. Goldie is still (after much fussing) somewhat lifeless below about 4500 rpm, then springs to life like a 2 stroke above that. And Red is the Goldilocks of the group, being about perfect throughout (engine and suspension), though its nuisance gremlin is the occasional “starts hard and won’t idle” that will happen randomly each summer. anyway, just some pointless sunday morning musings about the differences in these bikes, which i think maybe all have more “artist” and voodoo in them, like proper Italians should, after an enjoyable run on all 3 of the girls yesterday.5 points
-
Ohhhhh , it was personalized ! I had to remove all of this stuff right off the bat . IIRC , he had heater hose over the footpegs and that was the only thing I will confess to .4 points
-
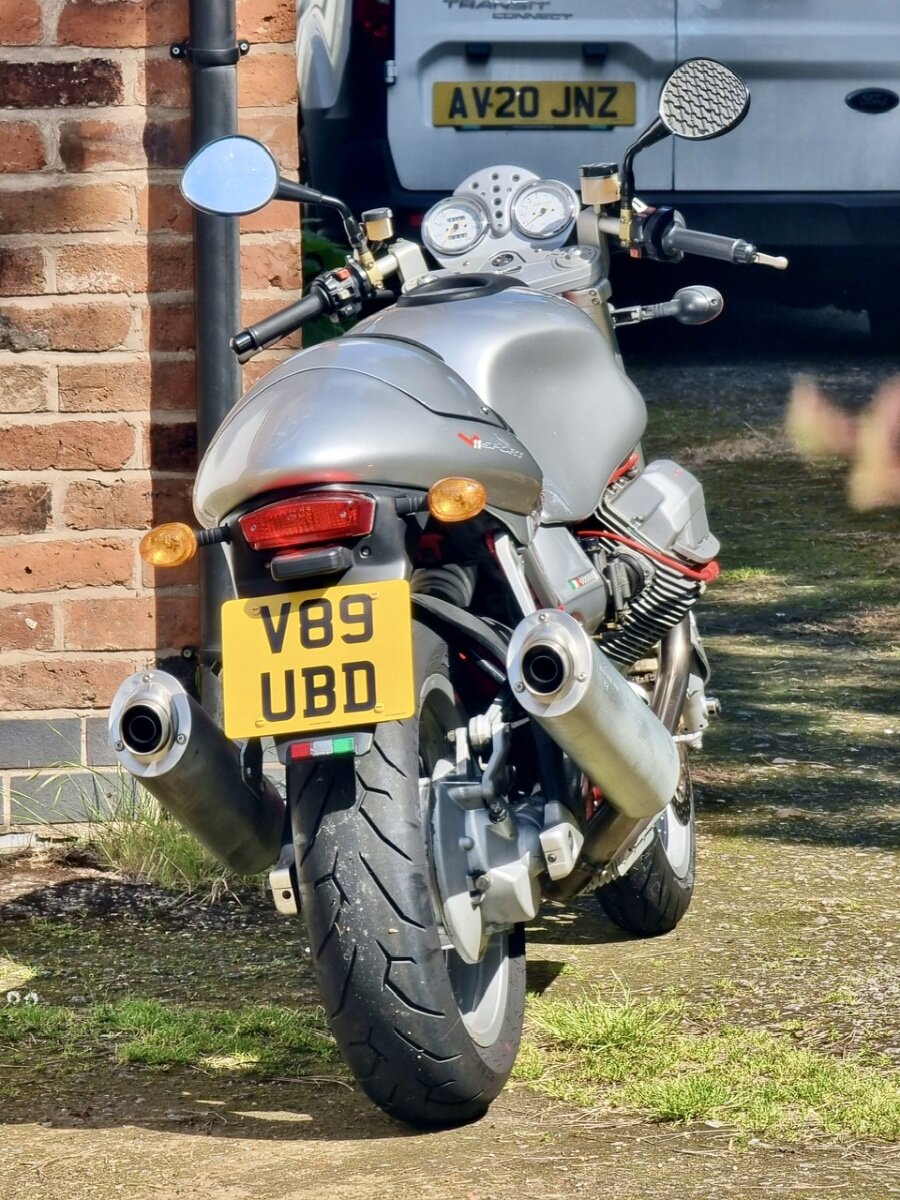
Slim V11, chunky Griso

 4 points
 -
I bought the one @Pressureangle suggested and just tested it. Here's why it's better than the Slime unit... Smaller, easier to assemble/use, I haven't weighed, but I think it is lighter. It's small enough that I would take it on a mountain bike instead of a hand pump. And the BEST part: You can set the desired pressure and it will stop pumping when it reaches that pressure. It also has a deflate function so you can air down to a desired pressure, which is convenient if your ride a dual-sport to the trail and want to air down for the single-track.) And for you dirt bikers who use the Tubliss system - it will go up to 120 PSI for the inner tube, and under 10 PSI for the tire. This is super key for multi-day trips, as it is important to keep that inner bladder pressure high (360-degree Rim-Lock).3 points
-
Probably all we need to know about THAT docc....3 points
-
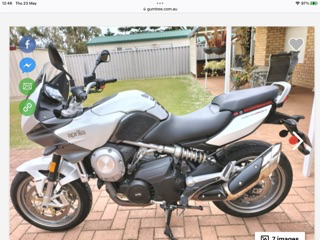
Well not actually *New* new but new to me. For years I've been wanting a Mana GT. This is the model with the full touring fairing as opposed to my 'Plain Jane' NA model. Well a couple of weeks ago one with a blown motor came up in Sydney for $950 so I bought it on a punt. Went and collected it last Wednesday and sadly, it's a shitter. Not worth me swapping the motor out of my NA into but only useful for spares. Not really a worry though as it came with a set of brand spanking new Sport Corsa tyres on it. They must of been put on the day the motor blew they're that new! That's half what I paid for the bike right there! Anyway I decided it was time to stop shilly-shallying around and found this on Gumtree Super clean, 40,000km and owned by an ex-customer of mine. Problem is it's in Perth so I have to get it shipped. My Givi luggage off my NA will bolt straight on and I'll be set for my touring steed for the rest of my days! It also means I can sell my Red Griso which was going to be set up as a tourer but the Mana makes far more sense.
 2 points
 -
If you're around Moab and route works out, the roads and views around Capitol Reef NP are amazing. If Fruita is along the way, stop in for a pie. But you cant go wrong almost anywhere in Southern Utah.2 points
-
I have the exact same "Slime" brand pump as in Docc's photo. It has served me well, and it takes power from the same plug where I connect a battery tender. I take the pump in a backpack on dirt bike, then nobody else in the group has to carry a pump. But they have to carry something else that nobody else does... The Slime unit takes a little assembly each time if you want to keep it in it's case. Takes a minute, but worth it to not be pumping by hand when you are trying to seat a rear tire bead in the woods, and it's getting dark, and it looks like it might snow, and you're already tired and out of water... geez, I remember that day too clearly. FWIW - we couldn't set the bead with the hand pump, so we just mounted the wheel and hit some bumps strategically until it seated it's damn self. The newer, rechargeable ones look nice too. Reliability, size, weight, and convenience would be my priorities (in that order). I've been looking at a beefier one that can handle re-inflating 4 big tires on my Bronco after airing down for off-road. https://www.amazon.com/dp/B000X9B32M/?coliid=I1RNPE5WCC7WX4&colid=1ESYMD7D6SJCQ&psc=1&ref_=list_c_wl_lv_ov_lig_dp_it2 points
-
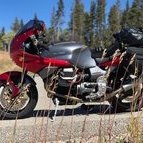
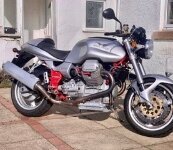
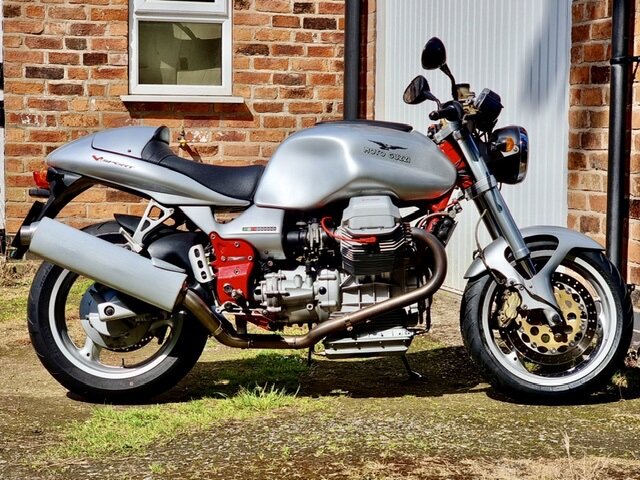
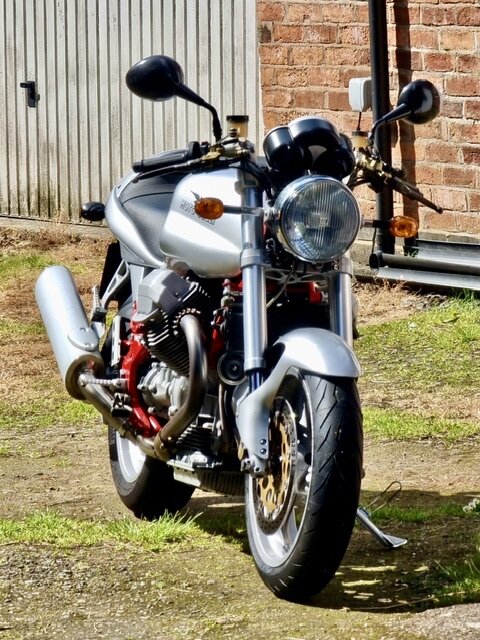
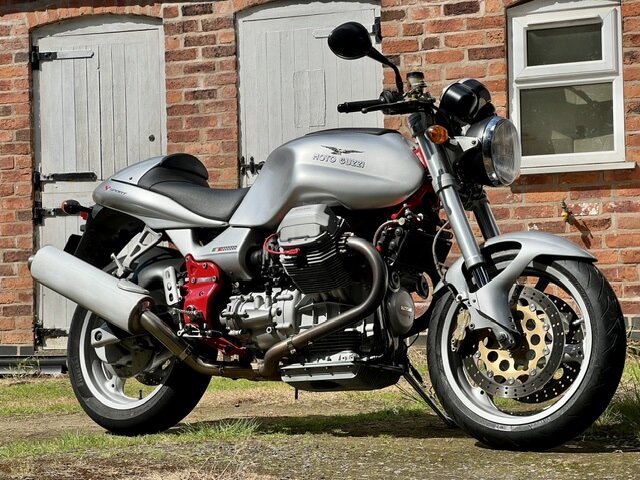
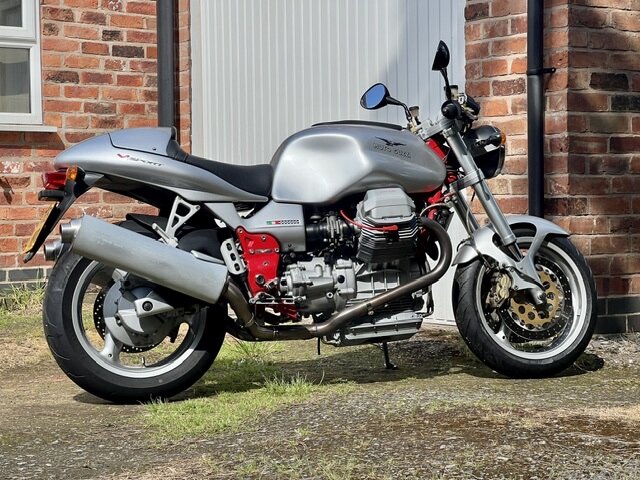
Fabulous silver V11
 2 points
 -
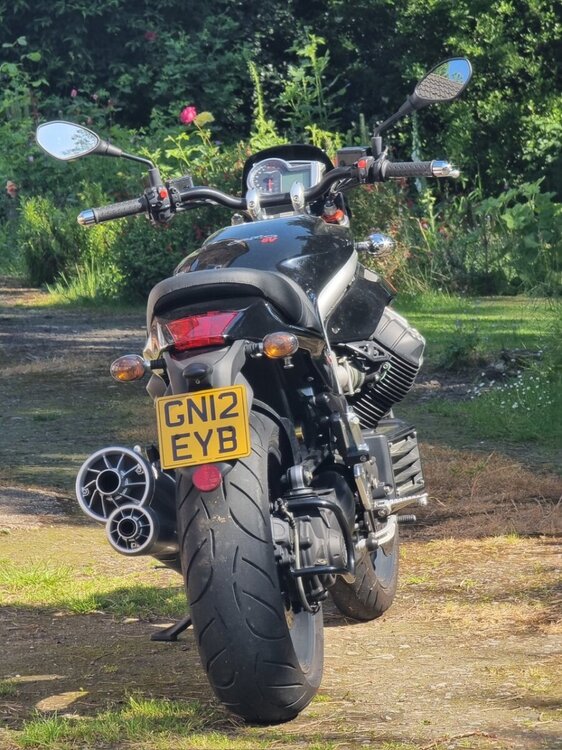
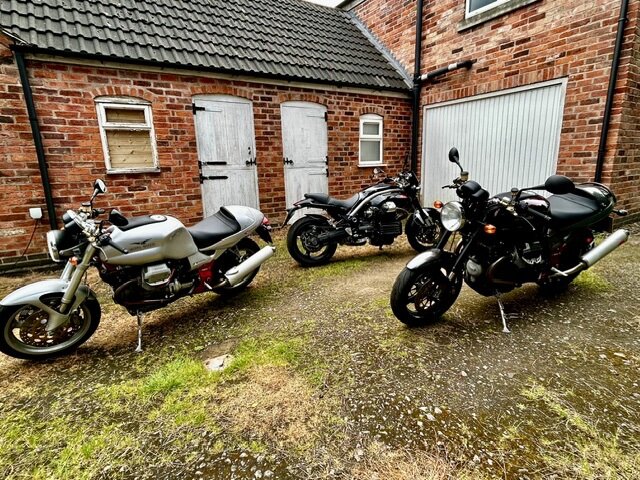
Washed the squashed bugs off these 3 last weekend

 2 points
 -
Helmets are like BBQ sauce . What you love , I just might turn my nose up to. A while back this progressive motorcycle shop was closing and I went over in hopes of getting a bargain on a NAME brand helmet . The owner told me "you better buy what fits you and disregard the name . It turns out I got what I needed and am enjoying it still.2 points
-
Hope this link works- bought this one for to carry on the Himalayan. Used it to pump up both tires after making new, pleasantly surprised at the speed and volume. Both tires from flat didn't use a third of the battery. Also can use as a battery pack for your phone, etc. https://www.amazon.com/Airmoto-Tire-Inflator-Air-Compressor/dp/B094DMH7ZM?pd_rd_w=6eqO3&content-id=amzn1.sym.b46c8fe2-d558-44b6-a291-82096c829da9&pf_rd_p=b46c8fe2-d558-44b6-a291-82096c829da9&pf_rd_r=MSHTGQ06R0979TDTF2B6&pd_rd_wg=Jv8si&pd_rd_r=ddf2d170-372b-4533-8338-211ce6419cd8&pd_rd_i=B094DMH7ZM&ref_=pd_bap_d_grid_rp_0_40_nped_pr_t&th=12 points
-
Oh , this was a project . The original owner was an "artist" & I had to go through a lot to de-personalize this bike . It was worth it .2 points
-
FYI , when I was trying to figure out the misfire on the black frame bike you can do this very quickly . I used an analog meter set on the highest scale of resistance and went from the HT lead to the frame and checked for continuity . This verified (infinite) an open circuit. I unscrewed the cap and checked it . These caps have resistors and have a different r value . Since it was open I knew I had found my problem. Installed new cap and tested again . Around 15k , so I knew everything else is good. The factory wire is a solid core and should be less than 10 ohm resistance . When you add the secondary value of the ign. coil to the test it will be more . It will be unusual for both sides to be messed up . Some service manuals give the primary / secondary r values. 99% of the time the secondary fails on a ignition coil aka transformer in a A.C. circuit. Remember this. If you are not sure about what you are doing or if you are not doing it correctly , go to the other cylinder and check your work . It is seldom both sides will be messed up .1 point
-
Came home after 2 months away, didn't figure on the espresso going stale. Should have left it in the fridge. Oh, and if you have a whole-house water filter, be sure to use the 'vacation' function I didn't know it had, or you'll drink salt water at low pressure for a couple hours.1 point
-
Was one on Kleinanziegen.de for quite a while, 2-3 weeks to late. Check there to. Cheers Tom.1 point
-
All sound very familiar . Cheers Tom.1 point
-
I don't remember the resistance/ft of non copper HT leads . I used to know . I used to have a meter that connected to each plug wire and gave a digital reading . High Kv output meant an open wire . Low Kv meant a fouled or bad spark plug. The most likely failure on a spark plug wire is an open . On these V11s these wires are copper core so they will / are not prone to failure. Now the resistor cap is designed / used for two reasons. #1 to stop RFI on AM radios . If you are old enough , you will remember the noise a vehicle made w/solid core wires. Also , resistors are made into spark plugs . AC Delco R44TS spark plugs . The R stands for resistor built into the spark plug. #2 Also , the resistor made into the cap give a more precise spark delivery . Weegie , I didn't fool w/the wires because they were difficult to get to and I was satisfied w/my work . I was happy when it started and ran 5 seconds. You have no idea how bad this was running !1 point
-
High marks for economy and the ol' College try before doing the work that was inevitable anyway. I washed mine and went for pizza with a friend.1 point
-
Yeah, just forgot. Been in El Paso for the duration, discovered a traditional Mexican style called 'Cafe de Ollo'. Pretty fantastic, but I've only found one shop that makes it. Probably I'd have better luck knocking on some stranger's house where Tia Maria makes it ever morning.1 point
-
Well I had a lovely coffee just before 5am PT. Went to a friends house to watch Moto GP Catalunya live this morning. He has a Nespresso machine and made me an "Intenza." You can even keep coffee beans/grounds in the freezer.1 point
-
I have done .......well , I will have to think about that one for a while .1 point
-
Gentle ride down the A60 to Loughborough scrubbing in new tyres
 1 point
 -
TTB coming to Tulsa 14 Jan.1 point
-
Quite appropriate, I reckon.1 point
-
Oh Ok. I use air compressors professionally and they have a collecting tank. I've always called those little ones electric air pumps, or tire inflators. I've never owned one. I'll bet the Enduro guys have some trick ones, as they often deflate tires for off road and reinflate for the road home.1 point
-
https://www.andystrapz.com/ https://www.andystrapz.com/category/tyre-pumps-and-gauges1 point
-
G'day. Mate, we have a great resource here in Andy Strapz. His gear is bloody good and as he's an avid rider himself anything he sells is WELL tested before he sells it. He has a couple of them ( I'll probably buy one myself at some stage ) and believe he ships world wide. Google him and take a look. Cheers1 point
-
This "Slime" mini tire inflator (top left) stays in the Tekno with this load out including an amazing plug system (not "rope" plugs). Used it a few times. I can't find any dimensions on the Slime products, but this one looks comparable: Slime Compact Tire Inflator #400601 point
-
Go on ebay and find an air compressor from a Goldwing 1200 Aspencade and strip the extraneous stuff off of it. Small, compact, you can wire it as desired for connection to your battery.1 point
-
This is what I carry on long distance trips now: https://www.amazon.com/gp/product/B0C36BBF7Y/ref=ppx_yo_dt_b_search_asin_title?ie=UTF8&psc=1 I have a slightly smaller one that attaches to the cigarette lighter under the seat, but decided I now wanted one w/o that requirement so I don't have to unload everything that is strapped on the seat. Very powerful, fast, a bit heavier than the prior one, but very solid.1 point
-
A recurring theme with running issues of the V11 Moto Guzzi is that a decent tune-up often effects an amazing improvement. It is The First Place to start. This past weekend, we collectively tuned two V11 in the garage of the South'n Spine Raid. Both bikes sounded fabulous after and the members have given good reports on the results. While the *suggested* procedure is fresh in my mind, I figured to get the basics down. There are several ways to achieve a tune-up on a V11, some more time effective and some more elaborate. This one strikes a balance that is approachable by most owners with a little effort and a few tools. ___________________________________________________________________________________________________________________ 1) Valves/ Plugs: When cool (after the bike is off ~45 minutes), remove the plugs, adjust the valves to 0.006"/0.008" (.15mm/.20mm), then gap and install fresh plugs. 2) TPS Baseline: Using a Casper's TPS Breakout Harness (or equivalent), disconnect the right throttle linkage, release the upward facing slotted screw for the high idle cam, back out the difficult to reach 2.5mm hex-drive right-side idle stop set-screw, and clean the throttle butterfly, throttle return spring, and the underside of the throttle bodies (if necessary). It is critically important that the throttle plate is COMPLETELY closed and all of the above have been seen to! Many say to even "snap" the throttle closed a few times (within reason) to seat the plate fully closed. Others "zip-tie" the throttle plate firmly closed. Otherwise, you can simply apply a firm, constant pressure with one hand to ensure the plate is COMPLETELY closed. This indexes the throttle opening to the entire fuel-ignition mapping and cannot be over-emphasized. Loosen the TPS fasteners only enough to tap it or budge it slightly, it is VERY sensitive. Changing the TPS fasteners to standard hex drives (from the factory Torx) simplifies the process (M4-0.7 thread pitch x 17mm long). With a quality voltmeter, connect the positive to the violet/black wire and the negative to the violet (the yellow is not used for this setting). With the Run Switch on, switch on the keyed Ignition Switch. Adjust the TPS to 157 milivolts (most accurate over the factory value of 150 mv). Realize the TPS value changes when it is tightened down, so just repeat until you're in range. Reconnect the throttle linkage and set the high idle cam so it just nudges the throttle when engaged [we will recheck this after the last step, "6) Idle Speed"]. Leave the right-side idle stop backed out. (Some have found using both idle stop screws gives a more stable idle.) (EDIT/May 2019): Having had two TPS go bad after 50,000-62,000 miles/ 79.000-100.000 km, it is simple enough to check the TPS for faults when it is hooked up to the DOM (Digital-Ohm-Meter) . Switch the DVOM to resistance in the 2000 Ohm range with the key off. Slowly and smoothly open and close the throttle body and observe for a smooth transition of increasing and decreasing resistance from the potentiometer (TPS). If there are jumps and glitches or drops and variations in the resistance, the TPS should be replaced. Be certain to set the DVOM back to > DC voltage < before baselining the TPS in millivolts or you'll think something is terribly wrong! 3) CO Fuel Trim: Using guzzidiag software interface (or equivalent), connect your computer to the V11 with the two necessary diagnostic cables. Available from several sources, be certain the OBD cable is properly FTDI chipped. >> Check the Fuel Trim/ CO. If it is deep in the negative double digits, adjust it to zero. That may not be the exact AFR, but it will be immensely better than negative double digits or more (values of -27 to -128 have been reported!). Adjusting the Fuel Trim/CO with Guzzidiag requires the motor to be at operating temperature; simply follow the prompts on Guzzidiag. (The CO Fuel Trim can also be set with TunerPro at any temperature, but that's beyond this basic procedure). >> Don't worry about any other shown values at this point. >> Lambda (oxygen sensor) equipped V11 must have the Lambda sensors turned off in TunerPro. 4) Air Bypass Screws: Turn the upward facing Throttle Body air bypass screws in all the way and back them out one full turn. It is quite common that the tips of these become very sooty along with the passageways. If you have the time and inclination, remove them and clean them and the passageways with some throttle body cleaner. Watch your eyes, Eugene! (There is only a captured O-ring on them and no spring or tiny ball waiting to exit the universe!) [edit/May 2023: These O-rings should be inspected due to their age. Deformed, torn, or damaged O-rings should be replaced.] 5) Throttle Body Balance: Bring the engine to operating temperature. Connect a suitable Throttle Body balance tool like "TwinMax," manometer, alcohol/Hg sticks or the equivalent to the vacuum taps at the junction of the heads. With the white Nylon knob on the left, balance the vacuum at two or three thousand RPM or so (not idle). Make certain the white knob does not interfere with the shock's reservoir or anything else. See that the throttle linkage rod does not foul the speedometer drive on the right side. If you open and close the bell crank of the left throttle body, be certain the cable seats itself back in the groove. [Consider a lock nut against the white knob per Dave Richardson/Guzziology.] Some like to fine tune the idle balance using the air bypass screws, one in a little, one out a little to show good balance at idle. 6) Idle Speed: Let it idle and adjust the 2.5mm hex-drive left-side idle stop set-screw (easy to get to) to put the idle where you and your V11 are happy. Technically 1050+/- 50, I find mine *happier* a little higher (around 1150-1200+). Don't worry over the *degrees of opening* or the TPS idle voltage; seriously, just put the idle where the motor idles nicely for your conditions and liking. Once Steps 1-5 are set, you can put the idle anywhere you want. But you cannot start here. [Be certain the throttle cable has the appropriate freeplay to not pull on the throttle linkage in the idle position. Finally, recheck that the fast idle cam is not making contact, but just nudges the right throttle linkage when engaged.] ___________________________________________________________________________________________________________________ That's a "decent tune-up." I prefer to tune *early & often* finding that even at 5,000 miles (8.000 km), the V11 runs sweeter after setting the valves, fresh plugs, and a throttle body balance. There is a lot that could be added here, and many well informed owners and technicians do things differently, yet this fairly concise procedure has been shown to give very satisfying results with reasonable effort. As always YMMV, for informational purposes only, and no small furry animals were harmed in the testing procedures.1 point
-
About two months ago I gave her a service, including solving the wheep from the gearbox exit shaft seal. Discovered the seal was not installed all the way, so instead of replacing it, I tapped it a bit deeper. Then the wheep turned into a leak. So I went in again and disassembled the rear AGAIN, this time to replace the seal. Oh well....1 point